Toasted Coconut Mocha Cheesecake Cookies

Toasted Coconut Mocha Cheesecake Cookies
Hey, serious question time.

Out of all the smells on earth, which is your absolute favorite?

I know, this is kind of personal for a Wednesday, but I feel like we’ve reached that level in our friendship.

And, also, I can’t decide for myself.

I’ve been over the question, in my head, mostly, for the past few days and I can’t settle on one answer. There is too many smells that I love. Seriously, though, like the Juicy perfume I wear, or fresh laundry, or Thanksgiving dinner, or that manly man smell—you know the one I’m talking about—or baby smell, or even the smell when you open a brand new book. How is one supposed to settle on a favorite?

Toasted Coconut Mocha Cheesecake Cookies

You just can’t. It’s impossible. Or, I should say, it’s impossible for me.

What I can do though, is settle on two. I can’t tell you which is first or second, but I can tell you, without hesitation, these are my absolute favorite smells on earth. PERIOD.

You ready?

My two favorite smells are….

Toasted Coconut Mocha Cheesecake Cookies

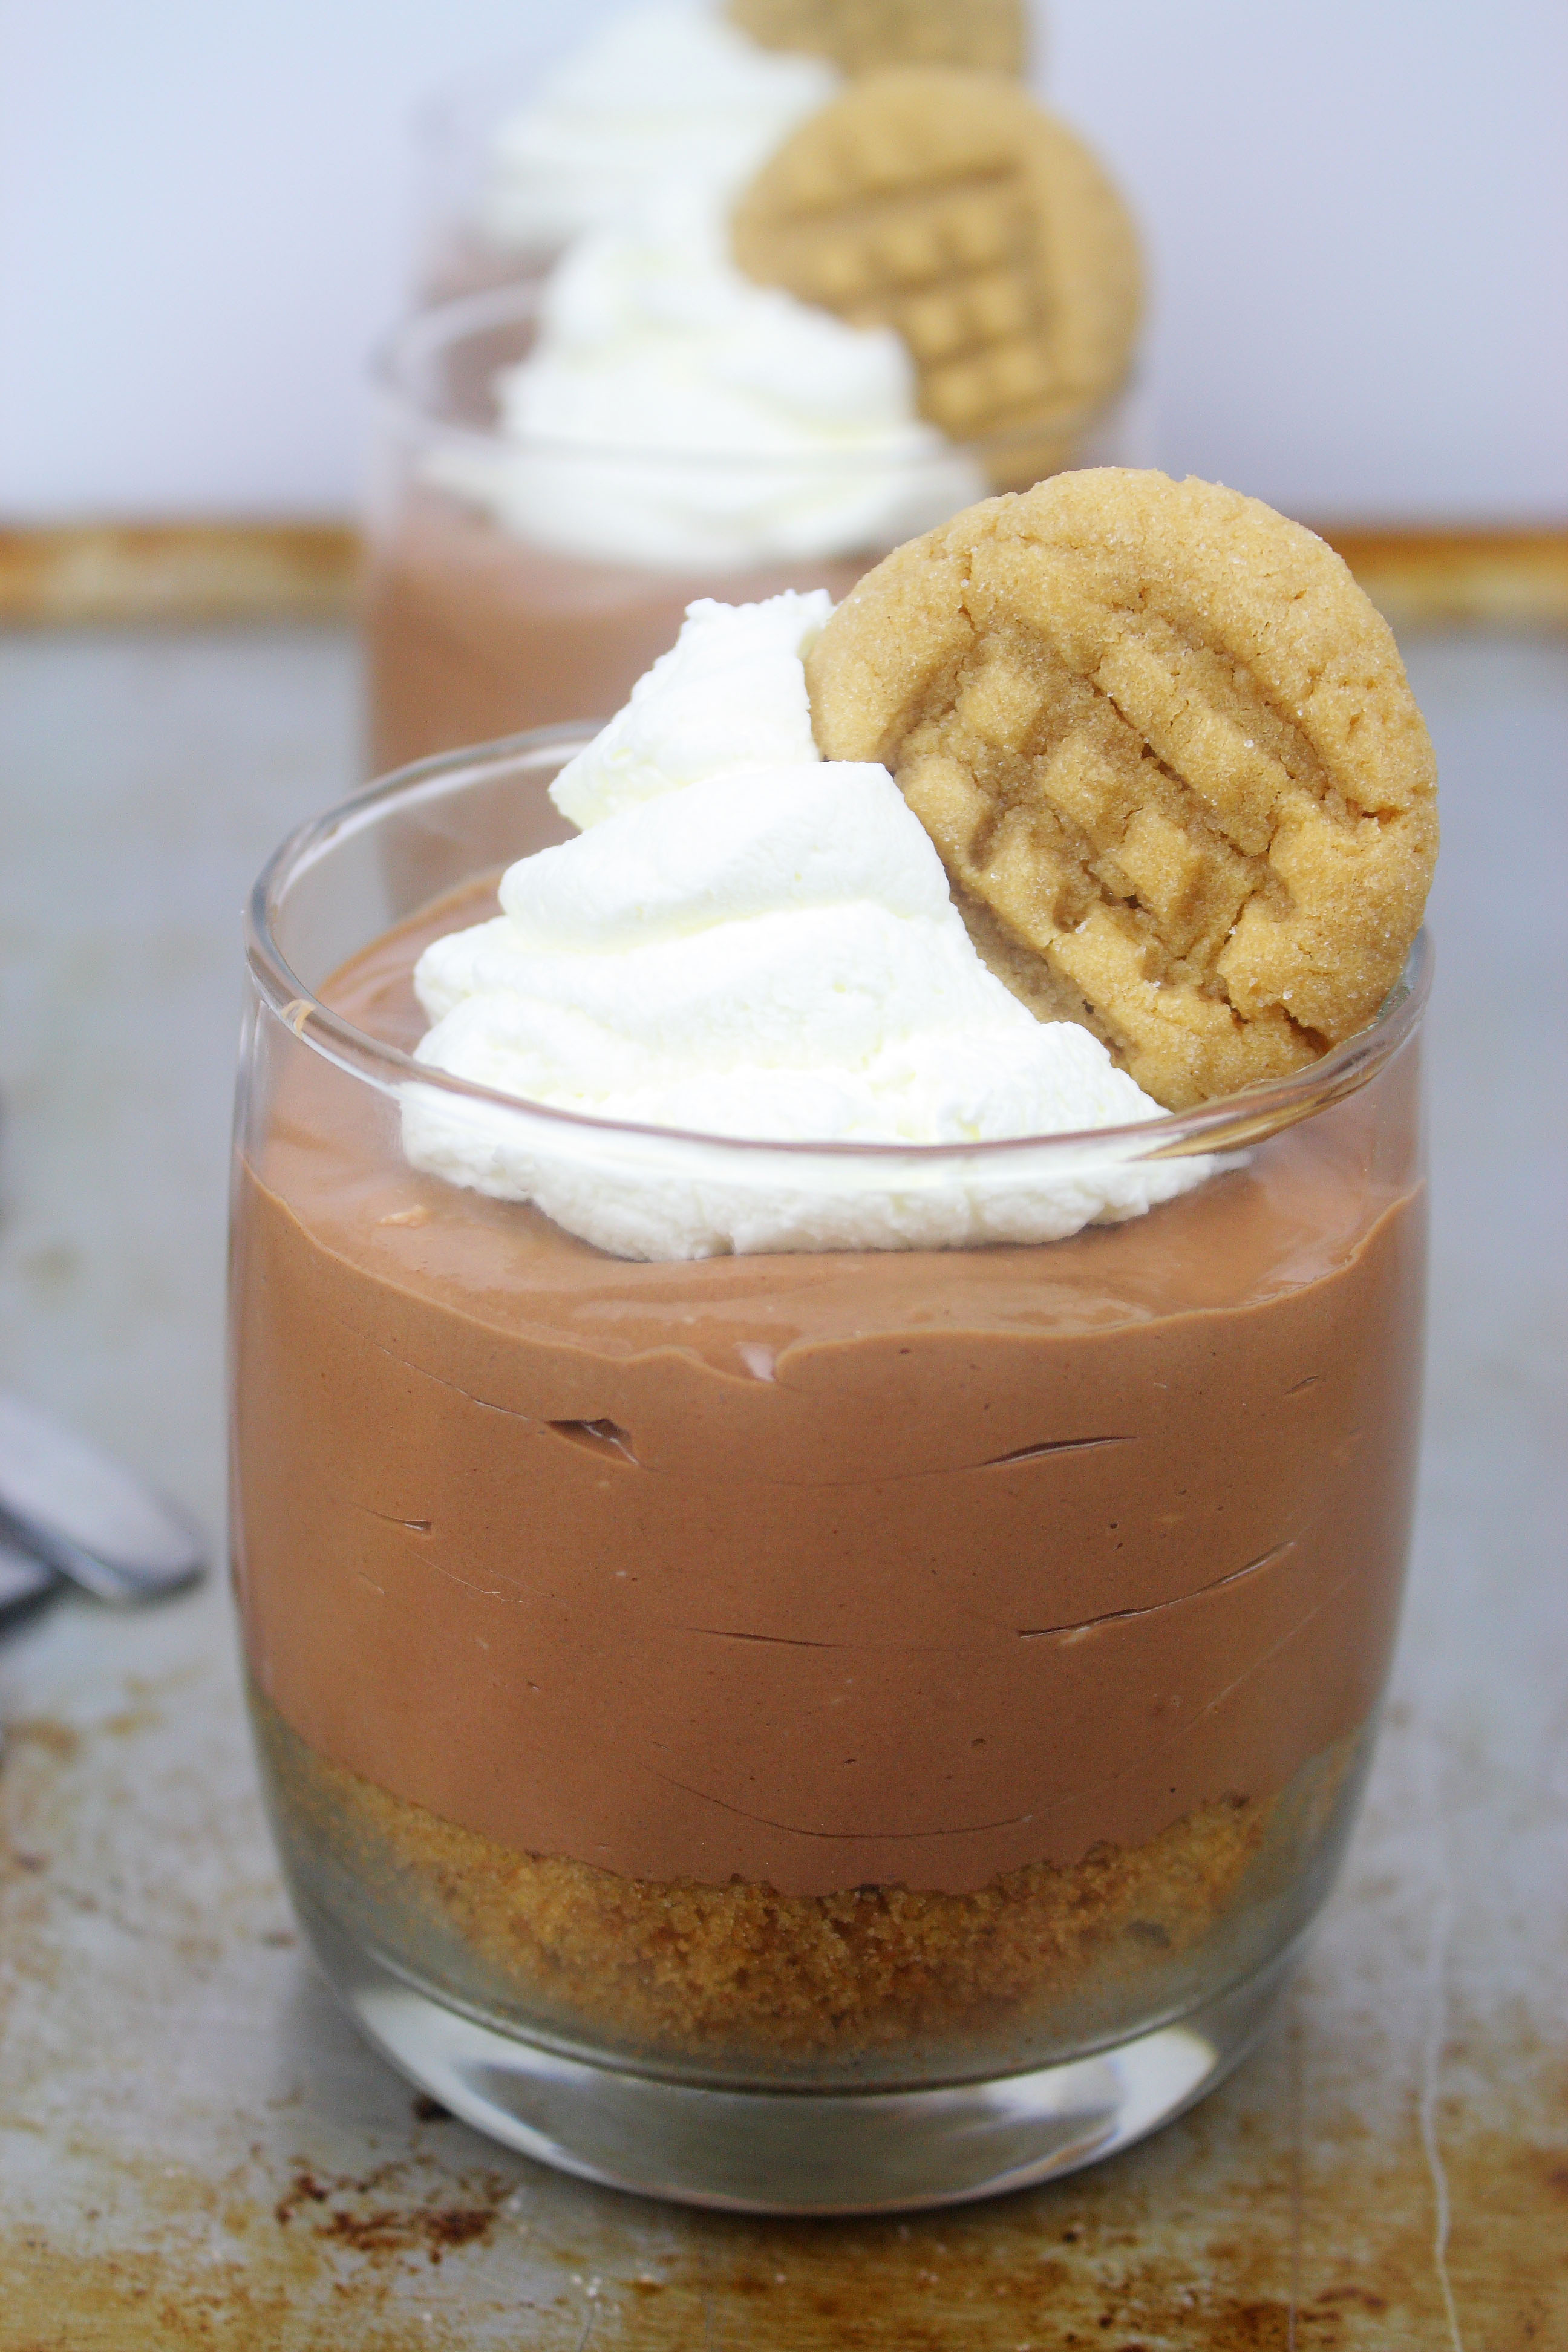
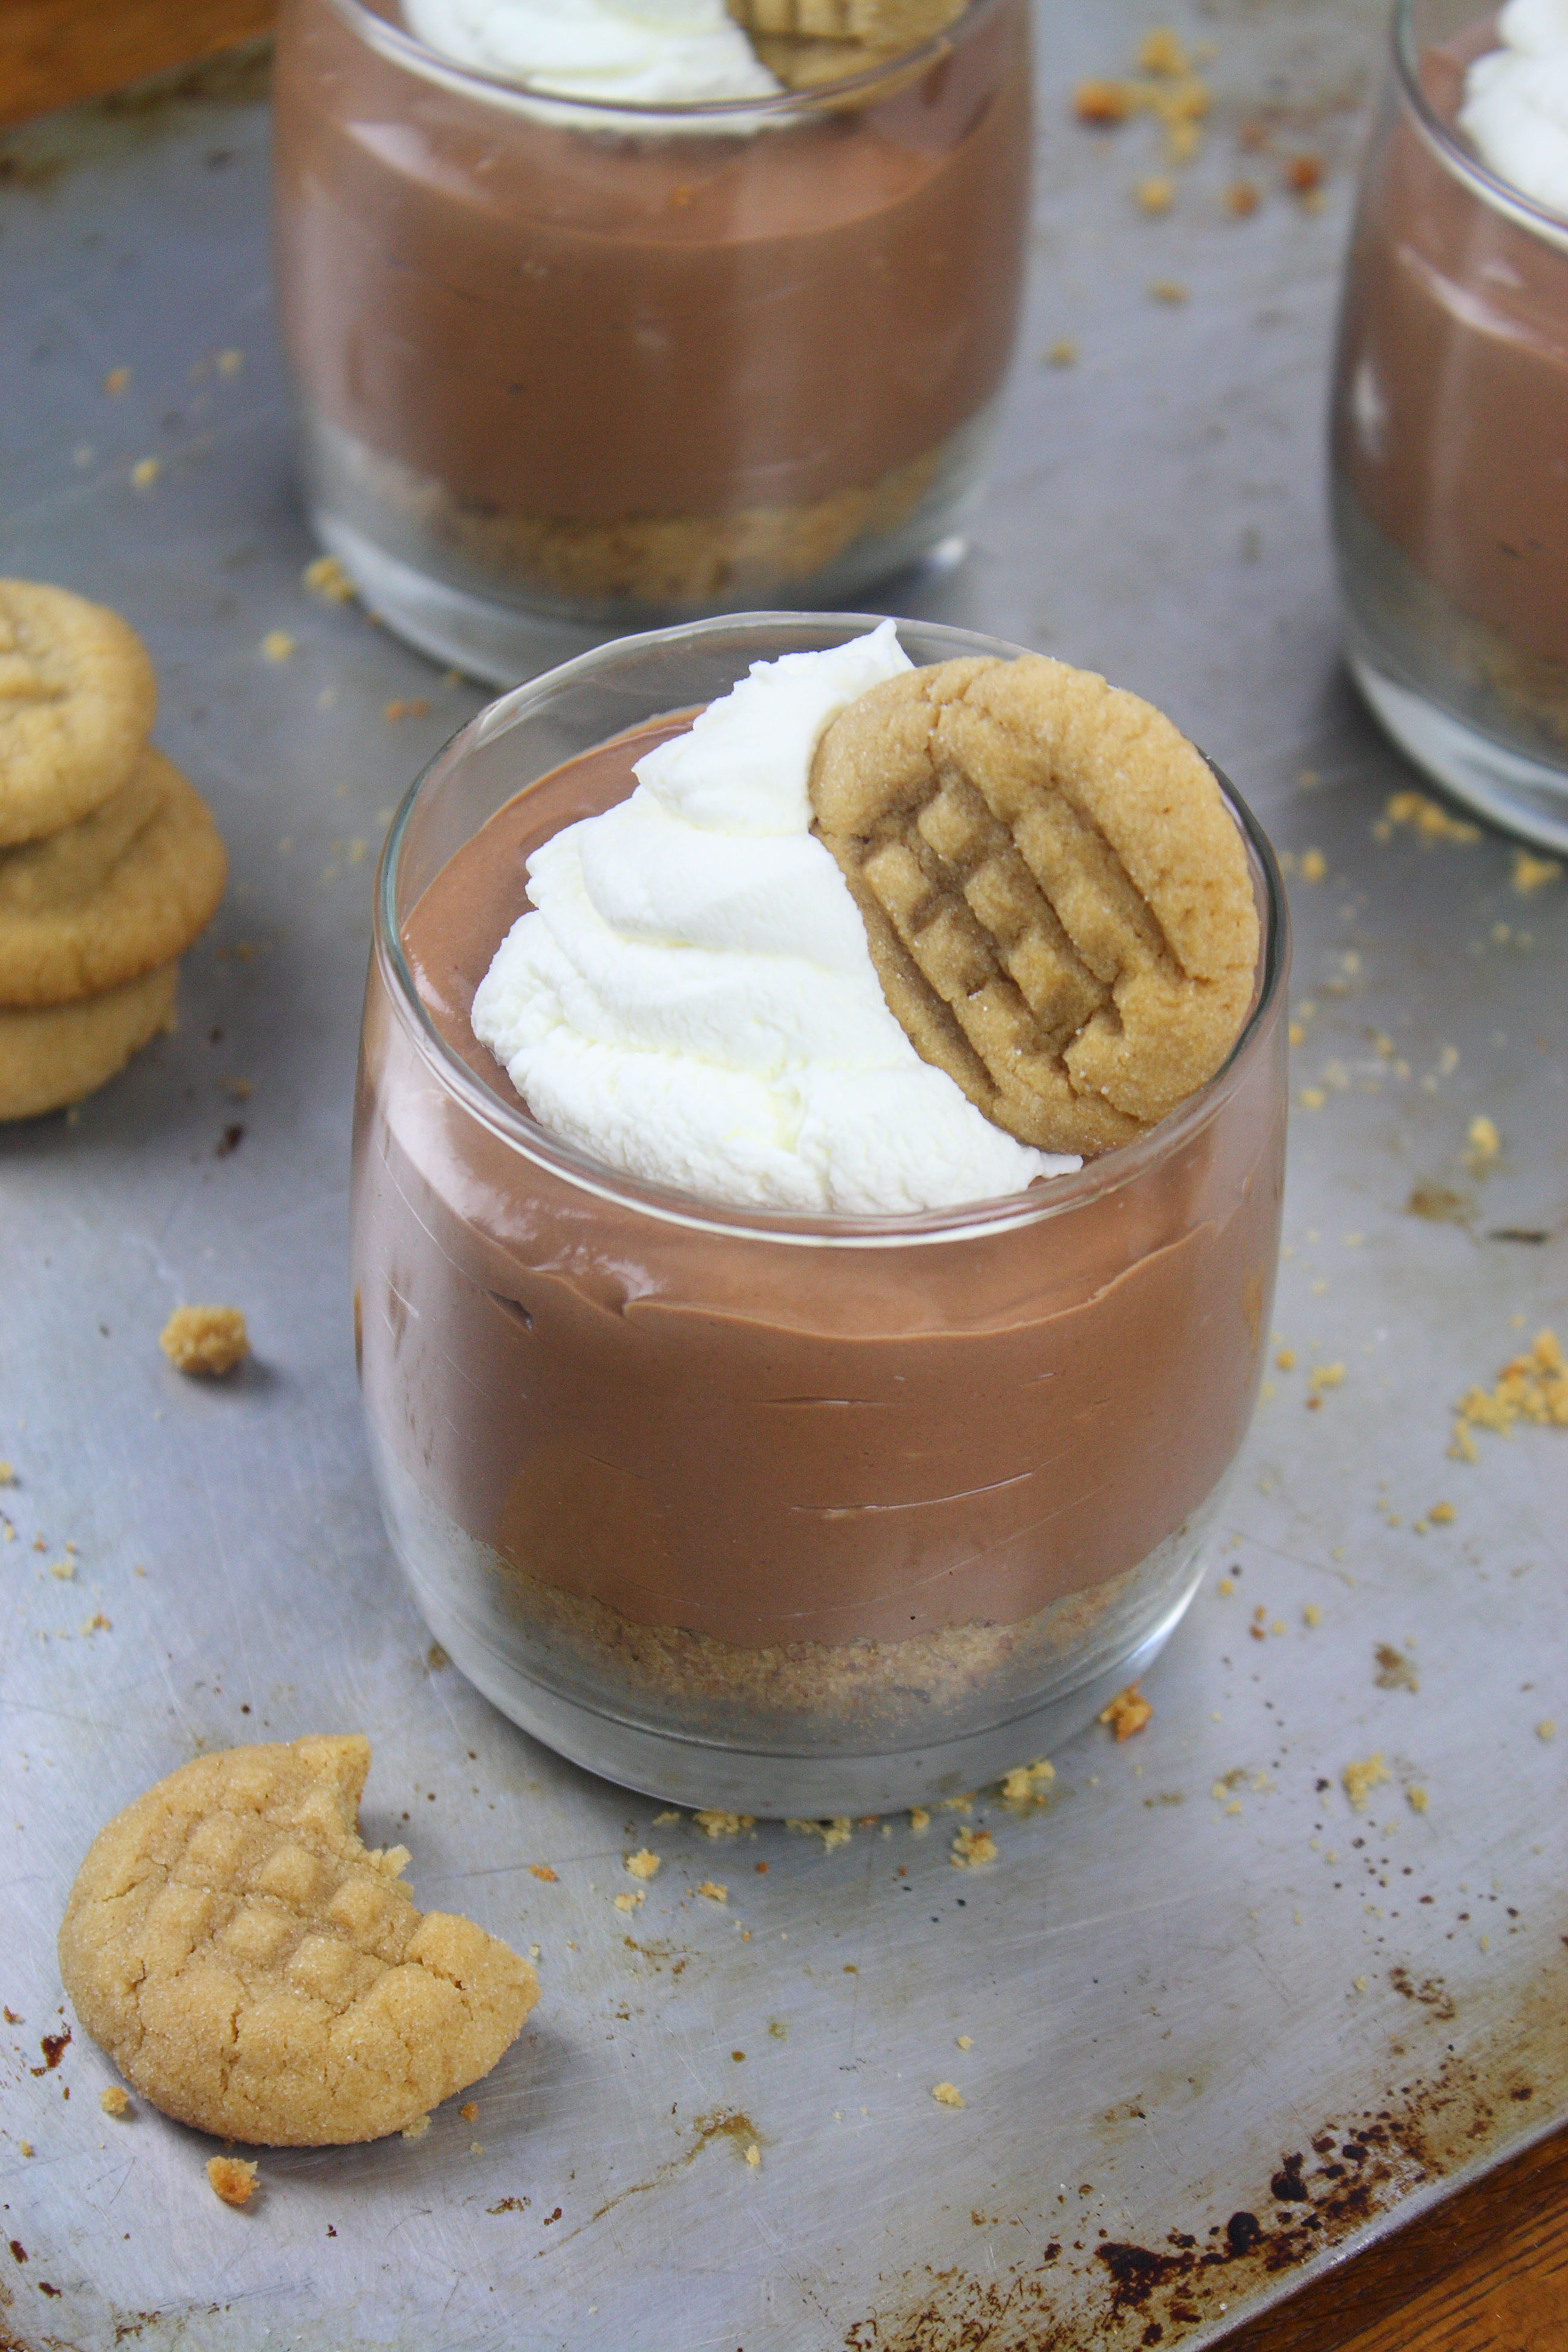
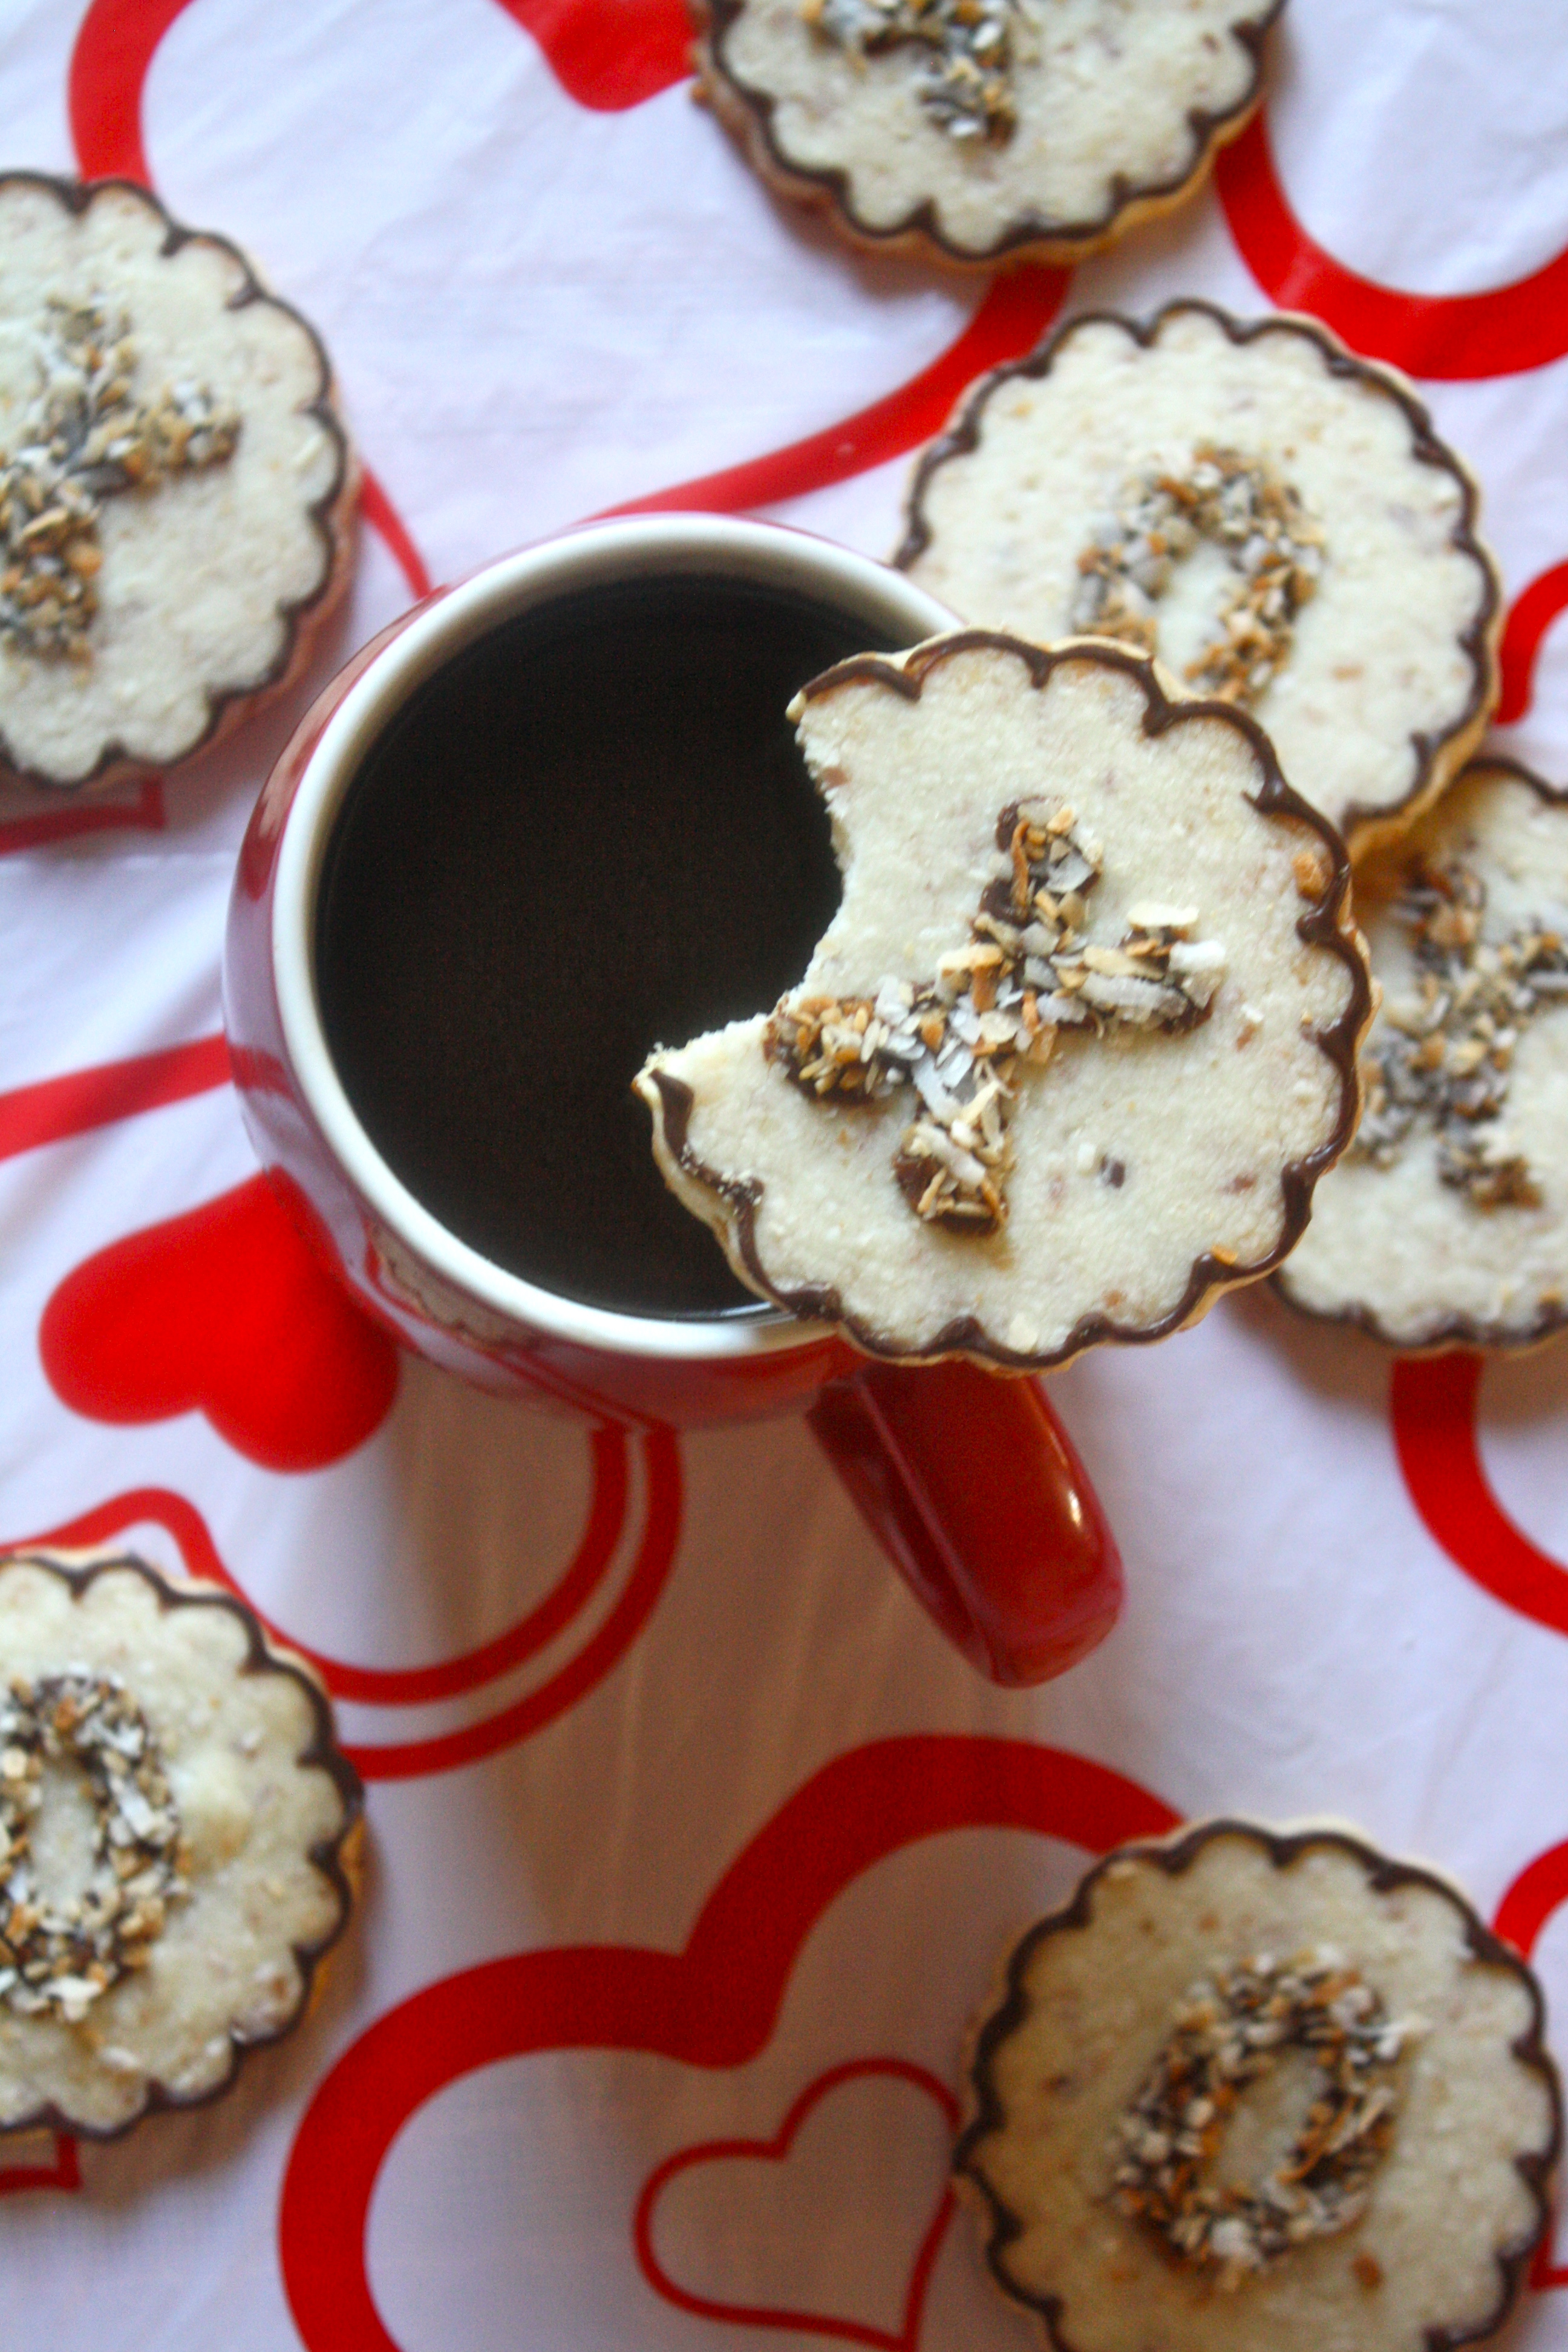
Freshly brewed pot of coffee AND cookies baking in the oven.

I know, kind of predictable considering I consume rant about coffee more than your average person, and have a baking blog that quite often features cookies. But, it’s the truth, predictable or not. Those two smells are absolute heaven to me. Really, they need to be bottled and sold. Don’t you agree?

I’d buy it in bulk. And then I’d send you a bottle of each. Okay, fine, two. But, only because I like you.

The problem is, like I said, I can’t narrow it down to one smell.

I just can’t. 

Or, can I?

Toasted Coconut Mocha Cheesecake Cookies

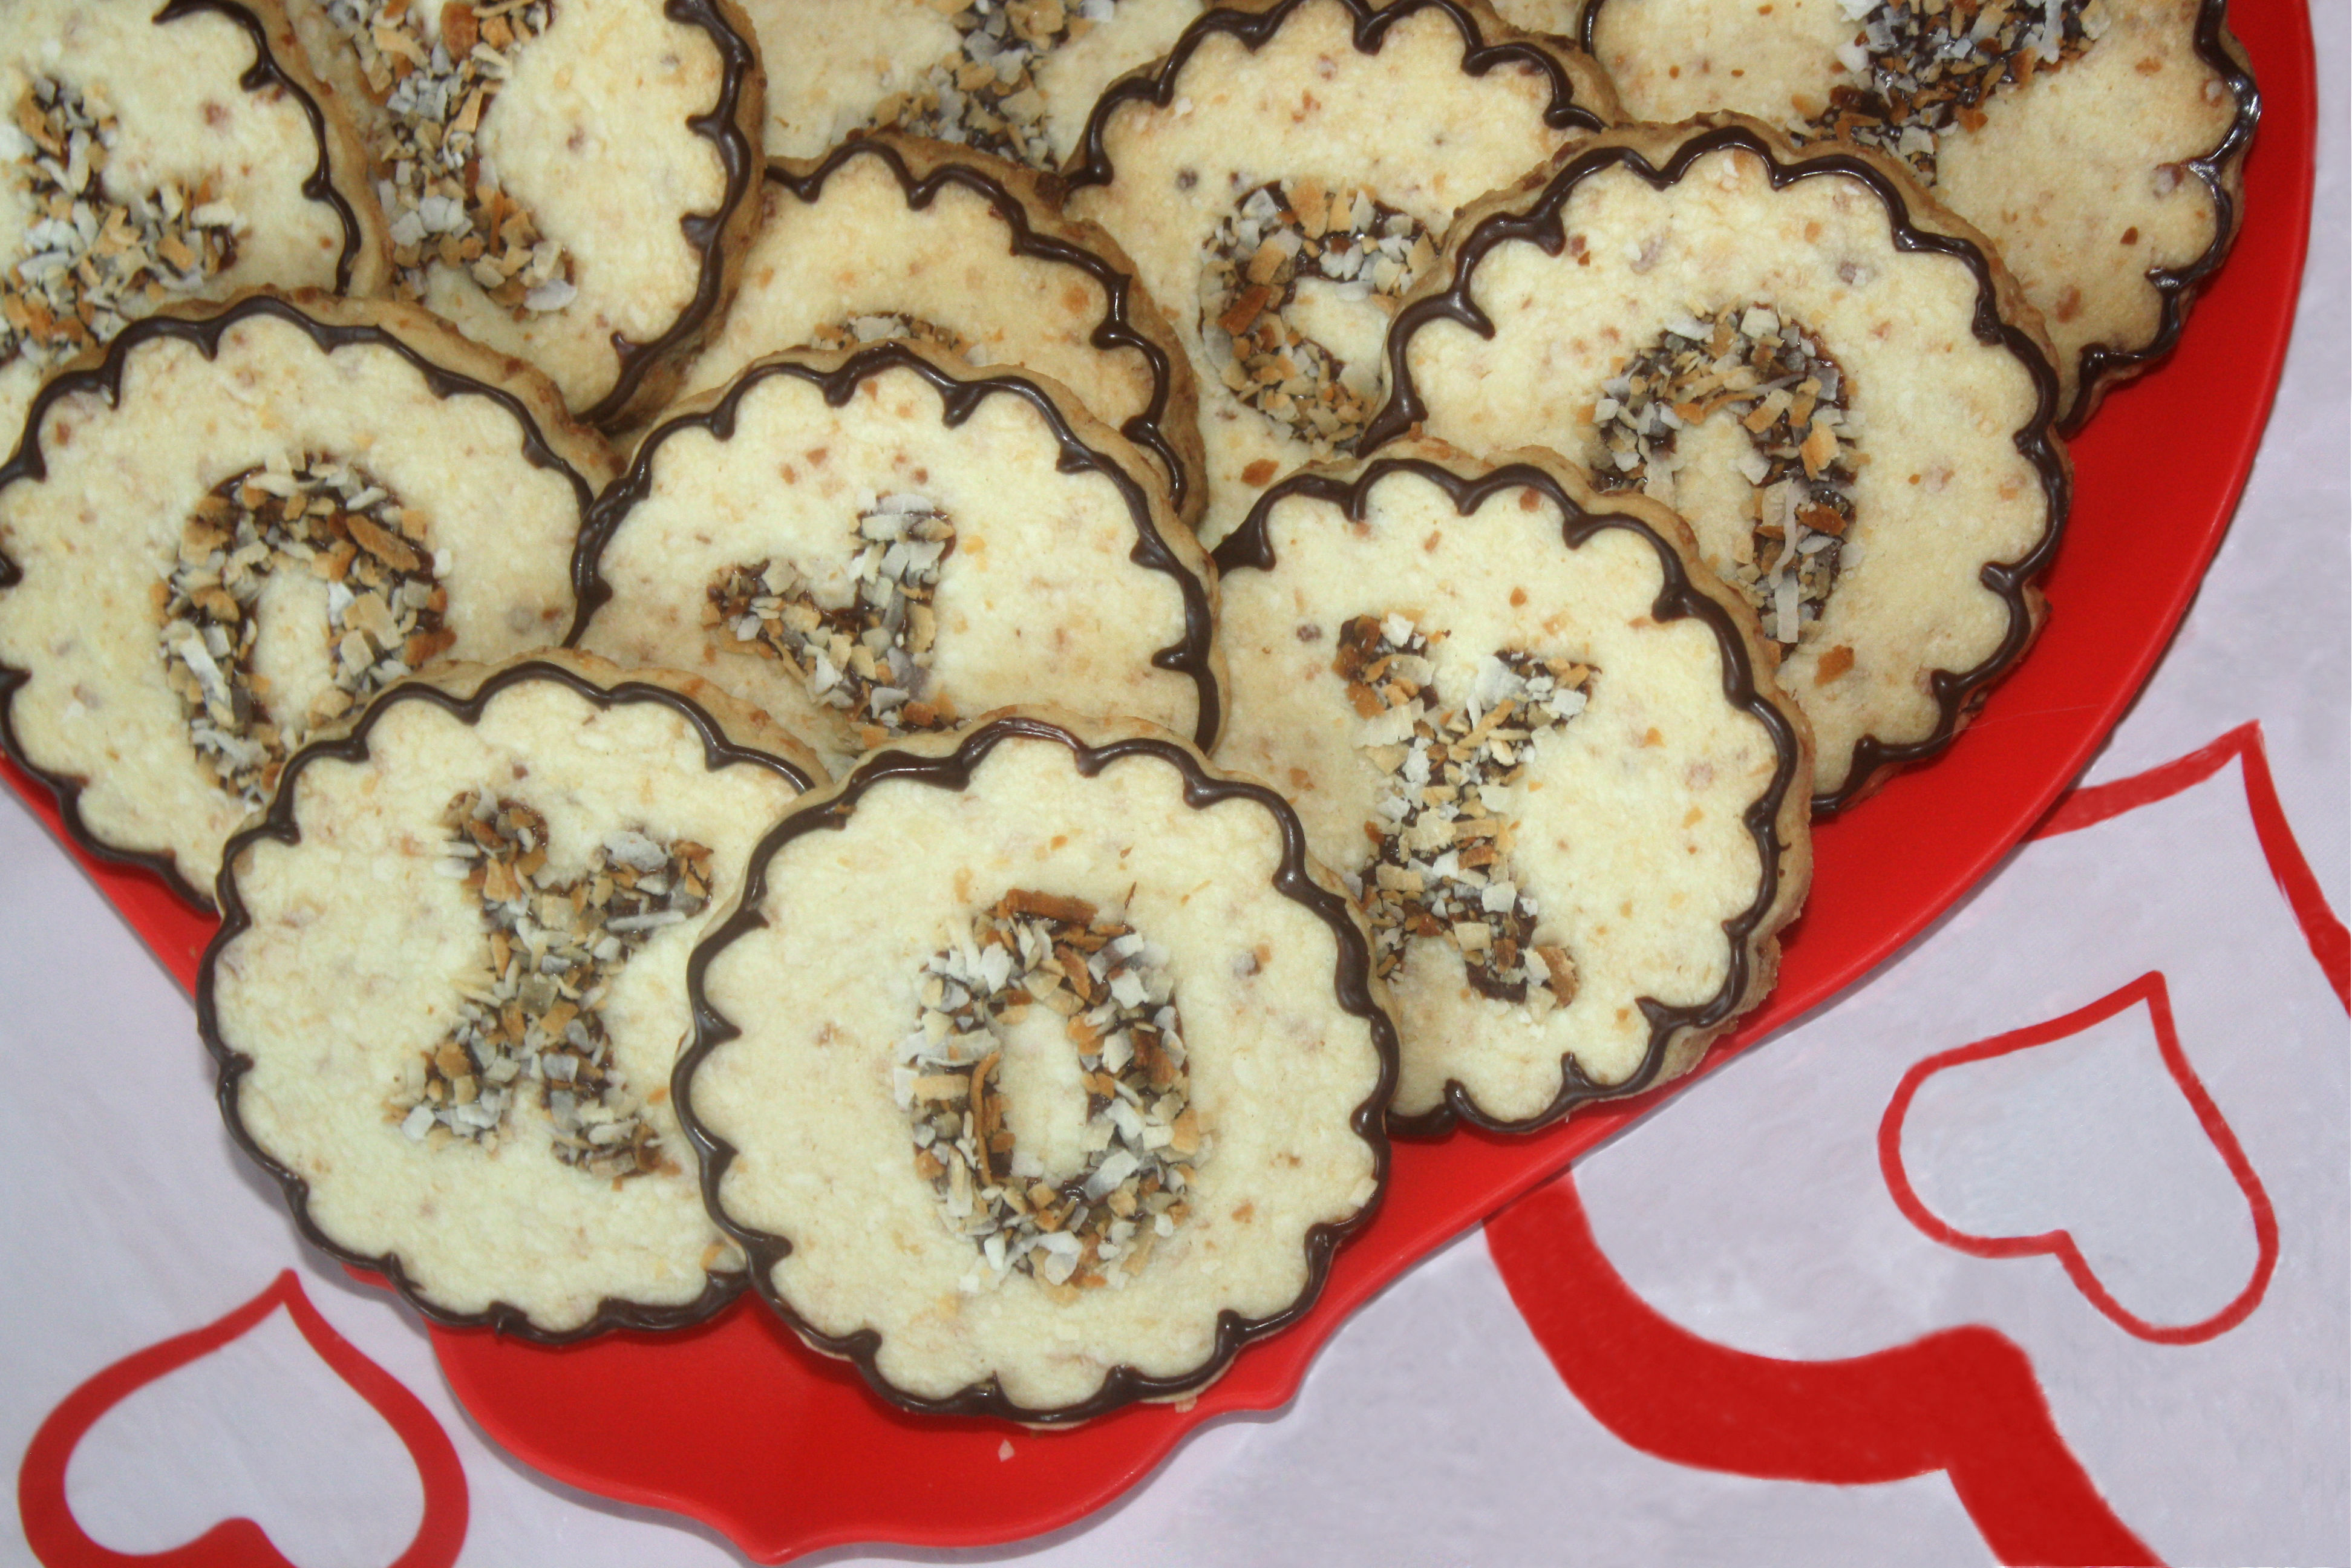
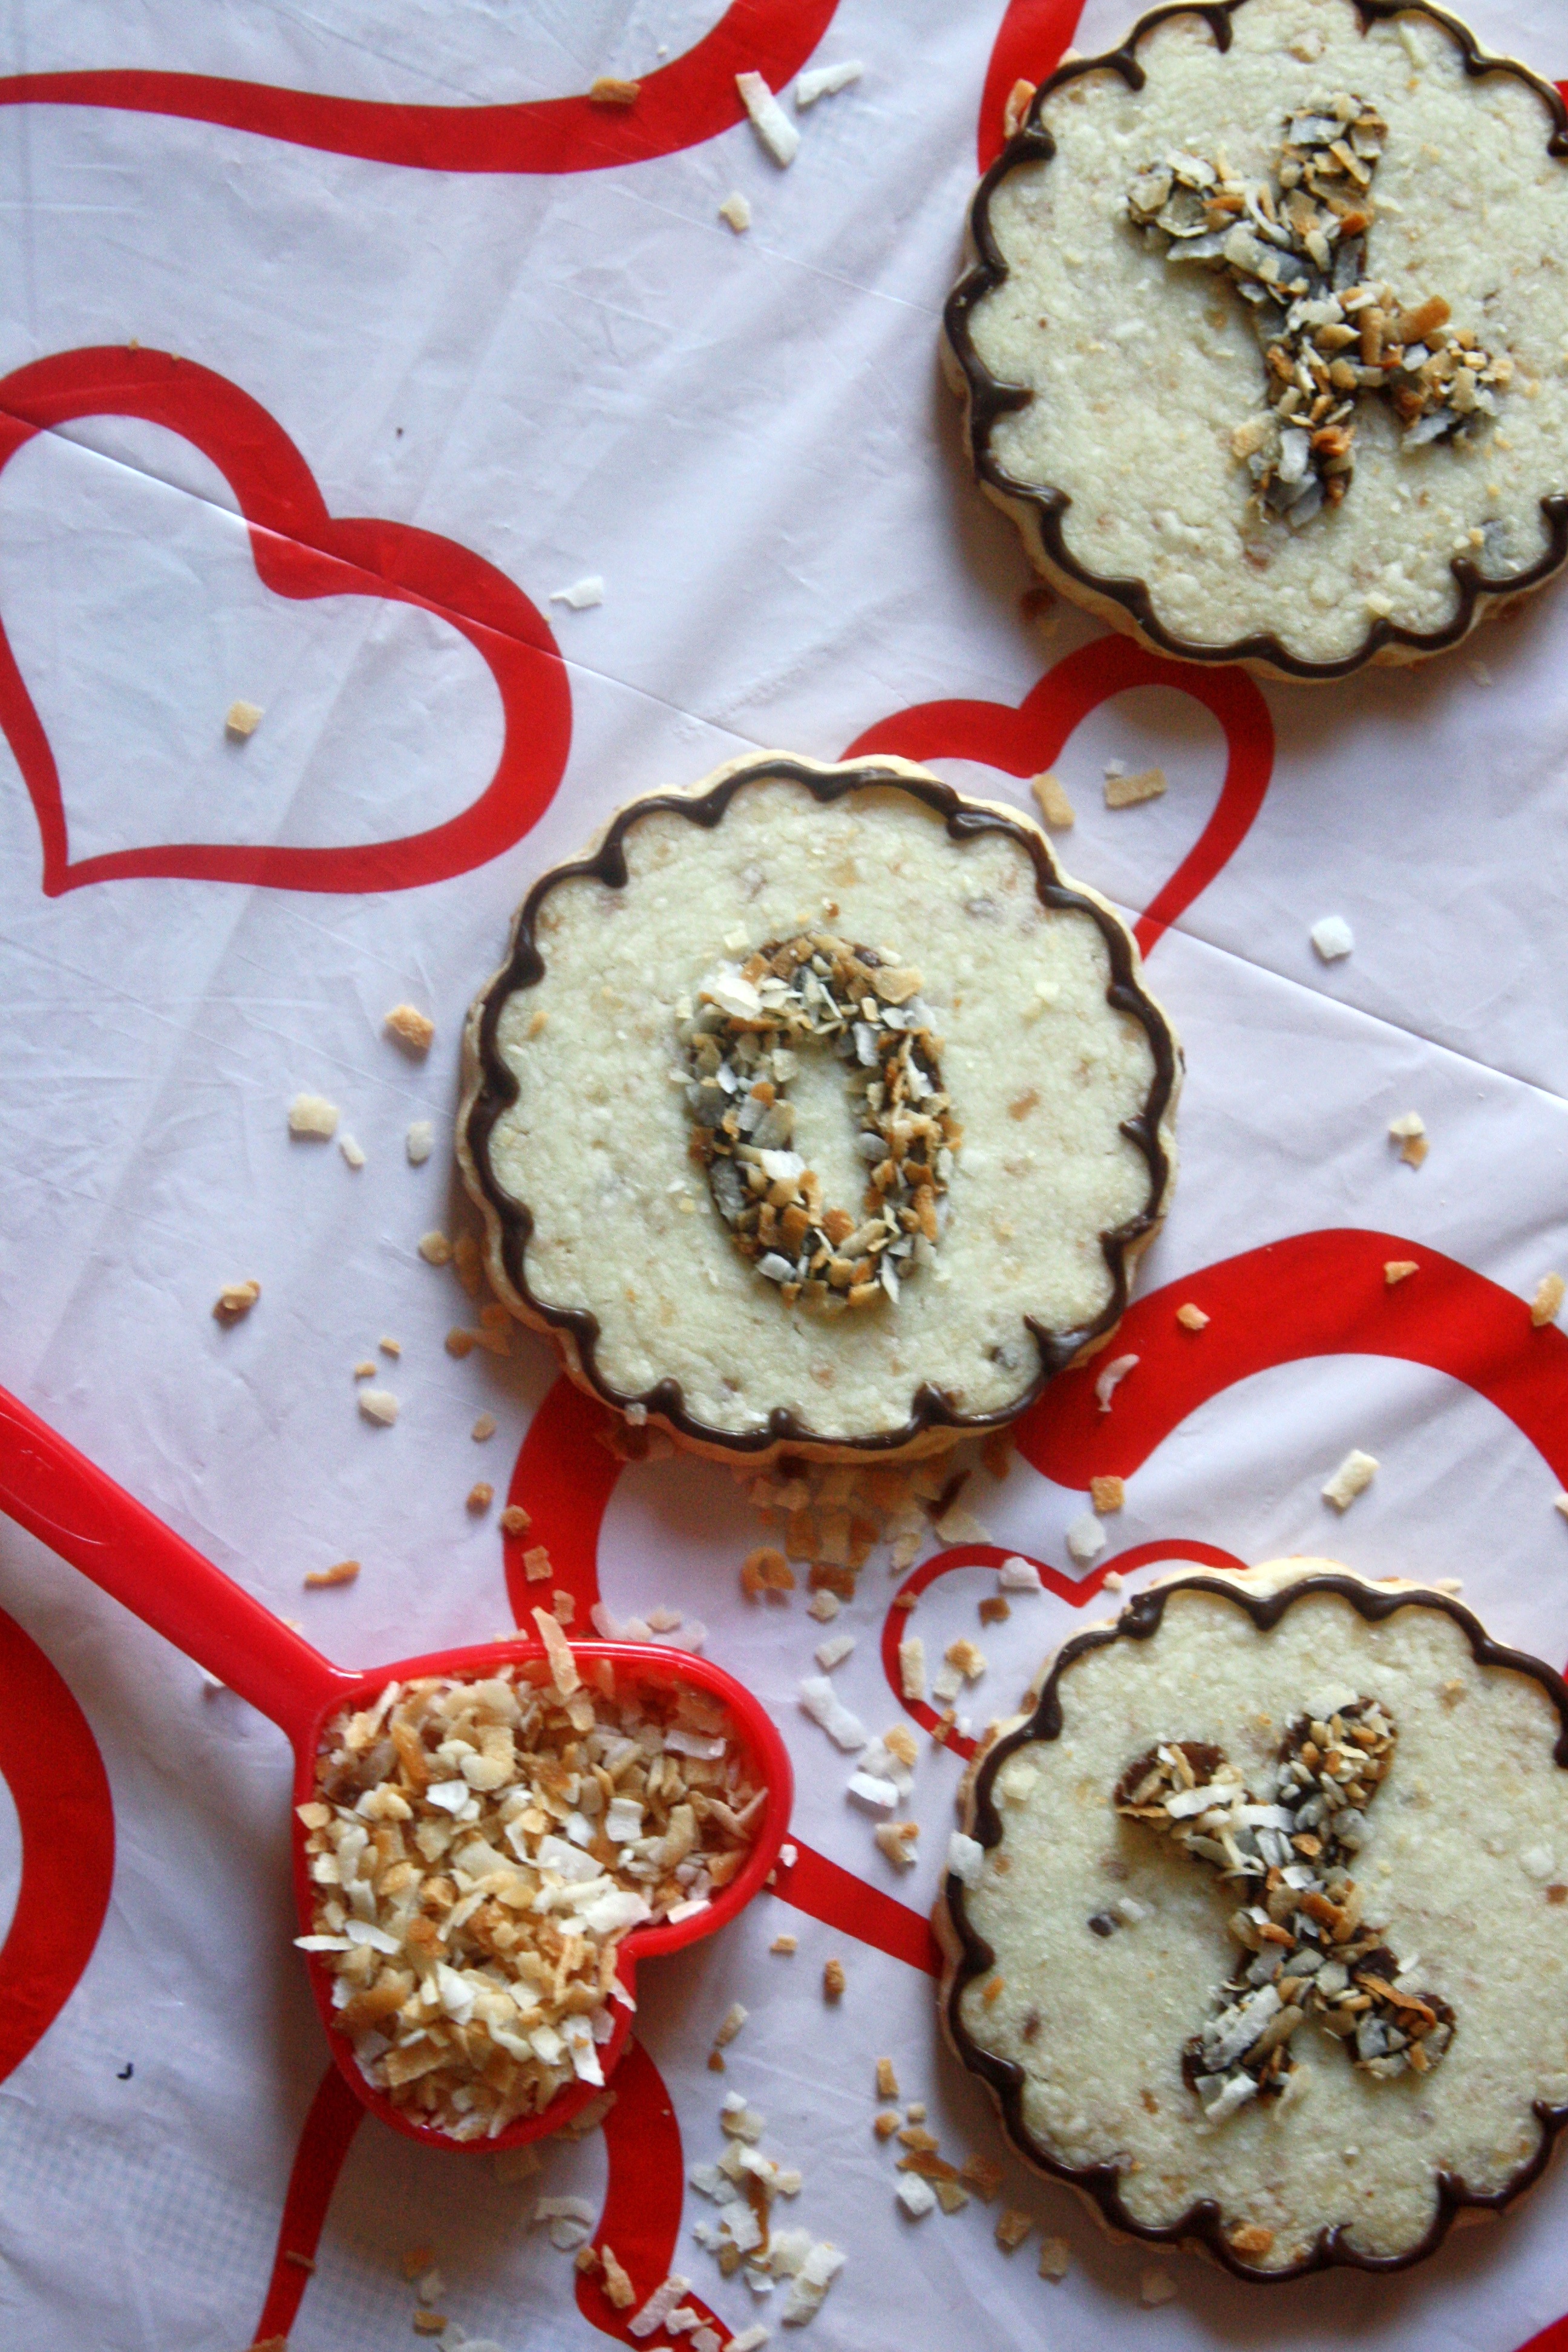
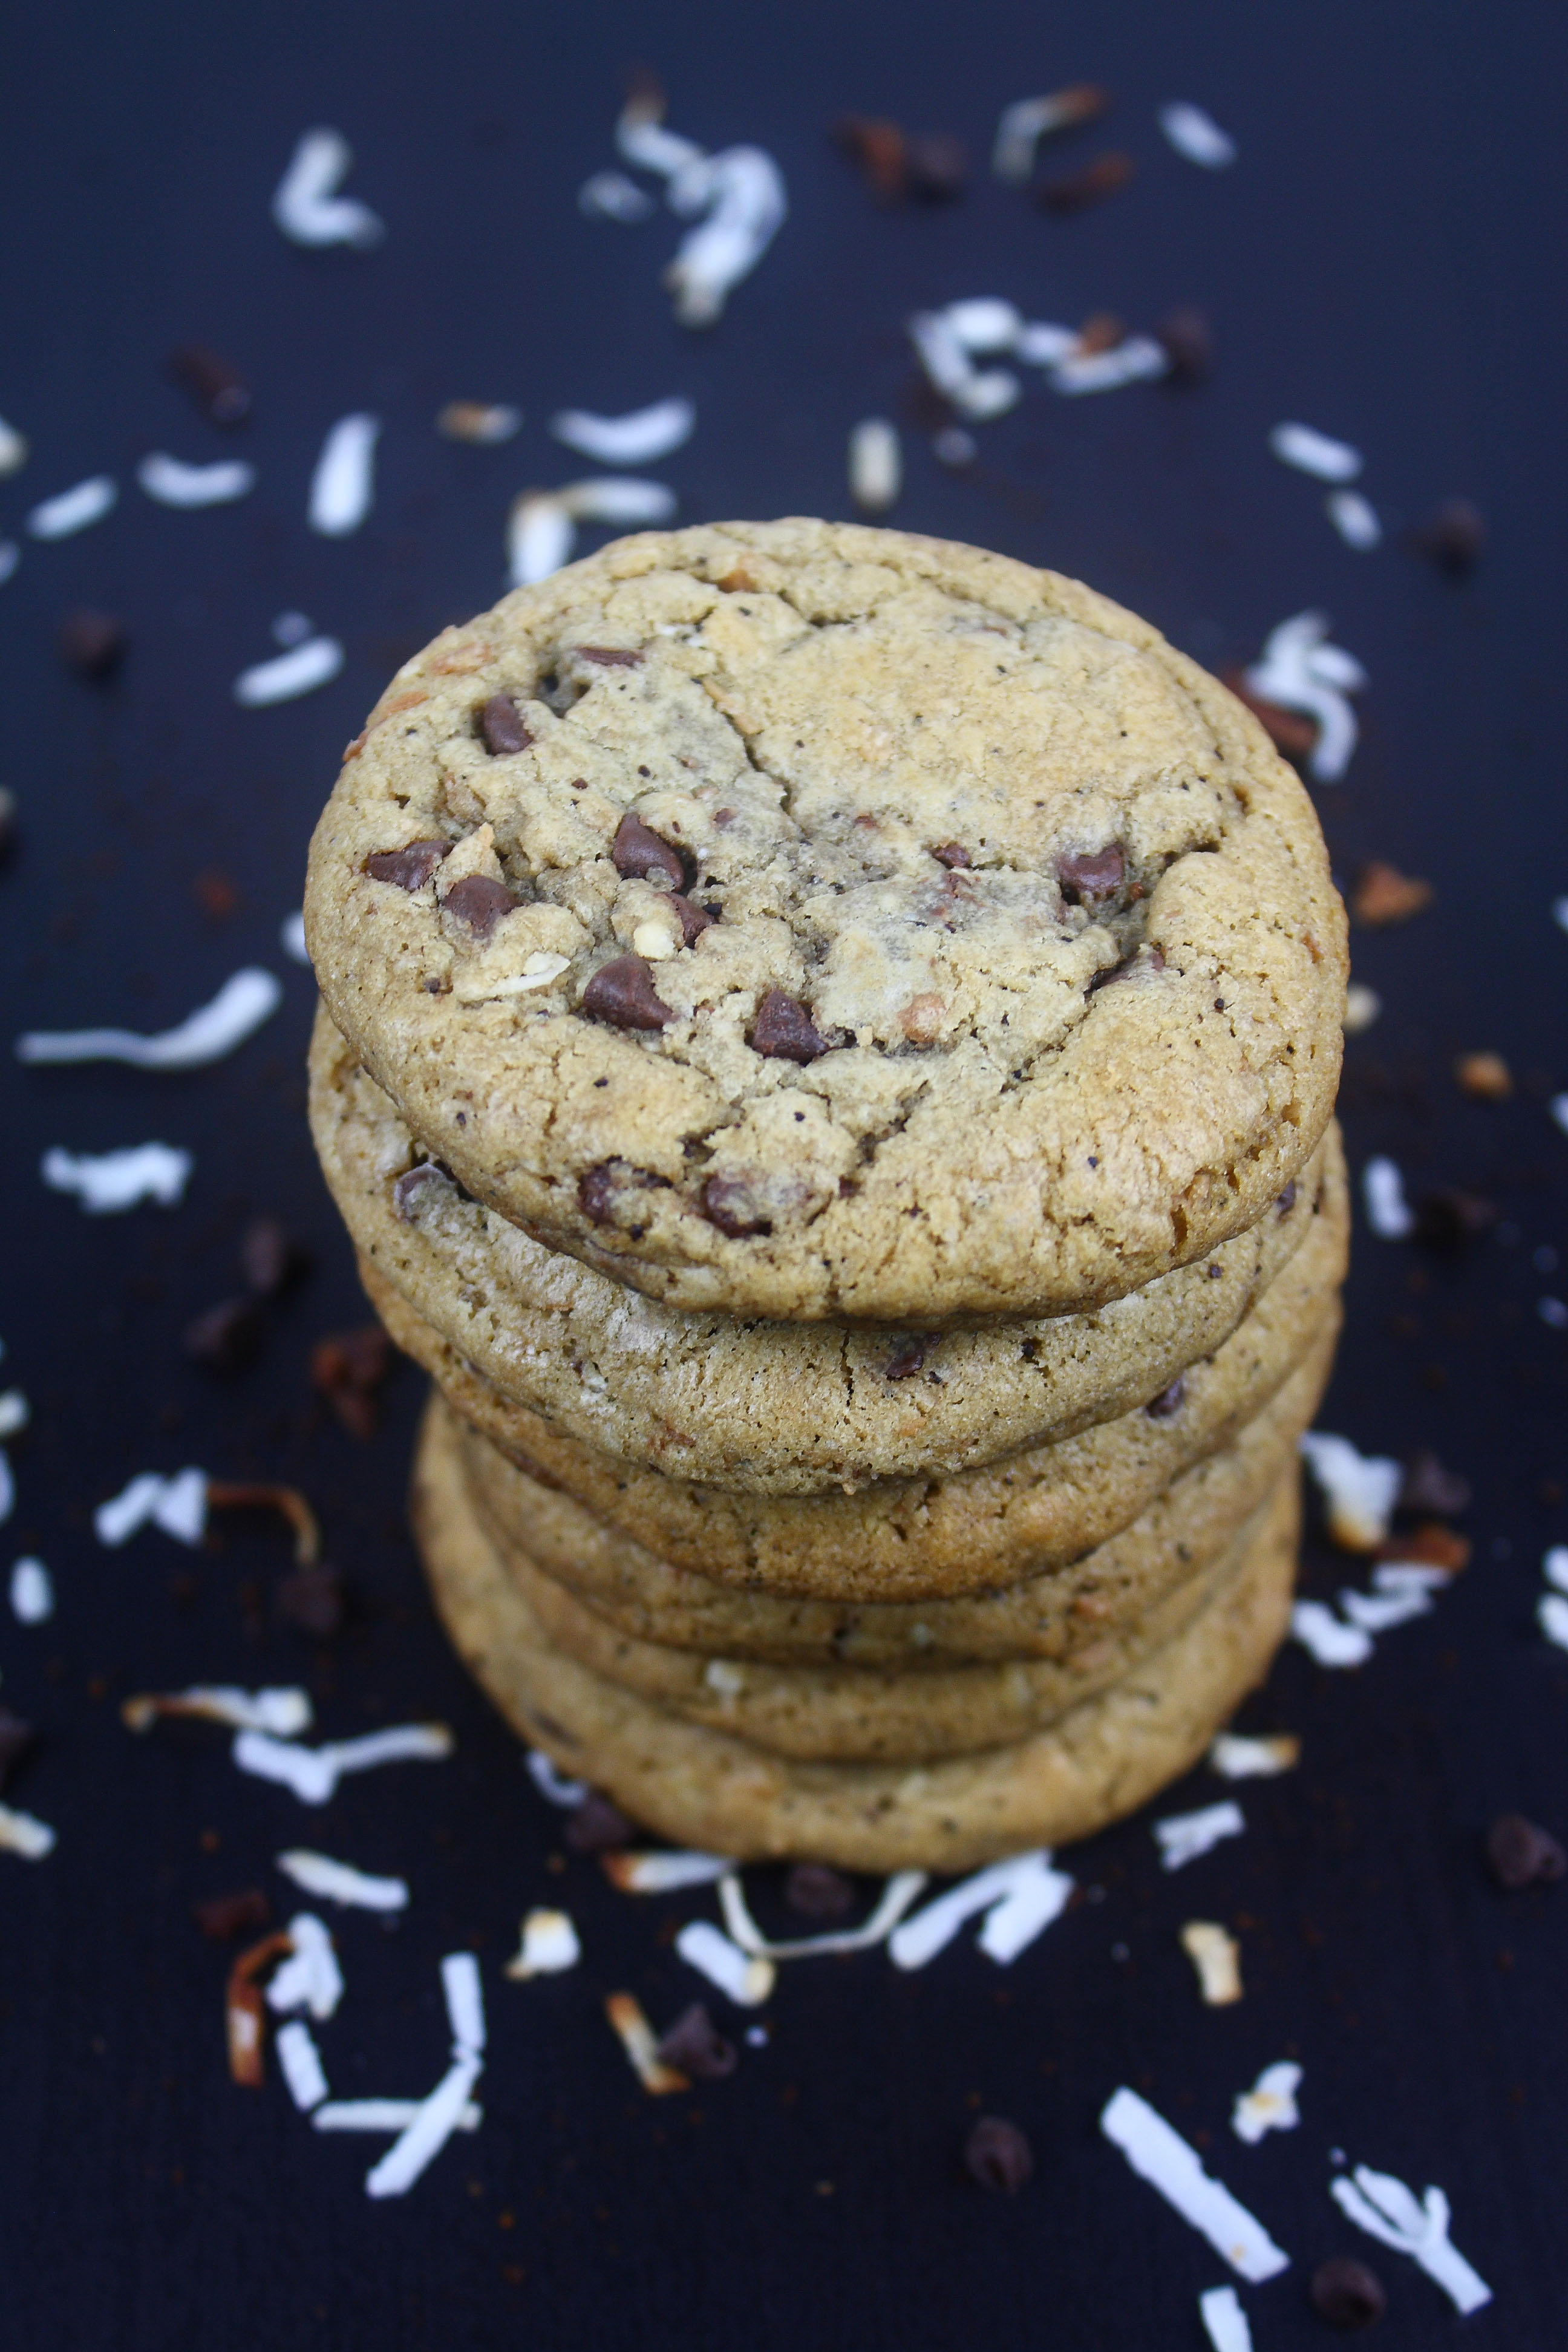
Oh hi Toasted Coconut Mocha Cheesecake Cookies.

What’s that you say? You have coffee in you? And when you bake you leave a faint smell of coffee in the air?

Oh my. How wonderful.

Toasted Coconut Mocha Cheesecake Cookies

Toasted coconut shreds, mini chocolate chips, and coconut coffee grinds all combined into a soft and doughy cookie. Oh, and I stuffed the cookies with coffee cheesecake, because…well, because why not?

It’s coffee + cookie + coconut + cheesecake. 

I mean, get in my belly, right?

Toasted Coconut Mocha Cheesecake Cookies
Yields: about 21 cookies

Ingredients:
Toasted Coconut Mocha Cookies
2 1/4 cups all-purpose flour
1 1/2 teaspoons cornstarch
1 teaspoon baking soda
1/2 teaspoon salt
2 3/4 teaspoon fine or coarse coffee grounds, coconut or mocha or coconut mocha flavored
3/4 cup unsalted butter, melted
3/4 cup dark brown sugar
1/2 cup granulated sugar
1 egg + 1 egg yolk
1/4 teaspoon coconut extract
1 1/2 teaspoon vanilla
1/2 cup sweetened coconut shreds, toasted
1/2 cup mini semi-sweet chocolate chips

Mocha Cheesecake Filling
4 oz cream cheese, softened to room temperature
1 1/2 cups powdered sugar
1 (.07 oz) packet instant coffee dissolved in 1 tablespoon water

Directions:
Toasted Coconut Mocha Cookies
In a large bowl combine flour, cornstarch, baking soda,salt, and coffee grinds. Set aside.
In a medium-sized bowl whisk together melted butter and sugars until no clumps remain. Whisk in the egg, and then the egg yolk. Add coconut and vanilla extracts, whisking until incorporated.
Pour the wet ingredients into the dry ingredients and mix together with a rubber spatula until just combined. The dough will be soft, but very thick to work with. Using the spatula fold in the toasted coconut shreds and the mini chocolate chips. Cover the dough and let chill for at least 2 hours, or up to 3 days–I let mine sit overnight.

Mocha Cheesecake Filling
While the cookie dough is chilling, make the mocha cheesecake filling. Using a mixer combine cream cheese, powdered sugar, and 1/2 of the instant coffee mixture. Mix until smooth–it’ll have the consistency of a no-bake cheesecake. Place bowl in the freezer and freeze for at least 3 hours–I let mine sit overnight.

Assembling the Cookies
Once dough and cheesecake filling have chilled, start assembling the cookies. Roll about a tablespoon and half of cookie dough into a ball. Make a deep thumbprint in the middle of each dough ball, sort of like a well. Place a teaspoon of the coffee cheesecake in the center of the well and fold the edges of the dough over, using your fingers to enclose the cheesecake in the dough ball. Bake cookies for 11-12 minutes–the cookies will look soft and underbaked. Allow cookies to cool on the cookie sheet for 10 minutes before transferring to a wire rack to cool completely.

NOTE: I had extra coffee cheesecake, which I dipped these cookies into and ate, but if you don’t want extra, I suggest cutting the cheesecake portion in half.

Cookie Dough recipe adapted from this chocolate chip cookie recipe.


Wait, don’t think I forgot, I told you my favorite smells and now it’s your turn to share. That’s how this friendship thing works. I think.

Toasted Coconut Mocha Cheesecake Cookies

Advertisement

No-Bake Nutella Cheesecake with a Peanut Butter Cookie Crust

No-bake Nutella Cheesecake

Umm, guys, I can’t stop eating dreaming  wanting nutella. Well, nutella and peanut butter that is. I can’t have one without the other. I use to just eat spoonfuls of peanut butter, and be perfectly happy, but now my peanut-butter-smothered spoon demands to be dunked into nutella. I don’t know if you’ve ever dealt with peanut butter smothered spoons, but they can be quite persuasive when they want to be. Real sweet talkers. You just can’t say no to them.

It could also be that I don’t want to say no. Fine, I’ll admit it. I’m a peanutbutternutellaaholic.

And, as a pbnaholic, I accept a few things to be true. The first being that peanut butter and nutella are having their moment and I shouldn’t try to stop them. The second thing is that I accept that my spoon will now have to be dunked in both creamy substances before I can eat it. And, lastly, I accept the fact that both my jar of peanut butter and nutella are cross contaminated with each other. Surprise surprise, I can’t really find it in me to be bothered by this fact either. Really, it means less mixing for me, which means, more spoonfuls finding their way into my mouth.

Tell me how that sounds like a problem?

Exactly, my wonderful friends, it doesn’t.

No-bake Nutella Cheesecake

I know, I know, I’m fashionably late to the nutella party. My bad. I just wasn’t into it before. At all. I didn’t even want to try it. How ridiculous of me, right? But, then I finally bought a jar, had a tentative spoonful, decided it needed some peanut butter, and the rest is history. Well, maybe not, considering I can’t forget it.

Like I can’t forget these Peanut Butter & Nutella Pastry Puffs I made last week.

Like I won’t forget to buy a new nutella jar at target.

Like I’ll never forget about this cheesecake.

No-bake Nutella Cheesecake

This cheesecake. I. LITERALLY. CAN’T. EVEN.

Let me explain.

A homemade peanut butter cookie crust. I won’t even deny the fact that I made peanut butter cookies for the sole purpose of crumbling them up and using them as a crust. Or, that I made three different batches of varying sizes (large, small, and mini) just so that I would have the perfect sized peanut butter cookie as a topping for my cheesecake. What, you don’t think that’s normal? Awkward.

The peanut butter cookie crust is then topped with the most decadent and velvety no-bake nutella cheesecake in the world. Two words here people: rich and nutellaly—let’s pretend that’s a real word. Can I say one more word? Creamy. So, so, creamy. The ricotta cheese is to thank for that one. Yes, you heard right, ricotta cheese. Funny story, I had intended to add mascarpone cheese to this cheesecake, but accidentally grabbed ricotta instead. I got distracted by samples at Trader Joe’s. Can you blame me? It turned out to be a glorious mistake anyways. And, then of course, there’s whipped cream and the {perfect sized} mini peanut butter cookie on top.

No-bake Nutella Cheesecake

I repeat, I. CAN’T. EVEN.

No-bake Nutella Cheesecake with a Peanut Butter Cookie Crust
Yields: 4 large servings

Ingredients:
20 mini (or, about 9 larger) peanut butter cookie crumbs (I used this cookie recipe)
2 1/2 tablespoons unsalted butter, melted
2 (8 oz.) blocks of cream cheese, softened
1/2 cup powdered sugar, sifted
1 1/2 cups Nutella
4 to 5 tablespoons ricotta cheese (depending on texture and taste use more or less)
3/4 cup heavy cream
1-2 tablespoons sugar
1/2-1 teaspoon vanilla
whipped cream & mini peanut butter cookies, for garnish

Directions:
Combine melted butter and cookie crumbs, until just combined. Divide the crumb mixture equally between serving glasses, lightly pressing into the bottom of the glass. Set aside.
In the bowl of the stand mixer with whisk attachment whip heavy cream until stiff peaks form. Add sugar and vanilla, to taste, beating until just combined. Scrape into a separate bowl and set aside.
Using the same bowl you whipped the heavy cream in, beat the cream cheese until smooth. Mix in the powdered sugar, scraping the sides of the bowl as needed. Add nutella, mixing until incorporated, and then the ricotta cheese–add more or less depending on how velvety you want it. Using a spatula fold in the whipped cream mixture until just incorporate. Taste your cheesecake as you go and alter the taste for your preference, if you think its to rich add more whipped cream to lighten it up.
Spoon or pipe nutella cheesecake evenly into serving glasses, making sure to smooth the tops. Let chill for about two hours in the fridge.
Top cheesecakes with fresh whipped cream and a mini peanut butter cookie. Enjoy!


No-bake Nutella Cheesecake

Chocolate Dipped Pecan Shortbread Cookies

Pecan Shortbread CookiesYou know what I was just thinking?

It feels like it’s been forever since I made cookies. Like, I can’t even remember the last cookie I made. Eek.

Oh God, when was the last time I ate a cookie?

I. Can’t. Even. Remember.

Pecan Shortbread Cookies

Is it sad that I’m sort of maybe totally kind of panicking? Cause I am. You gotta understand, it’s a pretty sad day when you realize you haven’t made or eaten a cookie in what seems like a million years.

A. Million. Years.

So, as we can see, when I panic I apparently like to over exaggerate. It hasn’t been a million years, but it has been about seven months since I shared a cookie recipe. You have to admit, that’s kind of a long time. I don’t even know how that happened. Definitely not intentional either. I wouldn’t deprive you like that on purpose. That would just be cruel.

Funny enough, the last recipe I posted was also a chocolate dipped cookie. I really don’t know how that slipped my mind considering it was the beginning of my obsession with dipping the bottoms of cookies. I find it unfair for the top of the cookie to have all the fun. Fair point, huh? The dipped bottom, to me, is like putting a big fat shiny bow on top of a present; it just makes it that much better.

Pecan Shortbread Cookies

These cookies almost didn’t make it up on the blog. Why you ask? Oh, let me just tell you. For those that don’t know or don’t remember, my brother has two huskies, (Ms.) Meeka and (Mr.) Archer (look here for their picture). They are the cutest things on the planet. And, that is in no way an exaggeration. Scouts honor on that one. As a rule we don’t feed them human food, mainly because they have super sensitive stomachs and can’t seem to handle it. That doesn’t mean, however, that they don’t try to eat human food whenever they get a chance. Adorable troublemakers. That’s what they are.

Pecan Shortbread Cookies

I’m sure you noticed these cookies require some work–I swear the end product is so totally worth it though. The dining room table became my work station, or at least half of the table did. It’s a pretty big table. Decent height. Lined with chairs on each side. I had rows of finished cookies just sitting on wax paper as I finished up with the caramel outlining. There was about five cookies left when it happened.

Meeka, my lovely little niece, came running in and quite literally face dived into a row of completed cookies. I repeat face dived. She tasted licked about two rows worth of cookies before I could pull her away. TWO. ROWS. WORTH. That’s a lot of deliciousness (and hard work, I might add) that went straight into the trash. Oh, and the kicker, in the panic I forgot to finishing filling in the trees with caramel on the cookie I had been working on when the face dive occurred. Ask me when I realized this? When I was opening the container filled with cookies to give to one of my coworkers. I was completely embarrassed. Like, blushing hardcore red. I gave someone an unfinished cookie. Poor under-decorated cookie. Poor person eating the cookie. Sad. Sad. Sad. Luckily, my coworker didn’t seem too mind at all. Thank the Baker God’s on that one.

Pecan Shortbread Cookies

Anyways, I should probably tell you a little about these cookies. It’s a buttery, melt in your mouth, shortbread cookie packed with chopped up pecan pieces dipped in milk chocolate and then outlined with some caramel. Oh, and it’s stamped with a Merry Christmas cookie stamp to make it festively beautiful. This is probably the first cookie I’ve made that I received equal amounts of compliments on taste and looks. Seriously, people love these cookies. I ate more than half of love these cookies. And, clearly, dogs love them too.

You know what that all adds up to, right?

Winning.

And, the fact, that I absolutely insist that you go make them. If you don’t, I may or may not have to force feed you to eat them. You don’t want that. You just don’t.

Pecan Shortbread Cookies

Chocolate Dipped Pecan Shortbread Cookies
Yields: about 30 large cookies

Utensils:
Merry Christmas Cookie Stamp
Large circle cookie cutter

Ingredients:
2 cup (4 sticks) unsalted butter, softened to room temperature
1 1/3 cup powdered sugar
1 cup cornstarch
1/4 teaspoon salt
1 ½ cups all-purpose flour
1 ½ cups finely chopped pecans
3 cups milk chocolate candy melts
1/2 cup of caramel

Directions:
In the bowl of a stand mixer with paddle attachment, cream butter until light and fluffy.
Beat in powdered sugar until creamy. Scrape down the sides of the bowl as needed.
Add salt and cornstarch. Mix until incorporated. Gradually beat in the flour until combined.
Using a spatula, fold in the chopped pecans.
Gather the dough as best you can into a ball and place on a piece of parchment paper. Cover the top of the dough with another piece of parchment paper and roll to ½ inch thick. Slide the parchment-covered dough onto a cutting board and place in the fridge. Let chill for about 50-60 minutes.
After the dough is finished chilling, preheat oven to 350 degrees. Using a large circular cookie cutter (or, cup that is slightly larger than the stamp), cut your cookies into circles. Firmly press the cookie stamp into each cookie-if the dough becomes too sticky or tough to work with place back in the fridge until it’s easier to handle.
Bake for 6 minutes, reverse tray (this will ensure an even color on the cookies!), and bake for another 5 more minutes or until lightly brown.
Let cookies cool for about a minute on the cookie sheet, and then transfer to a cooling rack to finish cooling.
Once cookies have completely cooled, melt the milk chocolate candy melts in a microwave safe bowl, in 15 second intervals, until of drizzling consistency. Dip the bottoms of each cookie in the melted chocolate. Place cookie upside down on parchment paper until the chocolate has hardened.
Once chocolate has hardened, flip the cookie around. Using a piping bag with a very small tip or simply dipping a toothpick in the caramel (I used the toothpick method, it takes more time, but it ensures that the ‘Merry Christmas’ stays legible), fill in the stamped part of each cookie with caramel.


Pecan Shortbread Cookies

Caramel Toffee Chocolate Dipped Cookies

Caramel Toffee Chocolate Dipped Cookies
That’s a pretty flavorful title, huh?

Caramel.

Toffee.

And chocolate.

All packed into a single soft and chewy cookie. Please excuse me as I wipe the drool off my keyboard. Oh, would you like a napkin too? Here, borrow mine.

Would you believe that this tasty title wasn’t actually my first choice? It’s true, it totally wasn’t. The original title was much too long, and if we are being completely honest, there wouldn’t have been a napkin big enough to clean up the drool spill that would have ensued.

I see that look in your eyes. You want to know the title don’t you? Luckily for you, I’m in the business of giving the people what they want. So, here goes. Don’t say I didn’t warn you.

Caramel & Milk Chocolate Toffee Swirled Ooey Gooey Soft & Chewy Cookies Dipped in Milk Chocolate.
Caramel Toffee Chocolate Dipped Cookies
Pretty delicious sounding, right? Okay, maybe you didn’t drool, but you can definitely see what I mean about the length. And, I’m betting you are (or, at least highly considering) moving this recipe to the top of your To Bake List. Do yourself a favor, move it to the top. There will be no regret.

In fact, Matt (my brother) claims these are the best cookies I have ever made. Well, his exact words were: “These are probably the best things you’ve ever made. Seriously, the amount of flavor and softness in this cookie, much better than some of that cardboard sh*t you’ve made.” Yeah, I live with some hard critics. And, no, I don’t think anything I’ve ever made tastes like cardboard. Definitely an exaggeration on his part, but I’ll let you be the judge of that. Feel free to stop by for a taste testing of my baking skills any time you’d like. You’re always welcome.

Caramel Toffee Chocolate Dipped Cookies
I want to tell you about this cookie recipe. I dreamed up the flavor combination about two weeks ago. So, why did I wait so long to actually make them, you ask? Two reasons. Weirdly, they both start with an h. The first is hockey.

I have become a hockey fan. Like, a pretty big hockey fan. And no, it’s not just because the Stanley Cup Playoffs are happening right now. Or, because my best friend since the fourth grade is the biggest hockey fan I know and has been trying to get me to like hockey for years. And, it’s not even because I went to a playoff game a few weeks ago and fell completely in love with a hockey player (seriously, go look up Tyler Seguin. Isn’t he just beautiful? Yes, he is at the top of my celebrity crush list. Don’t judge me.). It’s because I like the sport. It’s fast paced, it’s exciting to watch, and even though I’m not a violent person, I think it’s pretty awesome that hockey players can just start fighting in the middle of the game. It takes talent to throw a punch while wearing ice skates. I, for one, am impressed.

The second reason is the heat. I’m all in for some sun, occasionally. Honest. I’m coming around to the whole warm weather situation. I like being able to wear sundresses and sandals, eat popsicles, and leave the house without a jacket. I really do. But, when I can’t turn on my oven because it’s simply too hot, I don’t like it. At all. Thankfully, the weather finalllllly cooled down. Hence, these beauties making their way into the oven to be baked into absolute deliciousness.

Caramel Toffee Chocolate Dipped Cookies
I know I’m raving on and on about these cookies, and I’m sure you’re thinking “Yeah, okay Meggan”, but in all seriousness, these cookies do deserve all the hoopla. The flavor combination of the caramel, toffee, and chocolate, on its own, is heavenly, but to pair it with literally the best cookie dough base recipe ever, pushes these cookies over the top. I’m in absolute love with this cookie dough recipe, and I plan on using it as the base for all future cookies I make. That’s how good it is. Which is why I need to take a moment to thank Sally from the blog Sally’s Baking Addiction. Thank you for creating this cookie dough recipe! You truly are a baking goddess.

Caramel Toffee Chocolate Dipped Cookies
Yields: 24 Cookies

Ingredients:
2 ¼ cups all-purpose flour
1 ½ teaspoons cornstarch
1 teaspoon baking soda
½ teaspoon salt
¾ cup golden brown sugar
½ cup granulated sugar
¾ cup unsalted butter, melted
1 egg + 1 egg yolk
2 teaspoons vanilla
¾ cup caramel bits
½ cup milk chocolate toffee bits
1 1/3 cup milk chocolate candy melts

Directions:
In a large bowl combine flour, cornstarch, baking soda, and salt. Set aside.
In a medium-sized bowl whisk together melted butter and sugars until no clumps of brown sugar remain.
Whisk in the egg, and then the egg yolk. Add vanilla. Whisk until combined.
Pour the wet ingredients into the dry mixture and mix together with a rubber spatula until combined. The dough will be soft, but very thick to work with.
Using a spatula fold in the caramel and milk chocolate toffee bits—because of the melted butter, they may not stick to the dough, but do your best to evenly spread them throughout.
Cover the dough and let chill for at least 2 hours, or up to 3 days—I let mine sit overnight. Chilling is mandatory for this recipe though—trust me, it’s worth it!
Take the dough out of the refrigerator and allow to slightly soften at room temperature for about 10 minutes.
Preheat oven to 325 degrees, and line a cookie sheet with parchment paper. Set aside.
Roll the dough into about tablespoon sized balls. The dough will be crumbly and tough to work with, but the warmth from your hands will allow the balls to stay intact.
Bake for 11-12 minutes. The cookies will look underbaked and very soft. Let them sit on the cookie sheet for 10 minutes, to continue baking, before moving them to a wire rack to cool completely.
Once cookies have completely cooled, melt the milk chocolate candy melts in a microwave safe bowl, in 15 second intervals, until of drizzling consistency. Dip the bottoms of the cookies in the melted chocolate or spoon chocolate on the bottom of the cookies and spread evenly until covered (I preferred this method!). Place chocolate dipped cookies upside down on wax paper until chocolate has completely hardened.

*Cookie Dough recipe from Sally’s Baking Addiction


Caramel Toffee Chocolate Dipped Cookies

Toasted Coconut XOXO Shortbread Cookies

Toasted Coconut XOXO Shortbread CookiesWhen I think XOXO, the first thought that immediately follows is Gossip Girl. Yup, you got me, I used to watch the show. My second thought is the more traditional, hugs and kisses. Probably what your first instinct was, huh?

Well, did you know that thinking hugs and kisses isn’t technically right? Apparently, the X is supposed to stand for kisses and the O is supposed to stand for hugs. So, really, we should be saying kisses and hugs. Can I tell you how I know this? I spent a good twenty minutes researching the meaning of XOXO. I had never really thought about why it represented hugs and kisses—yes, I will continue to say it this way, because I think it sounds better…feel free to join me—until I started making these cookies. And, once I thought about it, I really wanted to know the answer. So, here we go. Your very own lesson on the History of XOXO—now you can’t say I never gave you anything for Valentine’s Day.

Back in the Middle Ages, many people couldn’t read or write, and when they were presented with a document requiring a signature of understanding, they would simply write the letter X on the signature line. The X was meant to represent the cross and convey that in Christ’s name the contents of the document were true. But, wait, that has nothing to do with kisses! You’re right, it doesn’t. The kissing part of the story has been debated, but the common theory is that many individuals after signing the X would then kiss the X as a symbol of truly believing in what the document stood for. Sounds legitimate, right? Some people don’t think so. They choose to believe that the X simply looks like two triangle-faced individuals locking lips. Hence, X meaning kisses.

The O, on the other hand, has a history that is still very much debated. Some will argue that it was created by Jewish immigrants, who wanted their own way of signing documents that wasn’t related to the Christian X. Others say that the game of tic-tac-toe provided the inspiration for using the letter O when people decided they wanted another letter to represent a different kind of affection. Or, it could just be that an O looks like two open arms hugging.

What do you think?

Toasted Coconut XOXO Shortbread CookiesAnyways, let’s talk about chocolate X’s and O’s covered in toasted coconut shreds on top of a buttery, coconuty shortbread cookie. Excuse me, as I go eat one right now.

The base of these little loveable bad boys is shortbread. A really reallyyy good shortbread. Before decorating them with X’s and O’s, my Dad taste tested a cookie and asked me if I had really made them. When I said yes—worried, mind you, that I somehow messed up the recipe—he said that they tasted like something you would buy at a bakery. Let me just tell you something about my Dad. He’s not a sugar-coater, if he likes something he’ll tell you, and if he doesn’t, you’ll know too. So, as you can tell, his compliment meant a lot to me. I found the recipe for this shortbread in a little wooden recipe box that used to be my Grandma’s. I don’t know where she got it or if it came from a recipe book, but what I do know is that I will never use another shortbread recipe again. And, since I like you so much, I’m gonna share it!

I wanted a little something more than just shortbread for Valentine’s Day, so I decided to spruce the dough up with coconut. Can I just say, it was the BEST decision ever. The shortbread cookie itself has that buttery, soft, melt in your mouth taste. The addition of coconut from both the extract, which isn’t overpowering, and the toasted coconut shreds, which adds a little crunch to each bite, leaves you with a subtly infused coconut cookie that isn’t overly sweet. I didn’t stop there though. The cookie is then decorated with semi-sweet chocolate and covered with more toasted coconut shreds in the form of X’s and O’s. Again, BEST decision ever.

Toasted Coconut XOXO Shortbread CookiesBelieve me when I say that you can’t go wrong with these cookies. Seriously. Make them for your Valentine, a friend, your family, or for that special someone who doesn’t know that you like them yet. These cookies should definitely win that person over. Oh, and Happy [Early] Valentine’s Day. May it be filled with lots of X’s and O’s.

Toasted Coconut XOXO Shortbread Cookies
Yields: about 30 cookies

Utensils:
Scalloped circle cookie cutter
X cookie cutter
O cookie cutter
Piping bag (or, Ziploc bag) & small tip
Toothpick(s)

Ingredients:
Toasted Coconut Shortbread Cookies
1 heaping cup sweetened shredded coconut, toasted
1 cup (2 sticks) unsalted butter, at room temperature
2/3 cup powdered sugar
½ cup cornstarch
1/8 teaspoon salt
½ teaspoon coconut extract
1 ½ cups all-purpose flour

Toasted Coconut & Chocolate Topping
¼ cup sweetened shredded coconut, lightly toasted
½ cup semi-sweet chocolate chips
Vegetable shortening, as needed

Directions:
Toasted Coconut Shortbread Cookies
Using a food processor (or, blender), pulse the toasted shredded coconut until coarsely ground. Set aside.
In the bowl of a stand mixer with paddle attachment, cream butter until light and fluffy.
Beat in powdered sugar until creamy. Scrape down the sides of the bowl as needed.
Add salt, cornstarch, and coconut extract. Mix until incorporated.
Gradually beat in the flour until combined, and then mix in the toasted coconut.
Gather the dough as best you can into a ball and place on a piece of parchment paper. Cover the top of the dough with another piece of parchment paper and roll to ½ inch thick. Slide the parchment-covered dough onto a cutting board and place in the fridge. Let chill for about 30 minutes.
After the dough is finished chilling, preheat oven to 350 degrees. Using the scalloped cookie cutter cut cookies—if the dough becomes too sticky or tough to work with place back in the fridge until it’s easier to handle.
Bake for 6 minutes, reverse tray (this will ensure an even color on the cookies!), and bake for another 5 more minutes or until lightly brown.
Let cookies cool for about a minute on the cookie sheet, and then transfer to a cooling rack to finish cooling.

Toasted Coconut & Chocolate Topping
While the cookies are cooling, coarsely ground (with a food processor or blender) the lightly toasted shredded coconut. Set aside.
Once the cookies have cooled completely, melt semi-sweet chocolate chips and a little vegetable shortening in a microwave safe bowl (microwave in 15 second intervals, stirring after each interval, until smooth).
Lightly press the X or O cookie cutter into the bowl of melted chocolate—make sure the cookie cutter has enough chocolate on the rim so that the outline will show up on the cookies. Use a toothpick to add or take away chocolate as needed. Gently press the X or O chocolate covered cookie cutter into the middle of the cookie and then lift up, there should be an outline of the letter—if the outline is incomplete, dip a toothpick in the melted chocolate and complete the outline by hand.
Working quickly, use either a piping bag or toothpick to fill in the letter completely with melted chocolate (I found the toothpick method to be easiest…just pretend the toothpick is like a painting brush)—if the chocolate begins to harden, place back in the microwave for another 15 seconds or until of drizzling consistency.
Once the letter is filled in with chocolate, sprinkle the toasted coconut over the letter. Dust off the extra coconut. If needed use a toothpick to add more coconut to a specific spot or to help keep the shape of the letter intact.
Using a piping bag with a small tip (or Ziploc), trace the scalloped edge of the cookie with chocolate. Re-melt the chocolate as needed.
Repeat the above steps, alternating between the X and O cookie cutter, until all the cookies are finished.


IMG_0265

XOXO,
Meggan