Toasted Coconut Almond Chocolate (aka Almond Joy) Blondies

Toasted Coconut Almond Chocolate Blondies
Lets talk candy bars.

If you were to ask me what my favorite candy is, I honestly don’t know what I would say. I almost think I would answer that question differently depending on my mood, the month, or whatever was closest to me… and by that last one I mean, whichever candy was stashed in my purse. Yes, I am that lady that carries candy in her purse. Just in case. You never know when you just won’t be yourself.

Please tell me you picked up that Snickers reference? If you did, ignore this sentence completely, but if you didn’t, go watch a Snickers commercial. It’s kind of funny. And, very true.

Toasted Coconut Almond Chocolate Blondies

I’ve had affairs with Snickers, Twix, Reese’s, and Gummy Bears throughout my life. I seem to always come back to one of these four. I can count on them. They never let me down. Ever. Which is why I have never really been tempted to grab a different candy bar in the aisle.

Until one day an Almond Joy walked up. Well, really, my mom bought an Almond Joy and I tried a bite, and lets just say it was actually pretty darn good. I really liked the combination of coconut, almond, and chocolate. A lot. But, I’m far to loyal (or too in love with) my other four favorites, that there is simply no way Almond Joy’s could become part of my candy routine. But, that doesn’t mean they can’t become part of my baking routine. Or, at least that the ingredients can’t. I’m a problem solver people. I know how to make things work in our (fine, my) favor.

Toasted Coconut Almond Chocolate Blondies

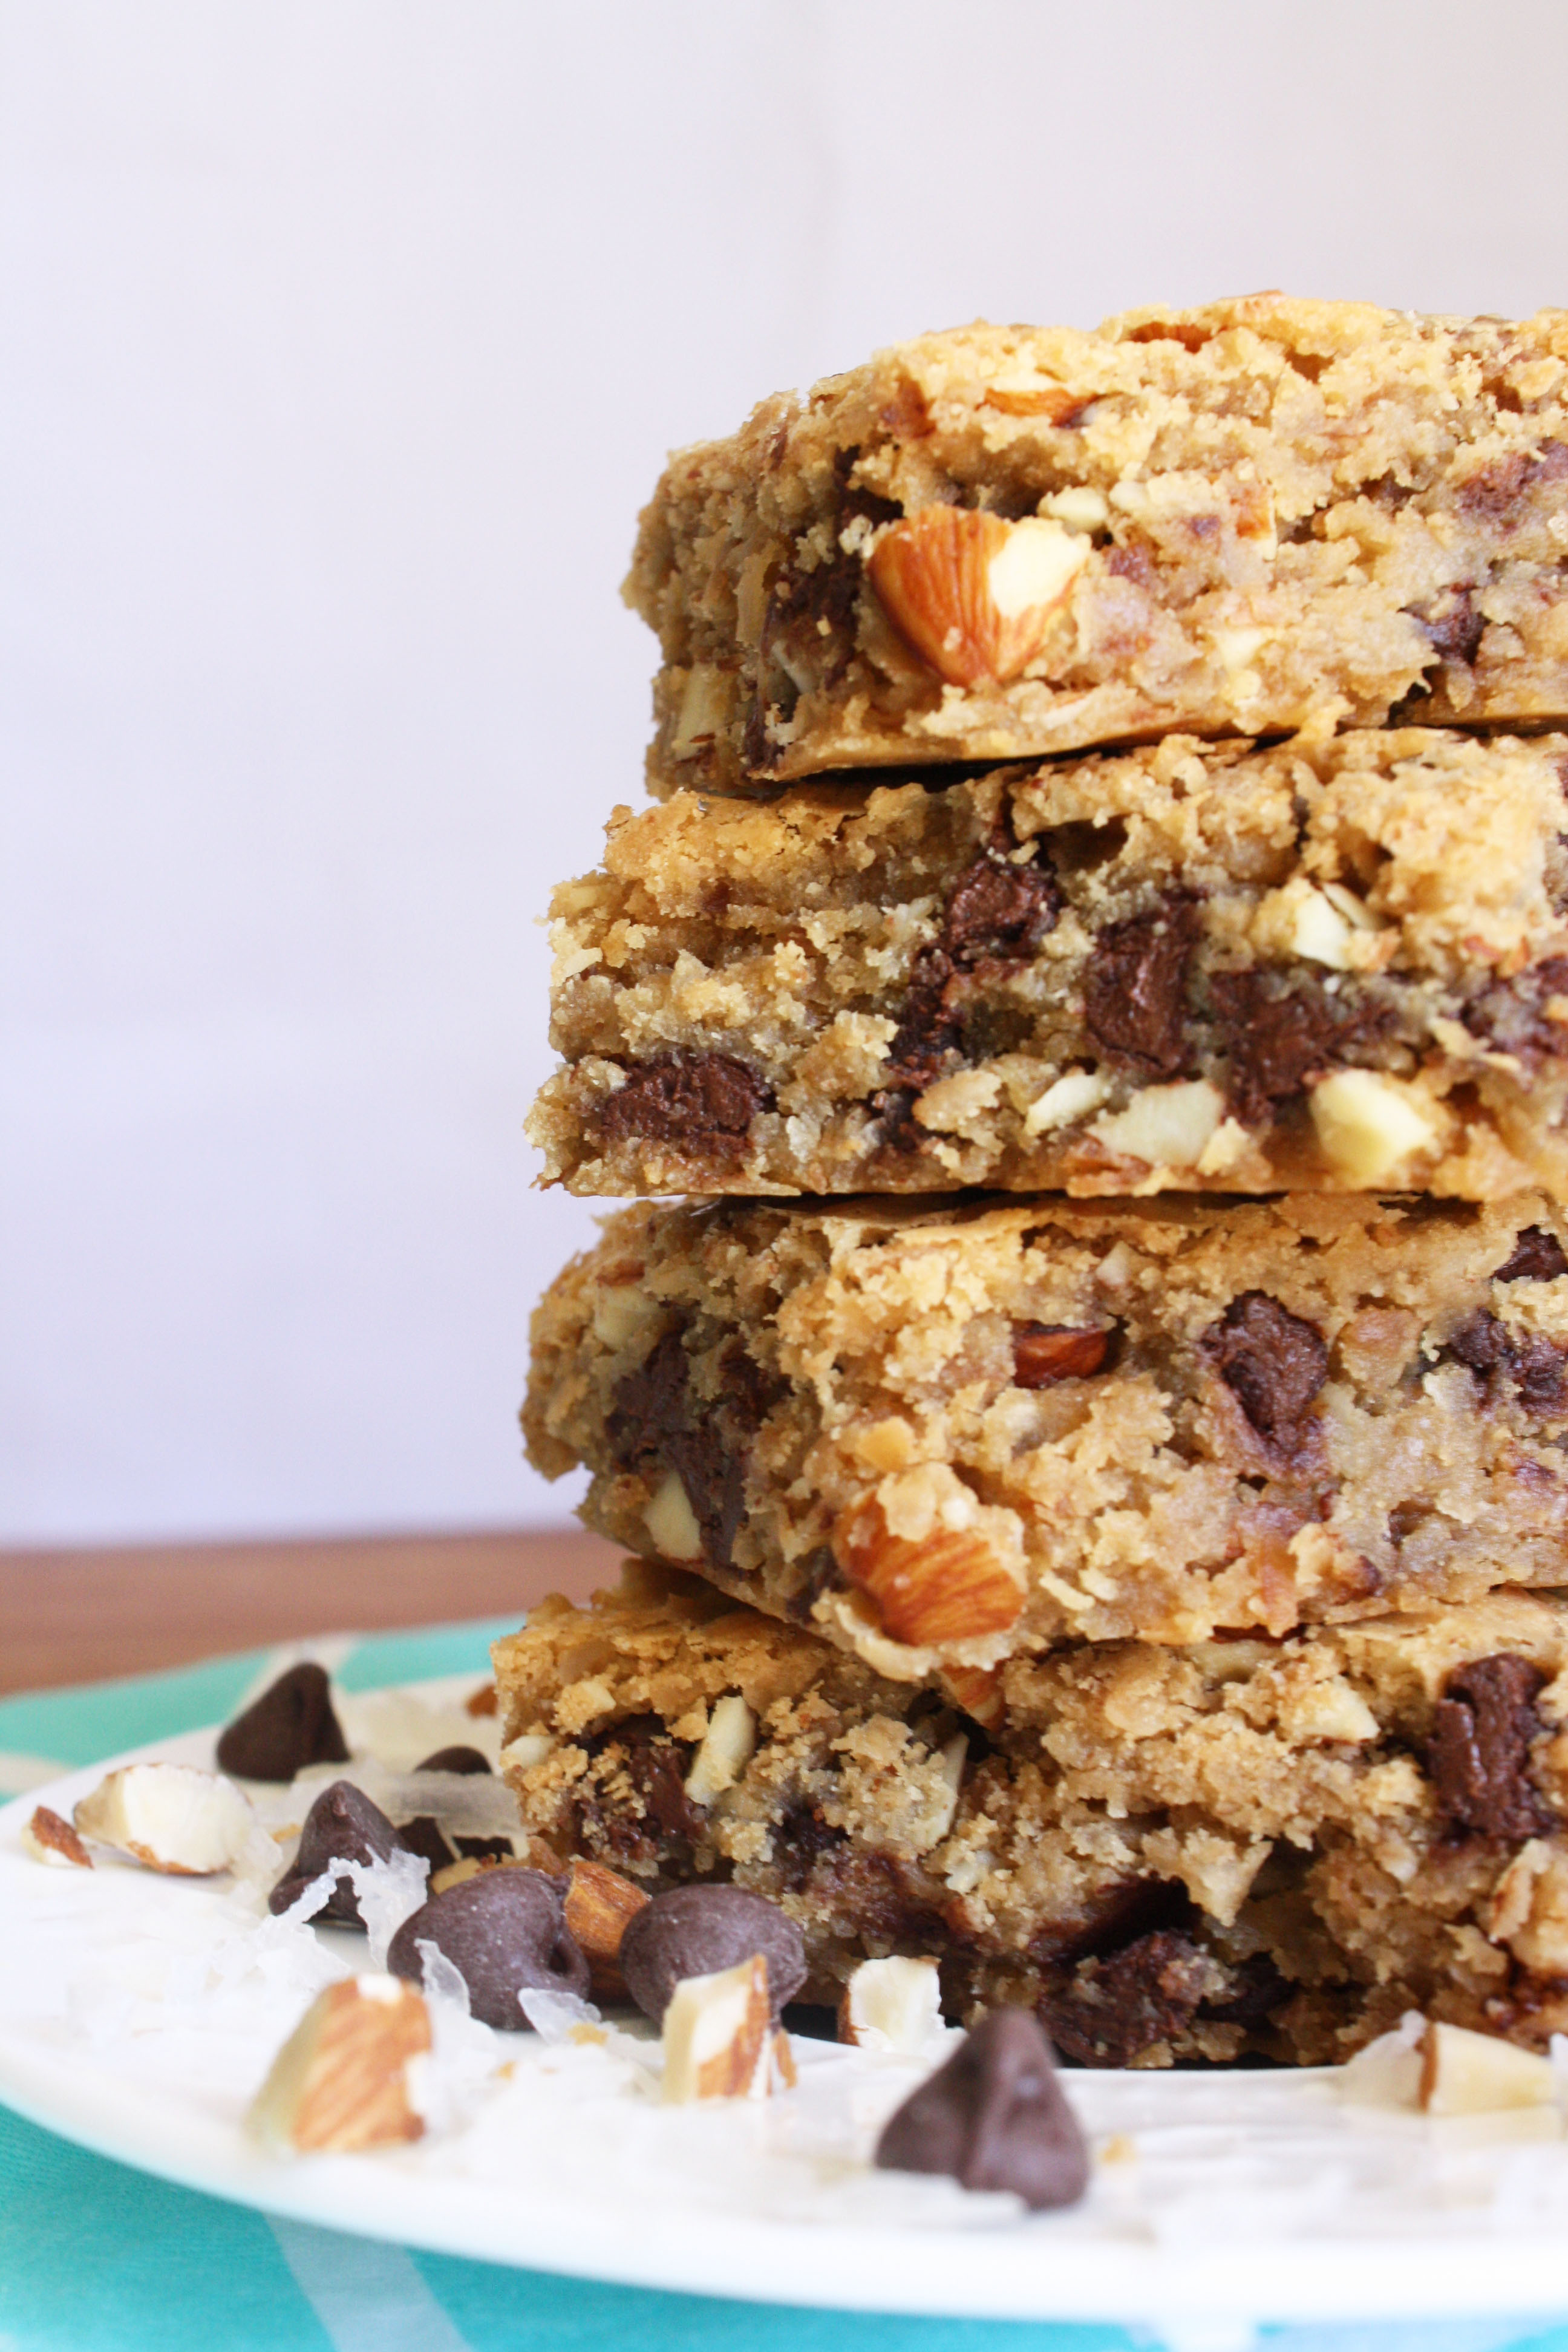
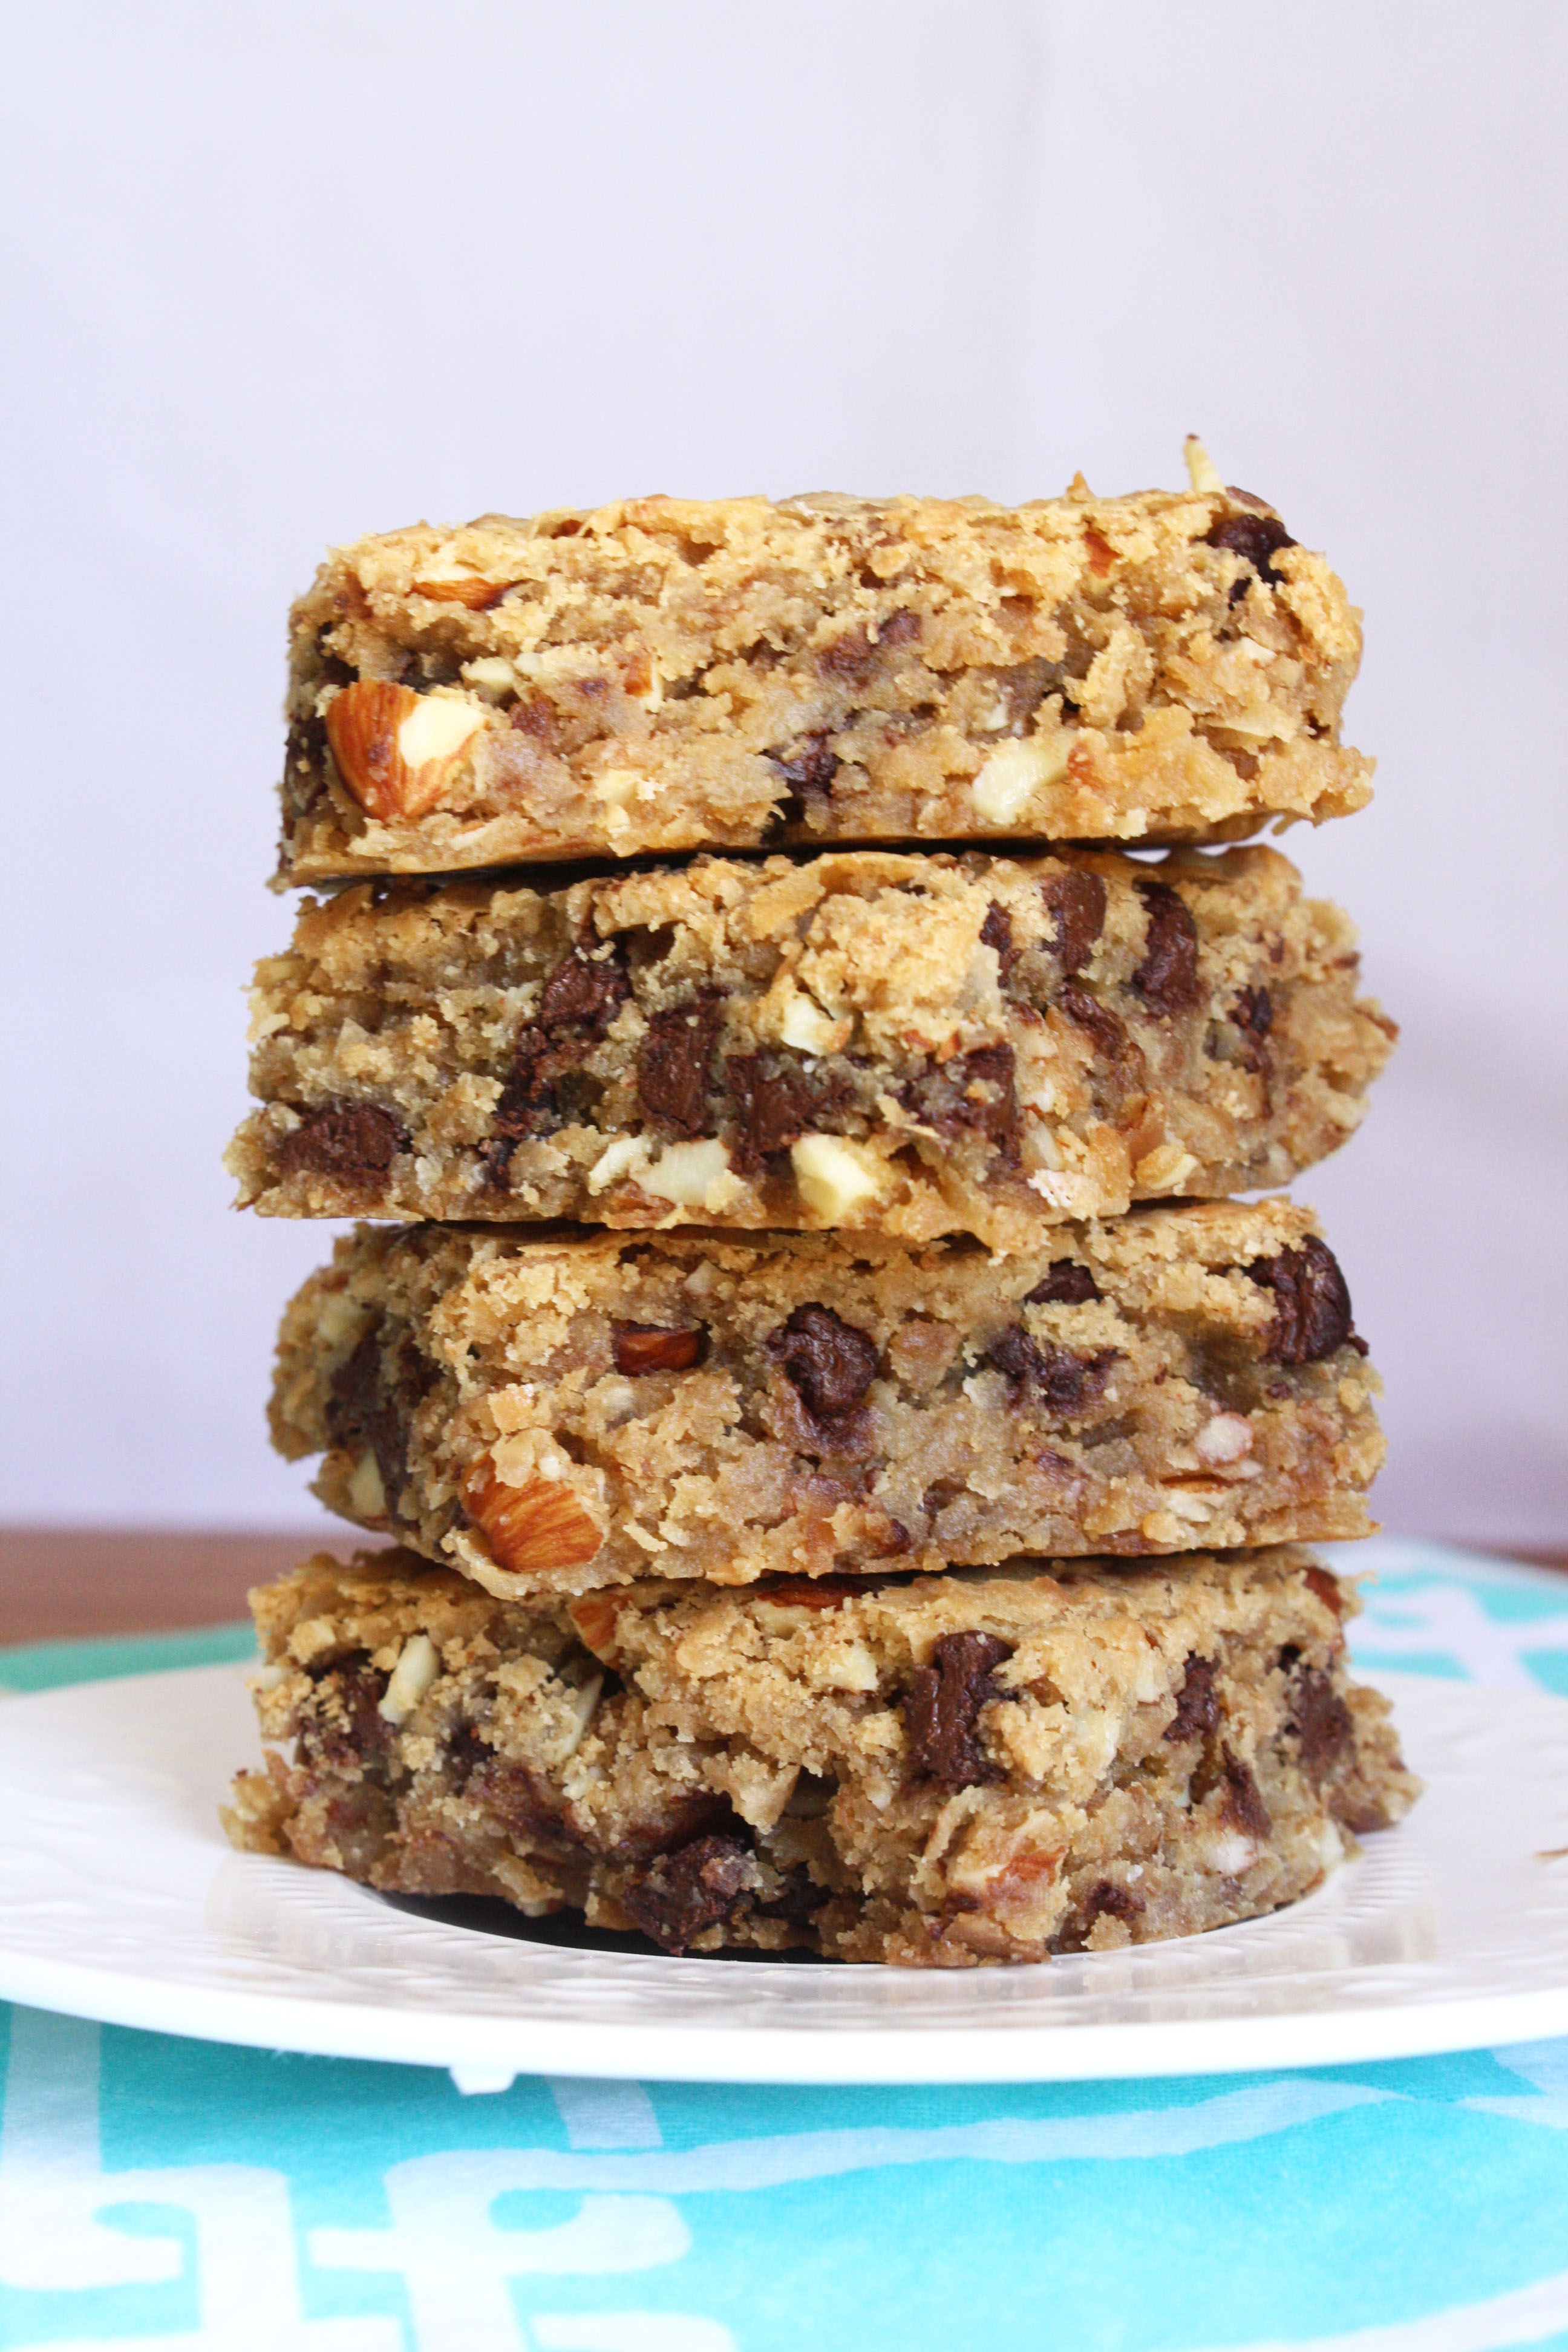
Oh hey there, Coconut Almond Chocolate Blondies or, more simply put, Almond Joy Blondies—I don’t know which name to pick, mainly because I don’t want you to think these bars have Almond Joy’s in them. They have all the ingredients of an Almond Joy, but no physical Almond Joy candy was present during the making process. So, I’m going to let you officially pick the name of these bars. Keep in mind, that this is kind of a big honor. I must really like you.

Can we take a brief minute to talk about blondies. Okay, so blondies. Yeah, I didn’t really get what all the fuss was about. I’m a brownie girl. I like my bars fudgy, gooey, and filled to the max with chocolate flavor. Blondies weren’t even a thought to me for the simple reason that they didn’t have fudge in them. They were acting like brownie imposters. And no one likes imposters. No one.

Toasted Coconut Almond Chocolate Blondies

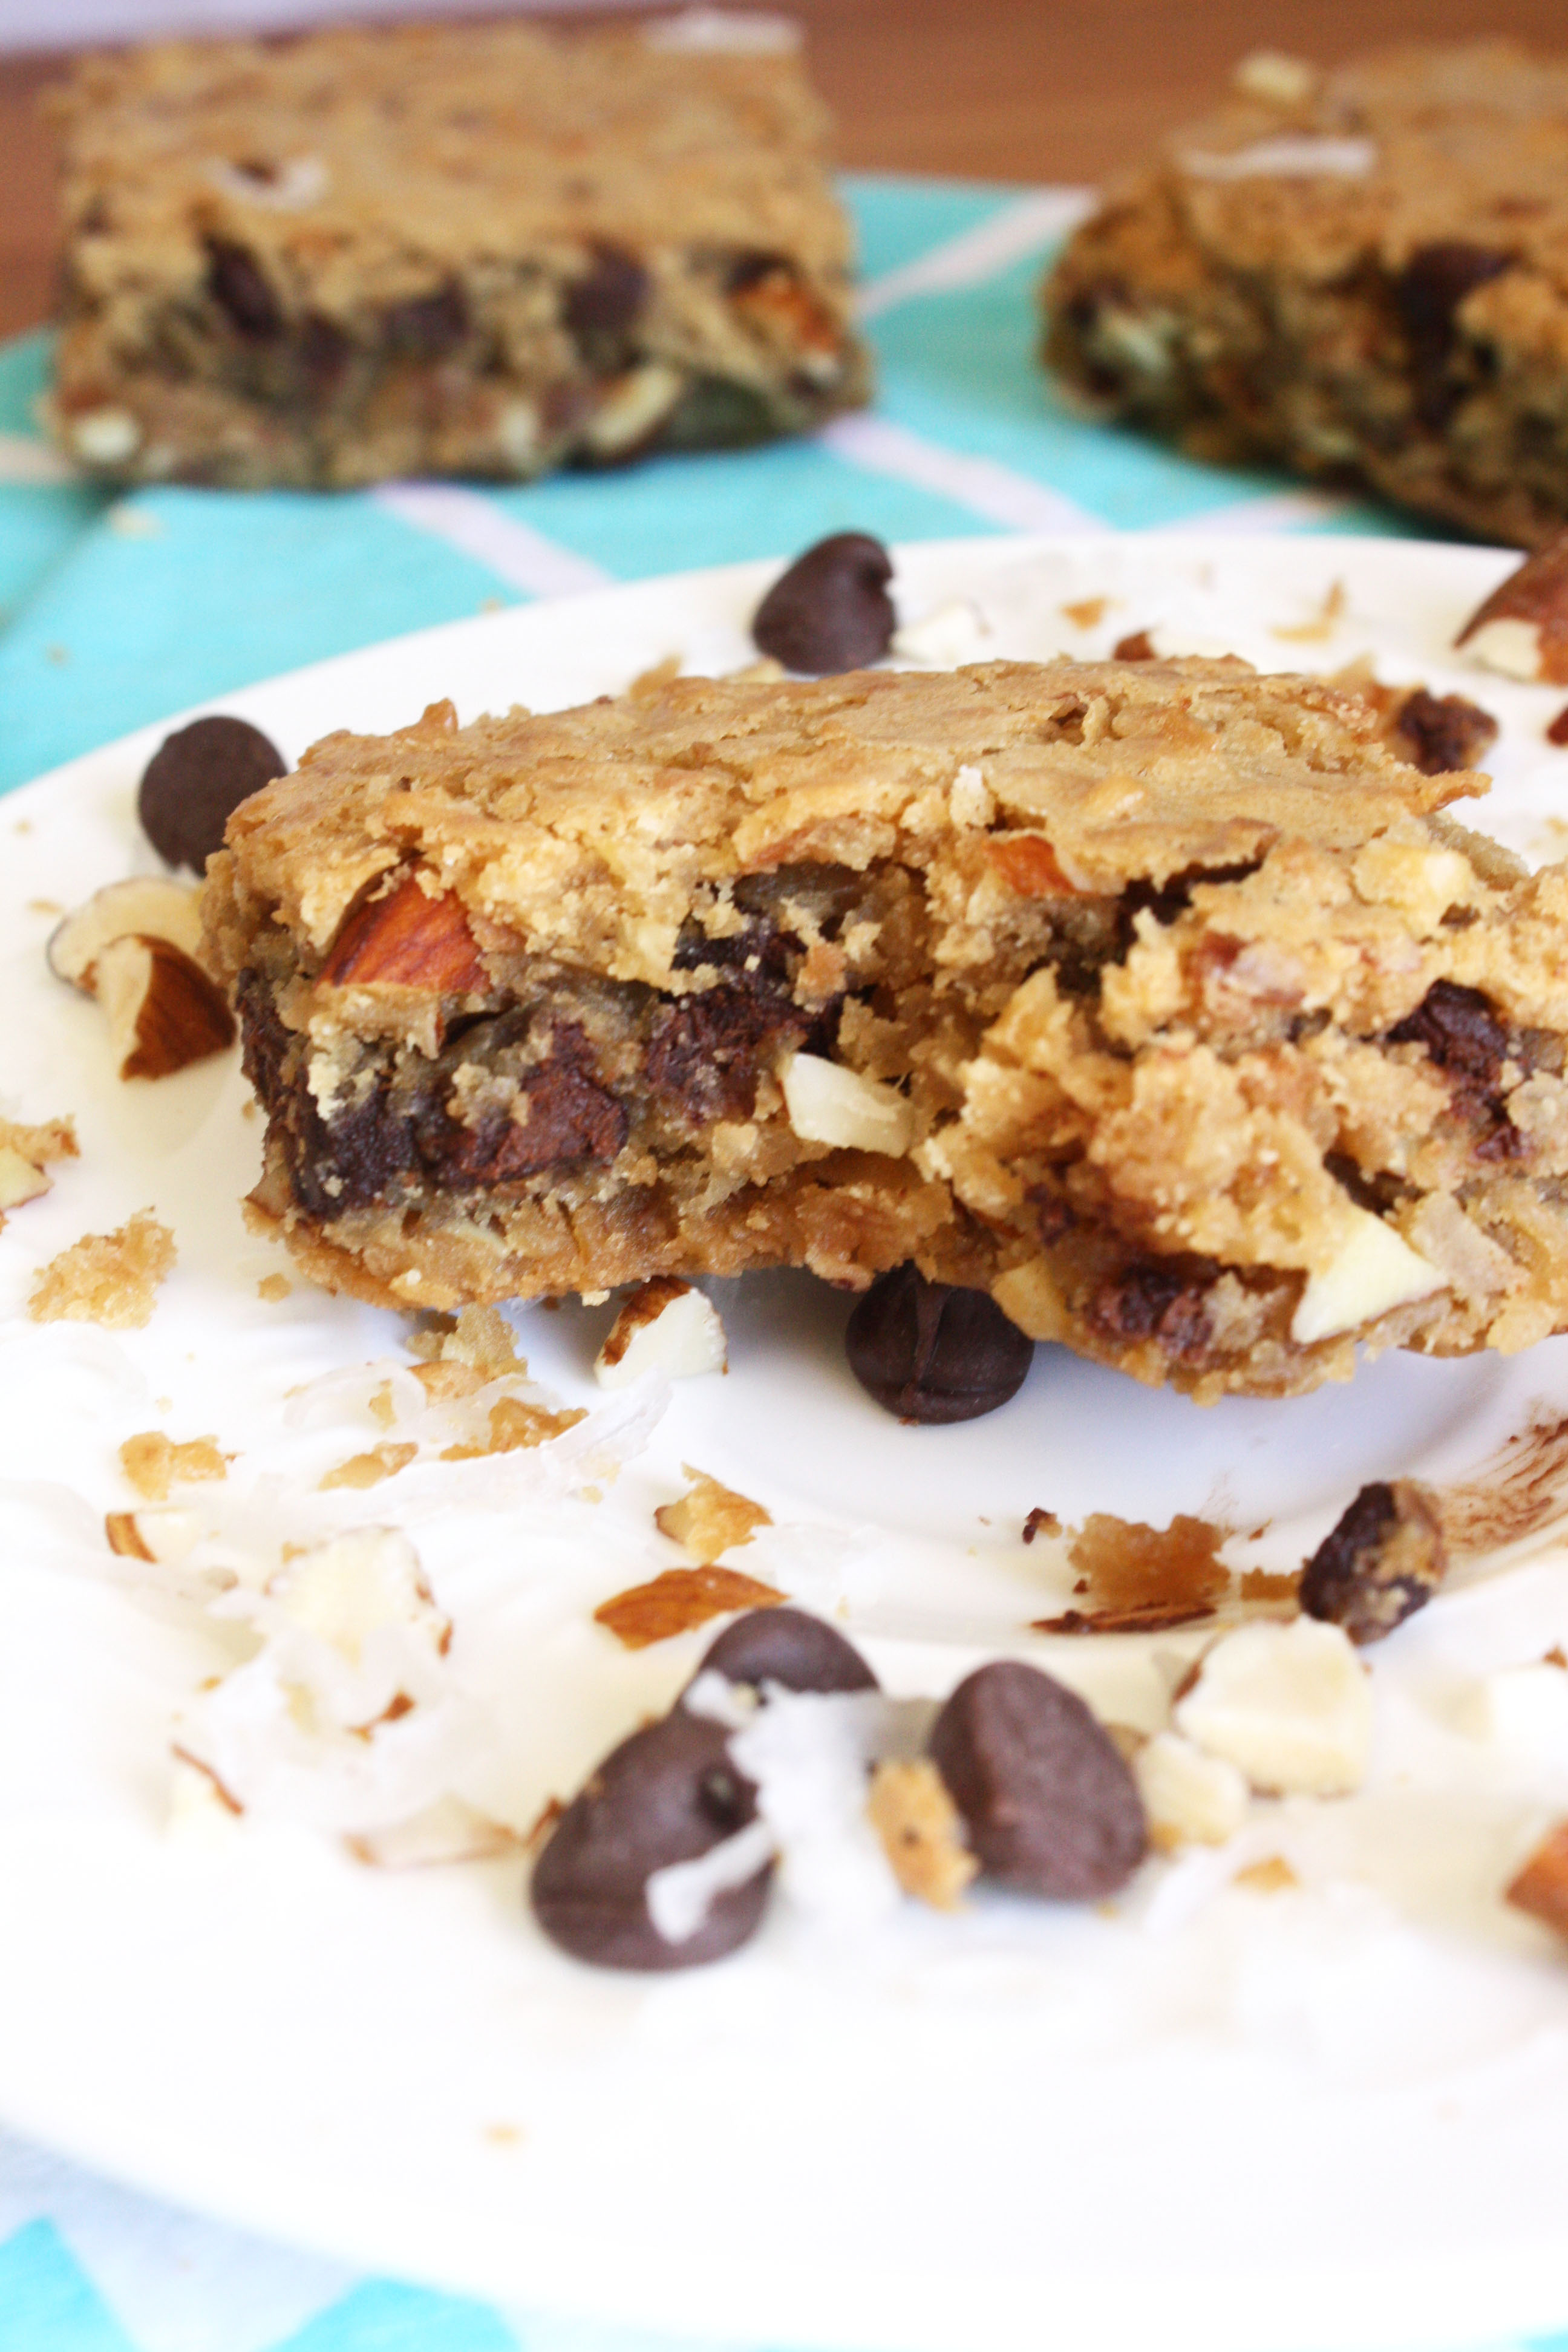
I now see the error in my ways. Blondies aren’t trying to be brownies. In fact, they have their own amazingly delicious thing going on, that they don’t even need to think about being someone else. Blondies are gooey and soft, taste buttery and rich, and are the perfect base for mixing in other ingredients. Why are they the perfect base you ask? Mainly because blondies allow all mixed in flavors, including its buttery self, to come through in each bite. They don’t overpower other ingredients and they definitely don’t let other ingredients overpower them. That’s why these bars are so good. Each bite is a combination of toasted coconut, some crunch from the almond pieces, rich chocolate creaminess, and a buttery gooeyness that keeps you coming back for more.

So, no, it’s not an Almond Joy candy, but I think I’ll dare to say, it’s better. Much better. As in, if this became a candy bar you could buy, I would gladly add it to my candy bar routine. In fact, it might work its way up to be my favorite candy affair.

Toasted Coconut Almond Chocolate Blondies

Toasted Coconut Almond Chocolate (aka Almond Joy) Blondies
Recipe adapted from Averie Cooks
Yields: 12 bars

Ingredients:
1 cup unsalted butter, melted (2 sticks)
2 cups golden brown sugar
2 eggs
2 teaspoons vanilla
½ teaspoon coconut extract
1 ½ cups all-purpose flour
½ teaspoon salt
1 ½ cups sweetened shredded coconut flakes, toasted
¾ to 1 cup roasted almonds, roughly chopped
1 cup semi-sweet chocolate chips

Directions:
Preheat oven to 350 degrees, and prepare a 9×13-inch pan by lining it with foil and spraying generously with cooking spray. Set aside.
In a medium-size bowl, whisk together melted butter and brown sugar, until no clumps of brown sugar remain.
Add eggs, one at a time, and then whisk in vanilla and coconut extract.
Whisk in flour and salt, until just combined—try not to over stir the batter or it will become tough to work with.
Using a spatula, fold in toasted coconut flakes and then the almonds. Fold in chocolate chips until just combined.
Pour batter into prepared pan and smooth top, if needed, lightly with a spatula. Bake for about 35-40 minutes or until a toothpick, stuck in the middle, comes out clean.
Let cool completely before slicing into bars.


Toasted Coconut Almond Chocolate Blondies

Caramel Toffee Chocolate Dipped Cookies

Caramel Toffee Chocolate Dipped Cookies
That’s a pretty flavorful title, huh?

Caramel.

Toffee.

And chocolate.

All packed into a single soft and chewy cookie. Please excuse me as I wipe the drool off my keyboard. Oh, would you like a napkin too? Here, borrow mine.

Would you believe that this tasty title wasn’t actually my first choice? It’s true, it totally wasn’t. The original title was much too long, and if we are being completely honest, there wouldn’t have been a napkin big enough to clean up the drool spill that would have ensued.

I see that look in your eyes. You want to know the title don’t you? Luckily for you, I’m in the business of giving the people what they want. So, here goes. Don’t say I didn’t warn you.

Caramel & Milk Chocolate Toffee Swirled Ooey Gooey Soft & Chewy Cookies Dipped in Milk Chocolate.
Caramel Toffee Chocolate Dipped Cookies
Pretty delicious sounding, right? Okay, maybe you didn’t drool, but you can definitely see what I mean about the length. And, I’m betting you are (or, at least highly considering) moving this recipe to the top of your To Bake List. Do yourself a favor, move it to the top. There will be no regret.

In fact, Matt (my brother) claims these are the best cookies I have ever made. Well, his exact words were: “These are probably the best things you’ve ever made. Seriously, the amount of flavor and softness in this cookie, much better than some of that cardboard sh*t you’ve made.” Yeah, I live with some hard critics. And, no, I don’t think anything I’ve ever made tastes like cardboard. Definitely an exaggeration on his part, but I’ll let you be the judge of that. Feel free to stop by for a taste testing of my baking skills any time you’d like. You’re always welcome.

Caramel Toffee Chocolate Dipped Cookies
I want to tell you about this cookie recipe. I dreamed up the flavor combination about two weeks ago. So, why did I wait so long to actually make them, you ask? Two reasons. Weirdly, they both start with an h. The first is hockey.

I have become a hockey fan. Like, a pretty big hockey fan. And no, it’s not just because the Stanley Cup Playoffs are happening right now. Or, because my best friend since the fourth grade is the biggest hockey fan I know and has been trying to get me to like hockey for years. And, it’s not even because I went to a playoff game a few weeks ago and fell completely in love with a hockey player (seriously, go look up Tyler Seguin. Isn’t he just beautiful? Yes, he is at the top of my celebrity crush list. Don’t judge me.). It’s because I like the sport. It’s fast paced, it’s exciting to watch, and even though I’m not a violent person, I think it’s pretty awesome that hockey players can just start fighting in the middle of the game. It takes talent to throw a punch while wearing ice skates. I, for one, am impressed.

The second reason is the heat. I’m all in for some sun, occasionally. Honest. I’m coming around to the whole warm weather situation. I like being able to wear sundresses and sandals, eat popsicles, and leave the house without a jacket. I really do. But, when I can’t turn on my oven because it’s simply too hot, I don’t like it. At all. Thankfully, the weather finalllllly cooled down. Hence, these beauties making their way into the oven to be baked into absolute deliciousness.

Caramel Toffee Chocolate Dipped Cookies
I know I’m raving on and on about these cookies, and I’m sure you’re thinking “Yeah, okay Meggan”, but in all seriousness, these cookies do deserve all the hoopla. The flavor combination of the caramel, toffee, and chocolate, on its own, is heavenly, but to pair it with literally the best cookie dough base recipe ever, pushes these cookies over the top. I’m in absolute love with this cookie dough recipe, and I plan on using it as the base for all future cookies I make. That’s how good it is. Which is why I need to take a moment to thank Sally from the blog Sally’s Baking Addiction. Thank you for creating this cookie dough recipe! You truly are a baking goddess.

Caramel Toffee Chocolate Dipped Cookies
Yields: 24 Cookies

Ingredients:
2 ¼ cups all-purpose flour
1 ½ teaspoons cornstarch
1 teaspoon baking soda
½ teaspoon salt
¾ cup golden brown sugar
½ cup granulated sugar
¾ cup unsalted butter, melted
1 egg + 1 egg yolk
2 teaspoons vanilla
¾ cup caramel bits
½ cup milk chocolate toffee bits
1 1/3 cup milk chocolate candy melts

Directions:
In a large bowl combine flour, cornstarch, baking soda, and salt. Set aside.
In a medium-sized bowl whisk together melted butter and sugars until no clumps of brown sugar remain.
Whisk in the egg, and then the egg yolk. Add vanilla. Whisk until combined.
Pour the wet ingredients into the dry mixture and mix together with a rubber spatula until combined. The dough will be soft, but very thick to work with.
Using a spatula fold in the caramel and milk chocolate toffee bits—because of the melted butter, they may not stick to the dough, but do your best to evenly spread them throughout.
Cover the dough and let chill for at least 2 hours, or up to 3 days—I let mine sit overnight. Chilling is mandatory for this recipe though—trust me, it’s worth it!
Take the dough out of the refrigerator and allow to slightly soften at room temperature for about 10 minutes.
Preheat oven to 325 degrees, and line a cookie sheet with parchment paper. Set aside.
Roll the dough into about tablespoon sized balls. The dough will be crumbly and tough to work with, but the warmth from your hands will allow the balls to stay intact.
Bake for 11-12 minutes. The cookies will look underbaked and very soft. Let them sit on the cookie sheet for 10 minutes, to continue baking, before moving them to a wire rack to cool completely.
Once cookies have completely cooled, melt the milk chocolate candy melts in a microwave safe bowl, in 15 second intervals, until of drizzling consistency. Dip the bottoms of the cookies in the melted chocolate or spoon chocolate on the bottom of the cookies and spread evenly until covered (I preferred this method!). Place chocolate dipped cookies upside down on wax paper until chocolate has completely hardened.

*Cookie Dough recipe from Sally’s Baking Addiction


Caramel Toffee Chocolate Dipped Cookies

Glazed Bailey’s Scones

Glazed Bailey's Scones
Glazed. Bailey’s. Scones.

Enough said, right?

Probably, but I’ll still say a little bit more.

I don’t know if I’ve told you this, but I don’t really do breakfast. Like at all. It’s nothing against breakfast food either, because I do love me some breakfast burritos, hash browns, omelettes, oatmeal, and cinnamon rolls any other time. Usually not all at once though. It’s more the time of day, I think. I just don’t wake up hungry. If we are being honest, I wake up thinking: t-minus 10 minutes until the Keurig makes me my morning cup of coffee. That’s all I want need in the mornings for me to be good to go. But, sometimes, I like to switch things up. Add a little spice to my morning routine. Really start my day off with something more than just a cup of coffee.

Glazed Bailey's Scones

Oh hello Bailey’s. How nice of you to stop by. Lets take a minute to talk about Bailey’s Irish Cream. Show of hands, please, as to who thinks it’s simply delicious? I see everyone is raising their hands, which means we all agree. Good. I knew we were friends for a reason.

I, myself, am a huge fan of Bailey’s. Bailey’s with milk? Fantastic. Bailey’s with coffee? Even better. Bailey’s baked into a scone and then dipped in your coffee? Possibly the best way ever to start your morning. Not even kidding.

Glazed Bailey's Scones

Scones and I have a love-hate relationship going on. When they are too dense or too hard, I dislike them, but when they manage to reach that perfect balance between a hard exterior and moist/tender interior I love love love them. Are you wondering where these scones stand? These scones reached that perfect balance of a slightly crisped exterior with a soft, light, and flavorful interior. And, honestly, I’m surprised by that. This was my first time making scones, and I’ll admit, I was a little nervous. The recipe was so easy and quick to put together that I was fairly certain I was going to end up with rock-hard scones that tasted horrible. But, that wasn’t the case at all!

Glazed Bailey's Scones

These scones are moist, lightly infused with Bailey’s, drizzled with a Bailey’s glaze (because, really, can you ever have enough?), and then sprinkled lightly with some cocoa powder. The Bailey’s flavor is very subtly, you won’t be getting drunk off these little guys, but there is enough there for you too taste it. I don’t know if it was beginners luck or if Bailey’s was just meant to be put into scones, but these little scones definitely spiced up my morning. In a good way. I vote you switch up your morning routine too. You won’t regret it.

Glazed Bailey’s Scones
Yields: 32 small scones

Ingredients:
Bailey’s Scones
3 ¼ cups all-purpose flour
1/3 cup + 1 tablespoon sugar, divided
2 ½ teaspoons baking powder
½ teaspoon baking soda
½ teaspoon salt
¾ cup cold unsalted butter, cubed
1 cup + 1 ½ tablespoons Bailey’s Irish Cream, divided

Bailey’s Glaze
1 cup powdered sugar, sifted
¼ cup Bailey’s Irish Cream
1 tablespoon unsalted butter, softened

Directions:
Bailey’s Scones
Preheat oven to 425 degrees. Line a cookie sheet with parchment paper. Set aside.
In a large bowl, whisk together flour, 1/3 cup sugar, baking powder, baking soda, and salt.
Cut in the butter using a pastry cutter or your fingers until mixture forms coarse crumbs.
Using a spatula, stir in a cup of Bailey’s until just moistened.
Knead dough gently in the bowl until it is no longer sticky. Turn dough onto a parchment lined surface and divide in half. Using your hands, form the first half of dough into a rectangle that is about ¾-inch thick.
Using a sharp knife, cut the dough rectangle into 8 even squares. Then cut the 8 squares in half to create 16 smaller triangles. Repeat with the other half of dough.
Place scones on prepared baking sheet, about 1-inch apart. Brush tops with extra Bailey’s and sprinkle with remaining sugar.
Bake for 7-8 minutes or until lightly browned. Transfer scones to a wire rack to cool completely.
Once the scones have cooled, started working on the glaze. In a medium bowl whisk together powdered sugar, Bailey’s, and butter until smooth.
Drizzle generously over the scones and then sprinkle the tops with cocoa powder.

*scone recipe adapted from Taste of Home


Glazed Bailey's Scones

Bunnny Rice Krispie Pops Dipped In Cookie Butter

Bunny Rice Krispie Pops Dipped In Cookie ButterYeah, I know. Back to back Cookie Butter posts.

Whatya want me to say?

That I tried to make a different, completely in no way related to Cookie Butter recipe last week, and that it didn’t turn out. So, naturally, I turned towards another Cookie Butter recipe because I know for a fact that it wouldn’t let me down. Or, maybe, I could say that I’m just really into this whole Cookie Butter thing at the moment.

Both of those statements, by the way, are true. But, don’t worry. This isn’t going to be a repeat of the pumpkin madness I put you through last fall. I may love me some Cookie Butter, but I also know that I can’t put it into everything.

Bunny Rice Krispie Pops Dipped In Cookie Butter

I just can’t. Trust me. I’ve been trying. It’s kind of becoming a problem. Each time I stick my spoon into the jar for a single—come on, call me out on that lie—bite, another idea pops into my head. Cookie Butter Sticky Buns? Cookie Butter Donuts? Deep Fried Cookie Butter? Yeah, I’m pretty sure I’ve covered it all. And, another thing, no one will take the jar out of my hand or help me eat it. I’m single-handedly devouring the jar of Cookie Butter by myself. And that, my lovely friends, is most definitely not okay.

I mean, it is. But, it’s not. My solution: putting it in recipes, like these adorable Bunny Rice Krispie Pops, so then I can give them away to people, which means less Cookie Butter in the jar for me to eat. Winning, right?

Bunny Rice Krispie Pops Dipped In Cookie ButterEnough about Cookie Butter. Let’s chat about these Bunny Rice Krispie Pops. Super cute, huh? I was originally planning on making something completely different for Easter, but somehow the day managed to creep up on me. It feels like yesterday was the first of April, and now, here we are, two days away from Easter and 18 days into the month. Where has the time gone? I don’t even know.

With the holiday right around the corner, I wanted to make something that was easy, fun, and super adorable. In hops these Bunny Rice Krispie Pops dipped in Cookie Butter. Rice Krispies are, to me, a classic delicious treat. All that crunchy, sticky, marshmallow goodness…who wouldn’t love that? Homemade Rice Krispies, in my opinion, are even better. Sure, they’re not as sweet, but the coating of Cookie Butter in these treats, definitely amps up the flavor. In a good way. A reallyy good way.

Bunny Rice Krispie Pops Dipped In Cookie Butter

Bunny Rice Krispie Pops Dipped In Cookie Butter
Yields: about 15 bunny pops

Utensils:
Bunny cookie cutter
Lollipop sticks
Yellow food coloring

Ingredients:
Rice Krispies
¼ cup unsalted butter
1 10 oz. bag (about 40) marshmallows
6 cup Rice Krispies Cereal

Coating & Decorations
½ cup Cookie Butter
2 tablespoons white chocolate chips

Directions:
Prepare a 13x9x2-inch pan by spraying it with non-stick spray. Set aside.
In a medium-sized saucepan melt butter over low heat. Once the butter has melted, add marshmallows, stirring constantly until completely melted. Remove from heat.
Stir in Rice Krispies until well coated.
Using your hands—run them under cold water first—press the Rice Krispies into the prepared pan. Allow Rice Krispies to cool.
Using the cookie cutter cut out bunny shapes from the cooled Rice Krispies. Stick a lollipop stick in the bottom of each bunny.
In a microwave safe bowl, melt Cookie Butter, in 15 second intervals, until of drizzling consistency. Dip the front of each bunny into the cookie butter or use a spatula to spoon melted Cookie Butter onto each bunny and spread it around. Allow time for the Cookie Butter to harden onto the bunnies.
In a microwave safe bowl, melt chocolate chips, in 10 second intervals, until of drizzling consistency. Stir in yellow food coloring. Use a toothpick to give the bunnies eyes. Transfer the remaining white chocolate into a piping bag with a very small tip or a Ziploc bag with the corner snipped off, and draw on the bow tie.


Bunny Rice Krispie Pops Dipped In Cookie Butter

Happy Easter friends. And, just know, some bunny thinks your special :)

Braided Cookie Butter Bread

Braided Cookie Butter Bread Can we just talk about Cookie Butter for a second?

Or, an hour. Or, maybe the whole darn day. Really, lets never stop talking about it. It deserves that much attention. Am I right?

My love for Cookie Butter is very, very new. As in, I tried it for the first time a week ago. Gasp. How could I wait so long? What was I doing with my life? How was I missing out on so much deliciousness? All valid questions. Let me tell you what happened.

I saw the Cookie Butter madness on Pinterest—recipes for Cookie Butter cookies, Cookie Butter pie, and even Cookie Butter bars—but, in all honesty, I just thought people were being fancy with their naming of desserts. Or, that they were listing the things they put in their desserts. Or, even that they somehow managed to take a perfectly wonderful cookie and turn it into butter, which they then baked into another cookie—I’ll admit that last one seemed a little complicated and I really didn’t want to have anything to do it.

I know. I messed up. Big time.

Braided Cookie Butter Bread

I finally decided to see what all the fuss was about. Looking at the recipes, I realized Cookie Butter was a creamy spread, much like peanut butter, that tasted like crushed up gingerbread cookies. Needless to say, I was intrigued.

So, I bought a jar. Stuck the tip of my spoon into it. Took my first bite. And, then my second. And, fifth. And, then I smeared it on some bread. Ate that. And, then I proceeded to ask all my friends if they had tried this magical Cookie Butter, which most of them hadn’t. So, I of course, told them to sprint to Trader Joe’s and get some. Like now.

That my friends is how I fell truly madly deeply in food love with Cookie Butter [yes, I did just hear that song, if you know what I mean].

I debated what I would bake cookie butter into first. A cookie? Cake? Pie? Bar? There were endless options and tons of ideas popping into my head (don’t worry, I will be sharing another Cookie Butter related post at some point!!), but then I saw this Braided Nutella Bread, and knew I had found THE recipe. Would now be a bad time to mention I also just recently tasted Nutella? Probably. That’s a story for another day.

Please give a warm welcome to this Braided Cookie Butter Bread. Oh, is that chanting I hear? You guys are so kind!
Braided Cookie Butter Bread

Cookie Butter swirled into a homemade bread loaf. Really, what more can I say? The Cookie Butter caramelized itself on the outside of the loaf as it bakes, giving it a little crunch, and stays creamy and soft in the inside. Honestly, I can’t say more. Just go make this bread already. 

Braided Cookie Butter Bread
Recipe adapted from Inspired by Charm
Yields: 1 loaf

Ingredients:
1 packet (2 ¼ teaspoons) active dry yeast
1 teaspoon sugar
1 cup water, warmed (temperature should be between 100-110 degrees, about 30 seconds in the microwave)
2 ½ cups all-purpose flour, plus more for dusting
1 teaspoon salt
½ cup Cookie Butter (I bought mine at Trader Joe’s)
1 egg, beaten with a tablespoon of water

Directions:
In a small bowl, dissolve yeast in a ¼ cup of the water. Mix in the teaspoon of sugar and let sit for ten minutes to activate.
In the bowl of a stand mixer combine flour and salt. Add the active yeast and remaining ¾ cup of water. Mix on low with the dough hook until just combined. Turn speed up to medium and mix for about 7 minutes or until dough is of a smoother looking consistency—the dough should be a little sticky, but still be able to hold it’s shape.
Place dough in a lightly oiled bowl and cover the top with plastic wrap. Let sit in a warm spot for about an hour or until dough has doubled in size.
On a lightly floured surface, roll out the dough to form a 12-inch x 15-inch rectangle. Spread the Cookie Butter—I found warming it in the microwave for about 10 seconds made it easier when spreading—evenly on the surface, leaving about a ½-inch border of dough. Roll the dough tightly (starting with the longer side) up. Using a sharp knife, cut the rolled dough down the middle, making sure to leave one end intact. Twist or ‘braid’ the dough over the top of each other. Place braided dough on top of a parchment-lined baking sheet that has been lightly sprinkled with flour. Cover loosely with a towel and let sit for 20 minutes.
Preheat oven to 350 degrees. Brush surface of the braided dough with egg wash. Bake bread for 25 to 30 minutes or until bread is lightly browned. Remove from oven and let cool slightly before digging in.


Braided Cookie Butter Bread