Raspberry Buttermilk Cake

Raspberry Buttermilk Cake
There is less than a week before summer. Well, more specifically, in five days it’s the first ‘official’ day of summer.

Emphasis on the official part. I’ve always been one to mark the first day of summer by the last day of school or the first day in June, which means I’m about seventeen days into my summer. But, hey, that could just be me. I have a tendency to go off book when it comes to holidays or events labeled on calendars.

Little known fact about myself: I like to celebrate (if I remember that is) the random, obscure, and definitely-not-listed-on-any-calendar national holidays. National Yogurtland Day? Best believe I’m waiting in line to eat my weight in free frozen yogurt. National Donut Day? Why, hello, Krispy Kreme drive thru, where have you been all my life? National Siblings Day? Instagram will be blown up with pictures of my brother and I, mainly because we were adorable kids, but also because the holiday demands it. Who am I to ignore these wonderful national holidays? But, better question, who are you to ignore them?

Raspberry Buttermilk Cake

Maybe it’s just me, but I find these kinds of days to be fun. I believe it’s the little things in life that make you happy, and these national holidays are the epitome of the little things. But, before I get more philosophical on you, let’s get back to the first official day of summer. A day that is listed on calendars, but not given very much attention on the celebration scale.

I vote we change that. I think it should be celebrated. And, what better way to do that than a Raspberry Buttermilk Cake? Yeahh, I’ll answer that question, there is no better way to celebrate it. So, if I were you, I’d join me. Like now, before the entire cake is eaten.

Raspberry Buttermilk Cake

Raspberry Buttermilk Cake. Funny story. I don’t ever have buttermilk or raspberries, for that matter, in my fridge. It’s just not something I buy with frequency. Actually, if we are being completely open, this was my first time buying raspberries. I know, how weird, right? Raspberries just aren’t my thing. In fact, the only berry that is my thing is a strawberry. Again, I know, how weird.

But, Costco had a sale. And raspberries scream summer. And, okay, fine, there wasn’t a good-looking box of strawberries left. So, the raspberries found themselves in my fridge, sitting next to a half-opened carton of buttermilk, which I had used to make a healthy potato salad (substitute buttermilk for mayo…surprisingly quite tasty) a few days before.

Raspberry Buttermilk Cake

And then I saw a recipe for a Strawberry Summer Cake on Smitten Kitchen. I think it was the world’s way of telling me to grab the raspberries and buttermilk and make a cake in honor of the first day of summer. And, when the world speaks to you like that, you don’t even think about it, you just do.

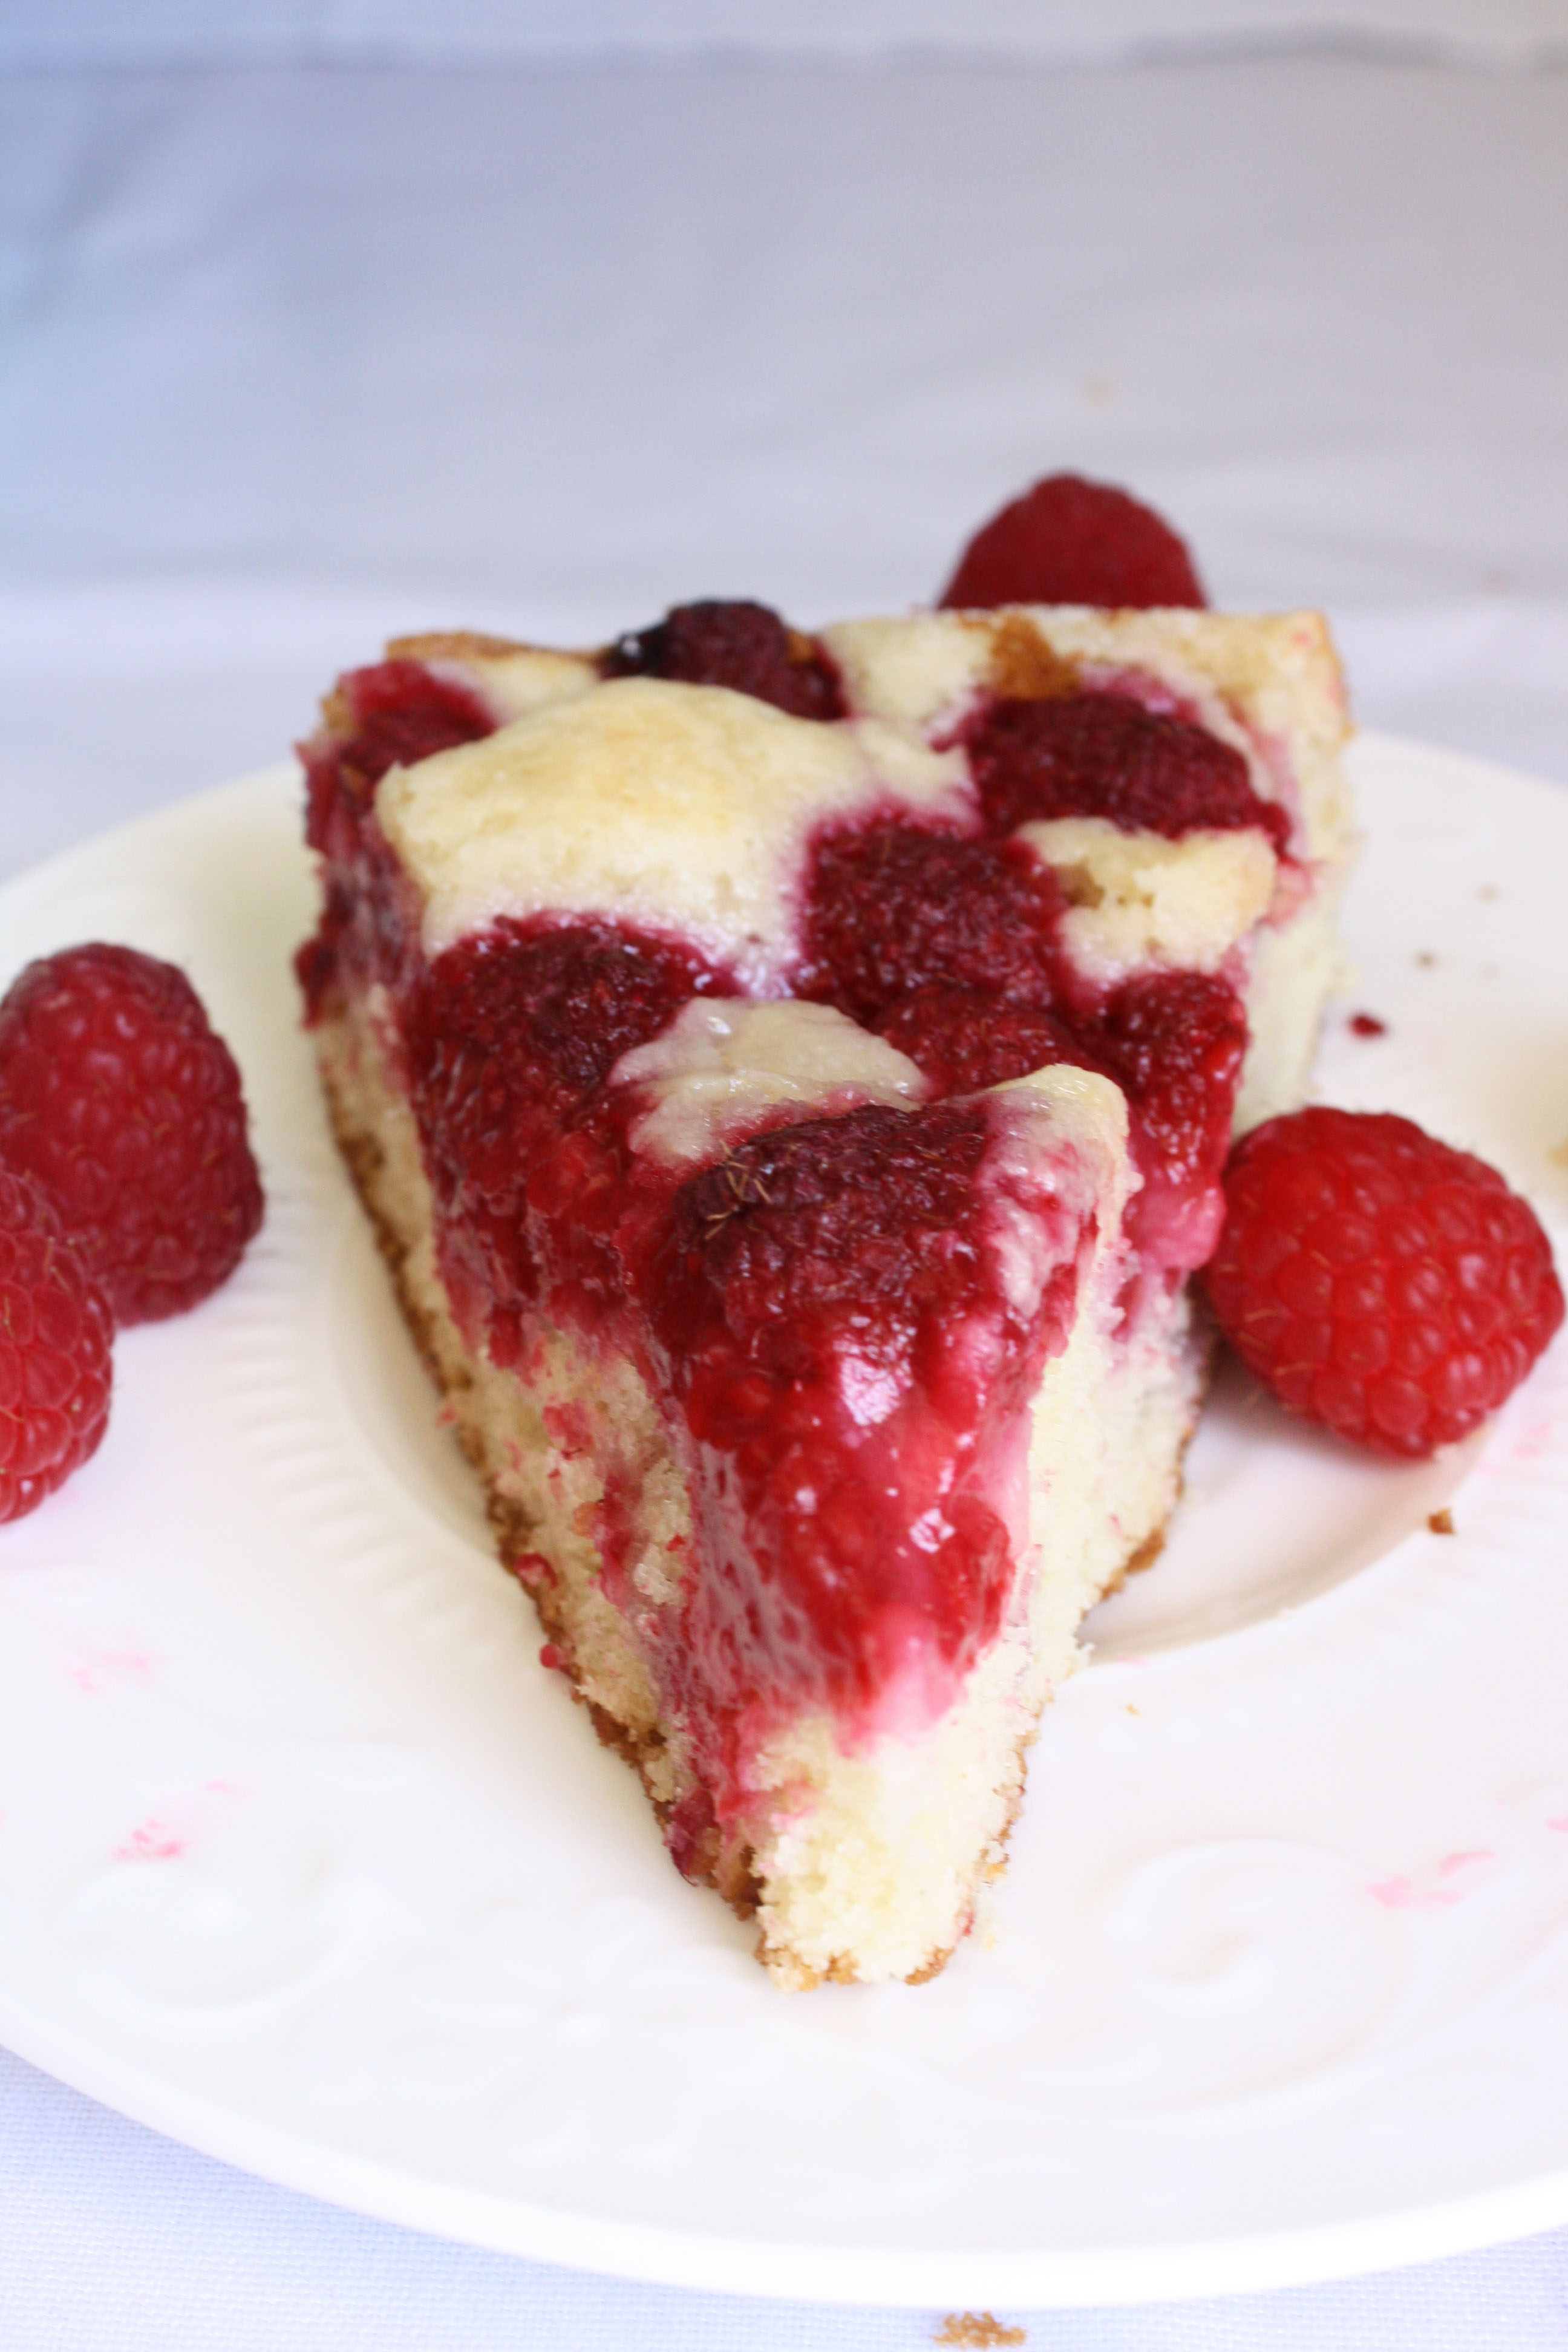
So I did. And, can I just say, I’m glad I did. The buttermilk cake is super moist, flavorful, and pairs rather nicely with the tartness of the raspberries. As the cake bakes, the raspberries turn into puddles of jam that soak into the cake, making your house smell amazing and your stomach grumble in anticipation. This dessert isn’t overly sweet, but I found a hefty spoonful of homemade whipped cream definitely makes up for that. It’s a light, summery, easy-to-put-together kind of dessert—so, basically, the ideal way to celebrate the first official day of summer if you ask me!

Raspberry Buttermilk Cake

Raspberry Buttermilk Cake
Recipe adapted from Smitten Kitchen
Yields: 1 9-inch cake

Ingredients:
1 ½ cups all-purpose flour
1 ½ teaspoons baking powder
½ teaspoon salt
6 tablespoons unsalted butter + extra for springform pan, softened to room temperature
1 cup + 2 tablespoons sugar
1 egg
½ cup buttermilk
1 teaspoon vanilla
16 oz fresh raspberries, washed and dried

Directions:
Preheat oven to 350 degrees, and butter a 9-inch springform pan (or cake pan or deep dish pie pan).
In a small bowl whisk flour, baking powder, and salt. Set aside.
In a large bowl beat butter and 1 cup of sugar until light and fluffy, about 3 minutes.
Mix in egg, buttermilk, and vanilla until well combined.
Gradually add the dry ingredients to the wet ingredients, mixing until just smooth.
Pour batter into prepared pan, smoothing the top with a spatula. Arrange raspberries, bottoms up, on top of the batter in a single layer. Sprinkle, as evenly as possible, remaining 2 tablespoons of sugar over the berries.
Bake cake for ten minutes then reduce oven temperature to 325 degrees and continue baking for 50-55 minutes until golden brown and a toothpick comes out clean (gooey raspberries on the toothpick are a given). Let cake cool in pan on a wire rack. Cut into slices and serve with whipped cream.


Raspberry Buttermilk Cake

Caramel Toffee Chocolate Dipped Cookies

Caramel Toffee Chocolate Dipped Cookies
That’s a pretty flavorful title, huh?

Caramel.

Toffee.

And chocolate.

All packed into a single soft and chewy cookie. Please excuse me as I wipe the drool off my keyboard. Oh, would you like a napkin too? Here, borrow mine.

Would you believe that this tasty title wasn’t actually my first choice? It’s true, it totally wasn’t. The original title was much too long, and if we are being completely honest, there wouldn’t have been a napkin big enough to clean up the drool spill that would have ensued.

I see that look in your eyes. You want to know the title don’t you? Luckily for you, I’m in the business of giving the people what they want. So, here goes. Don’t say I didn’t warn you.

Caramel & Milk Chocolate Toffee Swirled Ooey Gooey Soft & Chewy Cookies Dipped in Milk Chocolate.
Caramel Toffee Chocolate Dipped Cookies
Pretty delicious sounding, right? Okay, maybe you didn’t drool, but you can definitely see what I mean about the length. And, I’m betting you are (or, at least highly considering) moving this recipe to the top of your To Bake List. Do yourself a favor, move it to the top. There will be no regret.

In fact, Matt (my brother) claims these are the best cookies I have ever made. Well, his exact words were: “These are probably the best things you’ve ever made. Seriously, the amount of flavor and softness in this cookie, much better than some of that cardboard sh*t you’ve made.” Yeah, I live with some hard critics. And, no, I don’t think anything I’ve ever made tastes like cardboard. Definitely an exaggeration on his part, but I’ll let you be the judge of that. Feel free to stop by for a taste testing of my baking skills any time you’d like. You’re always welcome.

Caramel Toffee Chocolate Dipped Cookies
I want to tell you about this cookie recipe. I dreamed up the flavor combination about two weeks ago. So, why did I wait so long to actually make them, you ask? Two reasons. Weirdly, they both start with an h. The first is hockey.

I have become a hockey fan. Like, a pretty big hockey fan. And no, it’s not just because the Stanley Cup Playoffs are happening right now. Or, because my best friend since the fourth grade is the biggest hockey fan I know and has been trying to get me to like hockey for years. And, it’s not even because I went to a playoff game a few weeks ago and fell completely in love with a hockey player (seriously, go look up Tyler Seguin. Isn’t he just beautiful? Yes, he is at the top of my celebrity crush list. Don’t judge me.). It’s because I like the sport. It’s fast paced, it’s exciting to watch, and even though I’m not a violent person, I think it’s pretty awesome that hockey players can just start fighting in the middle of the game. It takes talent to throw a punch while wearing ice skates. I, for one, am impressed.

The second reason is the heat. I’m all in for some sun, occasionally. Honest. I’m coming around to the whole warm weather situation. I like being able to wear sundresses and sandals, eat popsicles, and leave the house without a jacket. I really do. But, when I can’t turn on my oven because it’s simply too hot, I don’t like it. At all. Thankfully, the weather finalllllly cooled down. Hence, these beauties making their way into the oven to be baked into absolute deliciousness.

Caramel Toffee Chocolate Dipped Cookies
I know I’m raving on and on about these cookies, and I’m sure you’re thinking “Yeah, okay Meggan”, but in all seriousness, these cookies do deserve all the hoopla. The flavor combination of the caramel, toffee, and chocolate, on its own, is heavenly, but to pair it with literally the best cookie dough base recipe ever, pushes these cookies over the top. I’m in absolute love with this cookie dough recipe, and I plan on using it as the base for all future cookies I make. That’s how good it is. Which is why I need to take a moment to thank Sally from the blog Sally’s Baking Addiction. Thank you for creating this cookie dough recipe! You truly are a baking goddess.

Caramel Toffee Chocolate Dipped Cookies
Yields: 24 Cookies

Ingredients:
2 ¼ cups all-purpose flour
1 ½ teaspoons cornstarch
1 teaspoon baking soda
½ teaspoon salt
¾ cup golden brown sugar
½ cup granulated sugar
¾ cup unsalted butter, melted
1 egg + 1 egg yolk
2 teaspoons vanilla
¾ cup caramel bits
½ cup milk chocolate toffee bits
1 1/3 cup milk chocolate candy melts

Directions:
In a large bowl combine flour, cornstarch, baking soda, and salt. Set aside.
In a medium-sized bowl whisk together melted butter and sugars until no clumps of brown sugar remain.
Whisk in the egg, and then the egg yolk. Add vanilla. Whisk until combined.
Pour the wet ingredients into the dry mixture and mix together with a rubber spatula until combined. The dough will be soft, but very thick to work with.
Using a spatula fold in the caramel and milk chocolate toffee bits—because of the melted butter, they may not stick to the dough, but do your best to evenly spread them throughout.
Cover the dough and let chill for at least 2 hours, or up to 3 days—I let mine sit overnight. Chilling is mandatory for this recipe though—trust me, it’s worth it!
Take the dough out of the refrigerator and allow to slightly soften at room temperature for about 10 minutes.
Preheat oven to 325 degrees, and line a cookie sheet with parchment paper. Set aside.
Roll the dough into about tablespoon sized balls. The dough will be crumbly and tough to work with, but the warmth from your hands will allow the balls to stay intact.
Bake for 11-12 minutes. The cookies will look underbaked and very soft. Let them sit on the cookie sheet for 10 minutes, to continue baking, before moving them to a wire rack to cool completely.
Once cookies have completely cooled, melt the milk chocolate candy melts in a microwave safe bowl, in 15 second intervals, until of drizzling consistency. Dip the bottoms of the cookies in the melted chocolate or spoon chocolate on the bottom of the cookies and spread evenly until covered (I preferred this method!). Place chocolate dipped cookies upside down on wax paper until chocolate has completely hardened.

*Cookie Dough recipe from Sally’s Baking Addiction


Caramel Toffee Chocolate Dipped Cookies

Bunnny Rice Krispie Pops Dipped In Cookie Butter

Bunny Rice Krispie Pops Dipped In Cookie ButterYeah, I know. Back to back Cookie Butter posts.

Whatya want me to say?

That I tried to make a different, completely in no way related to Cookie Butter recipe last week, and that it didn’t turn out. So, naturally, I turned towards another Cookie Butter recipe because I know for a fact that it wouldn’t let me down. Or, maybe, I could say that I’m just really into this whole Cookie Butter thing at the moment.

Both of those statements, by the way, are true. But, don’t worry. This isn’t going to be a repeat of the pumpkin madness I put you through last fall. I may love me some Cookie Butter, but I also know that I can’t put it into everything.

Bunny Rice Krispie Pops Dipped In Cookie Butter

I just can’t. Trust me. I’ve been trying. It’s kind of becoming a problem. Each time I stick my spoon into the jar for a single—come on, call me out on that lie—bite, another idea pops into my head. Cookie Butter Sticky Buns? Cookie Butter Donuts? Deep Fried Cookie Butter? Yeah, I’m pretty sure I’ve covered it all. And, another thing, no one will take the jar out of my hand or help me eat it. I’m single-handedly devouring the jar of Cookie Butter by myself. And that, my lovely friends, is most definitely not okay.

I mean, it is. But, it’s not. My solution: putting it in recipes, like these adorable Bunny Rice Krispie Pops, so then I can give them away to people, which means less Cookie Butter in the jar for me to eat. Winning, right?

Bunny Rice Krispie Pops Dipped In Cookie ButterEnough about Cookie Butter. Let’s chat about these Bunny Rice Krispie Pops. Super cute, huh? I was originally planning on making something completely different for Easter, but somehow the day managed to creep up on me. It feels like yesterday was the first of April, and now, here we are, two days away from Easter and 18 days into the month. Where has the time gone? I don’t even know.

With the holiday right around the corner, I wanted to make something that was easy, fun, and super adorable. In hops these Bunny Rice Krispie Pops dipped in Cookie Butter. Rice Krispies are, to me, a classic delicious treat. All that crunchy, sticky, marshmallow goodness…who wouldn’t love that? Homemade Rice Krispies, in my opinion, are even better. Sure, they’re not as sweet, but the coating of Cookie Butter in these treats, definitely amps up the flavor. In a good way. A reallyy good way.

Bunny Rice Krispie Pops Dipped In Cookie Butter

Bunny Rice Krispie Pops Dipped In Cookie Butter
Yields: about 15 bunny pops

Utensils:
Bunny cookie cutter
Lollipop sticks
Yellow food coloring

Ingredients:
Rice Krispies
¼ cup unsalted butter
1 10 oz. bag (about 40) marshmallows
6 cup Rice Krispies Cereal

Coating & Decorations
½ cup Cookie Butter
2 tablespoons white chocolate chips

Directions:
Prepare a 13x9x2-inch pan by spraying it with non-stick spray. Set aside.
In a medium-sized saucepan melt butter over low heat. Once the butter has melted, add marshmallows, stirring constantly until completely melted. Remove from heat.
Stir in Rice Krispies until well coated.
Using your hands—run them under cold water first—press the Rice Krispies into the prepared pan. Allow Rice Krispies to cool.
Using the cookie cutter cut out bunny shapes from the cooled Rice Krispies. Stick a lollipop stick in the bottom of each bunny.
In a microwave safe bowl, melt Cookie Butter, in 15 second intervals, until of drizzling consistency. Dip the front of each bunny into the cookie butter or use a spatula to spoon melted Cookie Butter onto each bunny and spread it around. Allow time for the Cookie Butter to harden onto the bunnies.
In a microwave safe bowl, melt chocolate chips, in 10 second intervals, until of drizzling consistency. Stir in yellow food coloring. Use a toothpick to give the bunnies eyes. Transfer the remaining white chocolate into a piping bag with a very small tip or a Ziploc bag with the corner snipped off, and draw on the bow tie.


Bunny Rice Krispie Pops Dipped In Cookie Butter

Happy Easter friends. And, just know, some bunny thinks your special :)

Braided Cookie Butter Bread

Braided Cookie Butter Bread Can we just talk about Cookie Butter for a second?

Or, an hour. Or, maybe the whole darn day. Really, lets never stop talking about it. It deserves that much attention. Am I right?

My love for Cookie Butter is very, very new. As in, I tried it for the first time a week ago. Gasp. How could I wait so long? What was I doing with my life? How was I missing out on so much deliciousness? All valid questions. Let me tell you what happened.

I saw the Cookie Butter madness on Pinterest—recipes for Cookie Butter cookies, Cookie Butter pie, and even Cookie Butter bars—but, in all honesty, I just thought people were being fancy with their naming of desserts. Or, that they were listing the things they put in their desserts. Or, even that they somehow managed to take a perfectly wonderful cookie and turn it into butter, which they then baked into another cookie—I’ll admit that last one seemed a little complicated and I really didn’t want to have anything to do it.

I know. I messed up. Big time.

Braided Cookie Butter Bread

I finally decided to see what all the fuss was about. Looking at the recipes, I realized Cookie Butter was a creamy spread, much like peanut butter, that tasted like crushed up gingerbread cookies. Needless to say, I was intrigued.

So, I bought a jar. Stuck the tip of my spoon into it. Took my first bite. And, then my second. And, fifth. And, then I smeared it on some bread. Ate that. And, then I proceeded to ask all my friends if they had tried this magical Cookie Butter, which most of them hadn’t. So, I of course, told them to sprint to Trader Joe’s and get some. Like now.

That my friends is how I fell truly madly deeply in food love with Cookie Butter [yes, I did just hear that song, if you know what I mean].

I debated what I would bake cookie butter into first. A cookie? Cake? Pie? Bar? There were endless options and tons of ideas popping into my head (don’t worry, I will be sharing another Cookie Butter related post at some point!!), but then I saw this Braided Nutella Bread, and knew I had found THE recipe. Would now be a bad time to mention I also just recently tasted Nutella? Probably. That’s a story for another day.

Please give a warm welcome to this Braided Cookie Butter Bread. Oh, is that chanting I hear? You guys are so kind!
Braided Cookie Butter Bread

Cookie Butter swirled into a homemade bread loaf. Really, what more can I say? The Cookie Butter caramelized itself on the outside of the loaf as it bakes, giving it a little crunch, and stays creamy and soft in the inside. Honestly, I can’t say more. Just go make this bread already. 

Braided Cookie Butter Bread
Recipe adapted from Inspired by Charm
Yields: 1 loaf

Ingredients:
1 packet (2 ¼ teaspoons) active dry yeast
1 teaspoon sugar
1 cup water, warmed (temperature should be between 100-110 degrees, about 30 seconds in the microwave)
2 ½ cups all-purpose flour, plus more for dusting
1 teaspoon salt
½ cup Cookie Butter (I bought mine at Trader Joe’s)
1 egg, beaten with a tablespoon of water

Directions:
In a small bowl, dissolve yeast in a ¼ cup of the water. Mix in the teaspoon of sugar and let sit for ten minutes to activate.
In the bowl of a stand mixer combine flour and salt. Add the active yeast and remaining ¾ cup of water. Mix on low with the dough hook until just combined. Turn speed up to medium and mix for about 7 minutes or until dough is of a smoother looking consistency—the dough should be a little sticky, but still be able to hold it’s shape.
Place dough in a lightly oiled bowl and cover the top with plastic wrap. Let sit in a warm spot for about an hour or until dough has doubled in size.
On a lightly floured surface, roll out the dough to form a 12-inch x 15-inch rectangle. Spread the Cookie Butter—I found warming it in the microwave for about 10 seconds made it easier when spreading—evenly on the surface, leaving about a ½-inch border of dough. Roll the dough tightly (starting with the longer side) up. Using a sharp knife, cut the rolled dough down the middle, making sure to leave one end intact. Twist or ‘braid’ the dough over the top of each other. Place braided dough on top of a parchment-lined baking sheet that has been lightly sprinkled with flour. Cover loosely with a towel and let sit for 20 minutes.
Preheat oven to 350 degrees. Brush surface of the braided dough with egg wash. Bake bread for 25 to 30 minutes or until bread is lightly browned. Remove from oven and let cool slightly before digging in.


Braided Cookie Butter Bread

Toasted Coconut Donut Holes with Coconut Cream Filling

Toasted Coconut Donut Holes with Coconut Cream FillingGUYS.

I made donuts.

The mini kind. The kind you can eat in two bites.

The deep-fried, not baked, kind.

The leave your fingers chocolately, tummy happy, kind. The can’t stop popping them in your mouth kind.

I’m getting ahead of myself here. Let’s back this up.

Donuts.
Who doesn’t love donuts? No one. That’s who.

Toasted Coconut Donut Holes with Coconut Cream FillingI mean, come on, if you didn’t have to worry about weight, sugar intake, and all that other health related business wouldn’t you just eat donuts on the regular? I’m pretty sure I would. It would be my morning staple. Sometimes even my snack. I would definitely have a ‘usual’ at the donut shop, and never have to wait in line. Sounds pretty awesome, right?  In my perfect world that would happen. But, in the real world, I can’t even tell you the last time I had a donut. And, I’m talking a real donut here. Not the baked kind. Not like the Baked Cinnamon Brown Sugar Donut Bites I made a while ago.

It may actually have been a year ago that I ate a real donut. Maybe even longer.  It’s not like I’m purposely avoiding donut shops either. It’s just…I’m not a huge breakfast person. And by that I mean I drink a cup of coffee, sometimes two, and call it a day. And, my snacks typically consist of goldfish or pita chips with a little hummus. As you can see, that doesn’t leave a lot of room for donut eating.

The idea of making my own fried donuts never really was a thought. I mean, there are a million other decadent desserts I want to make, and I don’t even have a deep fryer. Yes, I could just use oil and a huge pot, but I never had a good enough reason to go through all that trouble. Plus, I’ll admit it, I was slightly nervous about getting oil burns. I hear they hurt. A lot.

Are you wondering why I decided to finally make fried donuts? No. Okay, well, I’m still going to tell you anyways. My good friend, Lauren, visited this past week. Unlike myself, Lauren has no fears of oil burns. She is a lover of donuts, is always willing to have adventures in the kitchen, and can handle my craziness during the baking process rather well.

Let the fried donut making ensue.

Toasted Coconut Donut Holes with Coconut Cream FillingAs a first timer making donuts, I just want to start by saying, it’s actually kind of fun. Sure, it’s a process—making the dough, refrigerating the dough, letting the cut donuts rise, frying, cooling, stuffing with coconut cream, dipping in chocolate, and sprinkling with toasted coconut—but, the end result is totallllyyyy worth it. And, when you have a partner in crime in the kitchen with you, the time literally flies by.

The dough for these donuts was super easy to work with, and fried up rather nicely (and pretty quickly) into little golden donut holes. Neither Lauren nor I was burned by the oil, but we did burn the roofs of our mouths trying to taste test the donuts before they had cooled. Yup, we both are that inpatient. One of the reasons we’re friends. The donuts themselves are light, fluffy, and not overly sweet. Each donut hole is filled with coconut cream pudding, dipped in chocolate, and then sprinkled with toasted coconut shreds. If you like donuts, and you like coconut, you’ll want to make these!

Toasted Coconut Donut Holes with Coconut Cream Filling
Yields: about 40 donut holes

Ingredients:
Donut Holes
1 package (2 ½ teaspoons) active dry yeast
2/3 cups milk, at room temperature
1/3 cup sugar
2 teaspoons salt
3 ½ cups all-purpose flour
3 eggs
7 tablespoons unsalted butter, at room temperature, cut into 7 tablespoons
Canola oil, for frying

Coconut Cream Filling
1 (3.4 oz.) package of Jell-O instant Coconut Cream Pudding
2 cups milk

Toppings
¾ cup semi-sweet chocolate chips
vegetable shortening, as needed
¾ cup sweetened coconut shreds, toasted

Directions:
Donut Holes
In the bowl of stand mixer fitted with a dough hook, combine yeast and milk. Allow yeast to dissolve completely, about a minute.
Mix in sugar, salt, flour, and eggs on low for about 4 minutes to develop the dough.
With the mixer still on low, add the butter, one tablespoon at a time, until incorporated, about 5 to 6 minutes.
Remove dough from bowl—it will be sticky, so do your best—and wrap tightly in plastic wrap. Let dough sit in fridge for 6-15 hours (I let mine sit overnight and then made the donuts in the morning).
Once chilled, remove dough from plastic wrap and place on a piece of large parchment paper. Cover the top of the dough with another piece of large parchment paper and roll dough until about ½-inch thick. Using a 2-inch circle cookie cutter, cut out the donuts and place on a prepared (lined with parchment paper) cookie sheet. Allow donuts to rise in a warm spot for 1 ½-2 hours or until puffy and doubled in size.
When ready to fry, heat a pot filled with 3 inches of oil to 350 degrees. Line a baking sheet with papers towels (to soak up the extra oil) and set aside. Add donut holes to oil—be careful not to overcrowd the pot—and fry each side of the donut for about 1 ½ to 2 minutes, until golden brown. Make sure to watch your temperature as you continue to fry each batch of donut holes.
Remove donuts with slotted spoon and transfer to the paper-towel lined baking sheet. When cool enough to handle, transfer donut holes to a tray to cool completely.

Coconut Cream Filling
In a medium-sized bowl, mix together coconut cream mix and milk until combined. Let sit in the fridge for about 5 minutes.
Fill a pastry bag with a medium sized tip with coconut cream pudding. Poke a hole on each side of the donut (equidistant between the top and bottom of the donut) and squirt about 1/8 cup in each side of the donut.

Toppings
In a microwave safe bowl, melt semi-sweet chocolate chips and a little vegetable shortening, until of drizzling consistency (microwave in 15 second intervals, stirring after each interval, until smooth).
Dip the tops of each donut hole into the chocolate, holding the donut upside down to let excess chocolate drip off. Sprinkle the top of the chocolate-coated donut with toasted coconut shreds.

*donut recipe adapted from Buns In My Oven


Toasted Coconut Donut Holes with Coconut Cream Filling