Pumpkin Pecan Sticky Buns

Pumpkin Pecan Sticky BunsHello Friends.

I know I’ve gone a little pumpkin crazy on you. I’m sorrrry. I couldn’t help it. Honest.

I swear I’ll stop now. After I share this recipe. Pinky Promise.

I had to leave you with one last kick butt pumpkin recipe. It’s my duty. Or, I made it my duty. Either way. Feel free to thank me. Perhaps even a round of applause? I know, I’m asking for too much.

But, seriously, prepare yourself.

Take a deep breath.

Get ready to grab a fork. And, a napkin. A bigggg napkin.

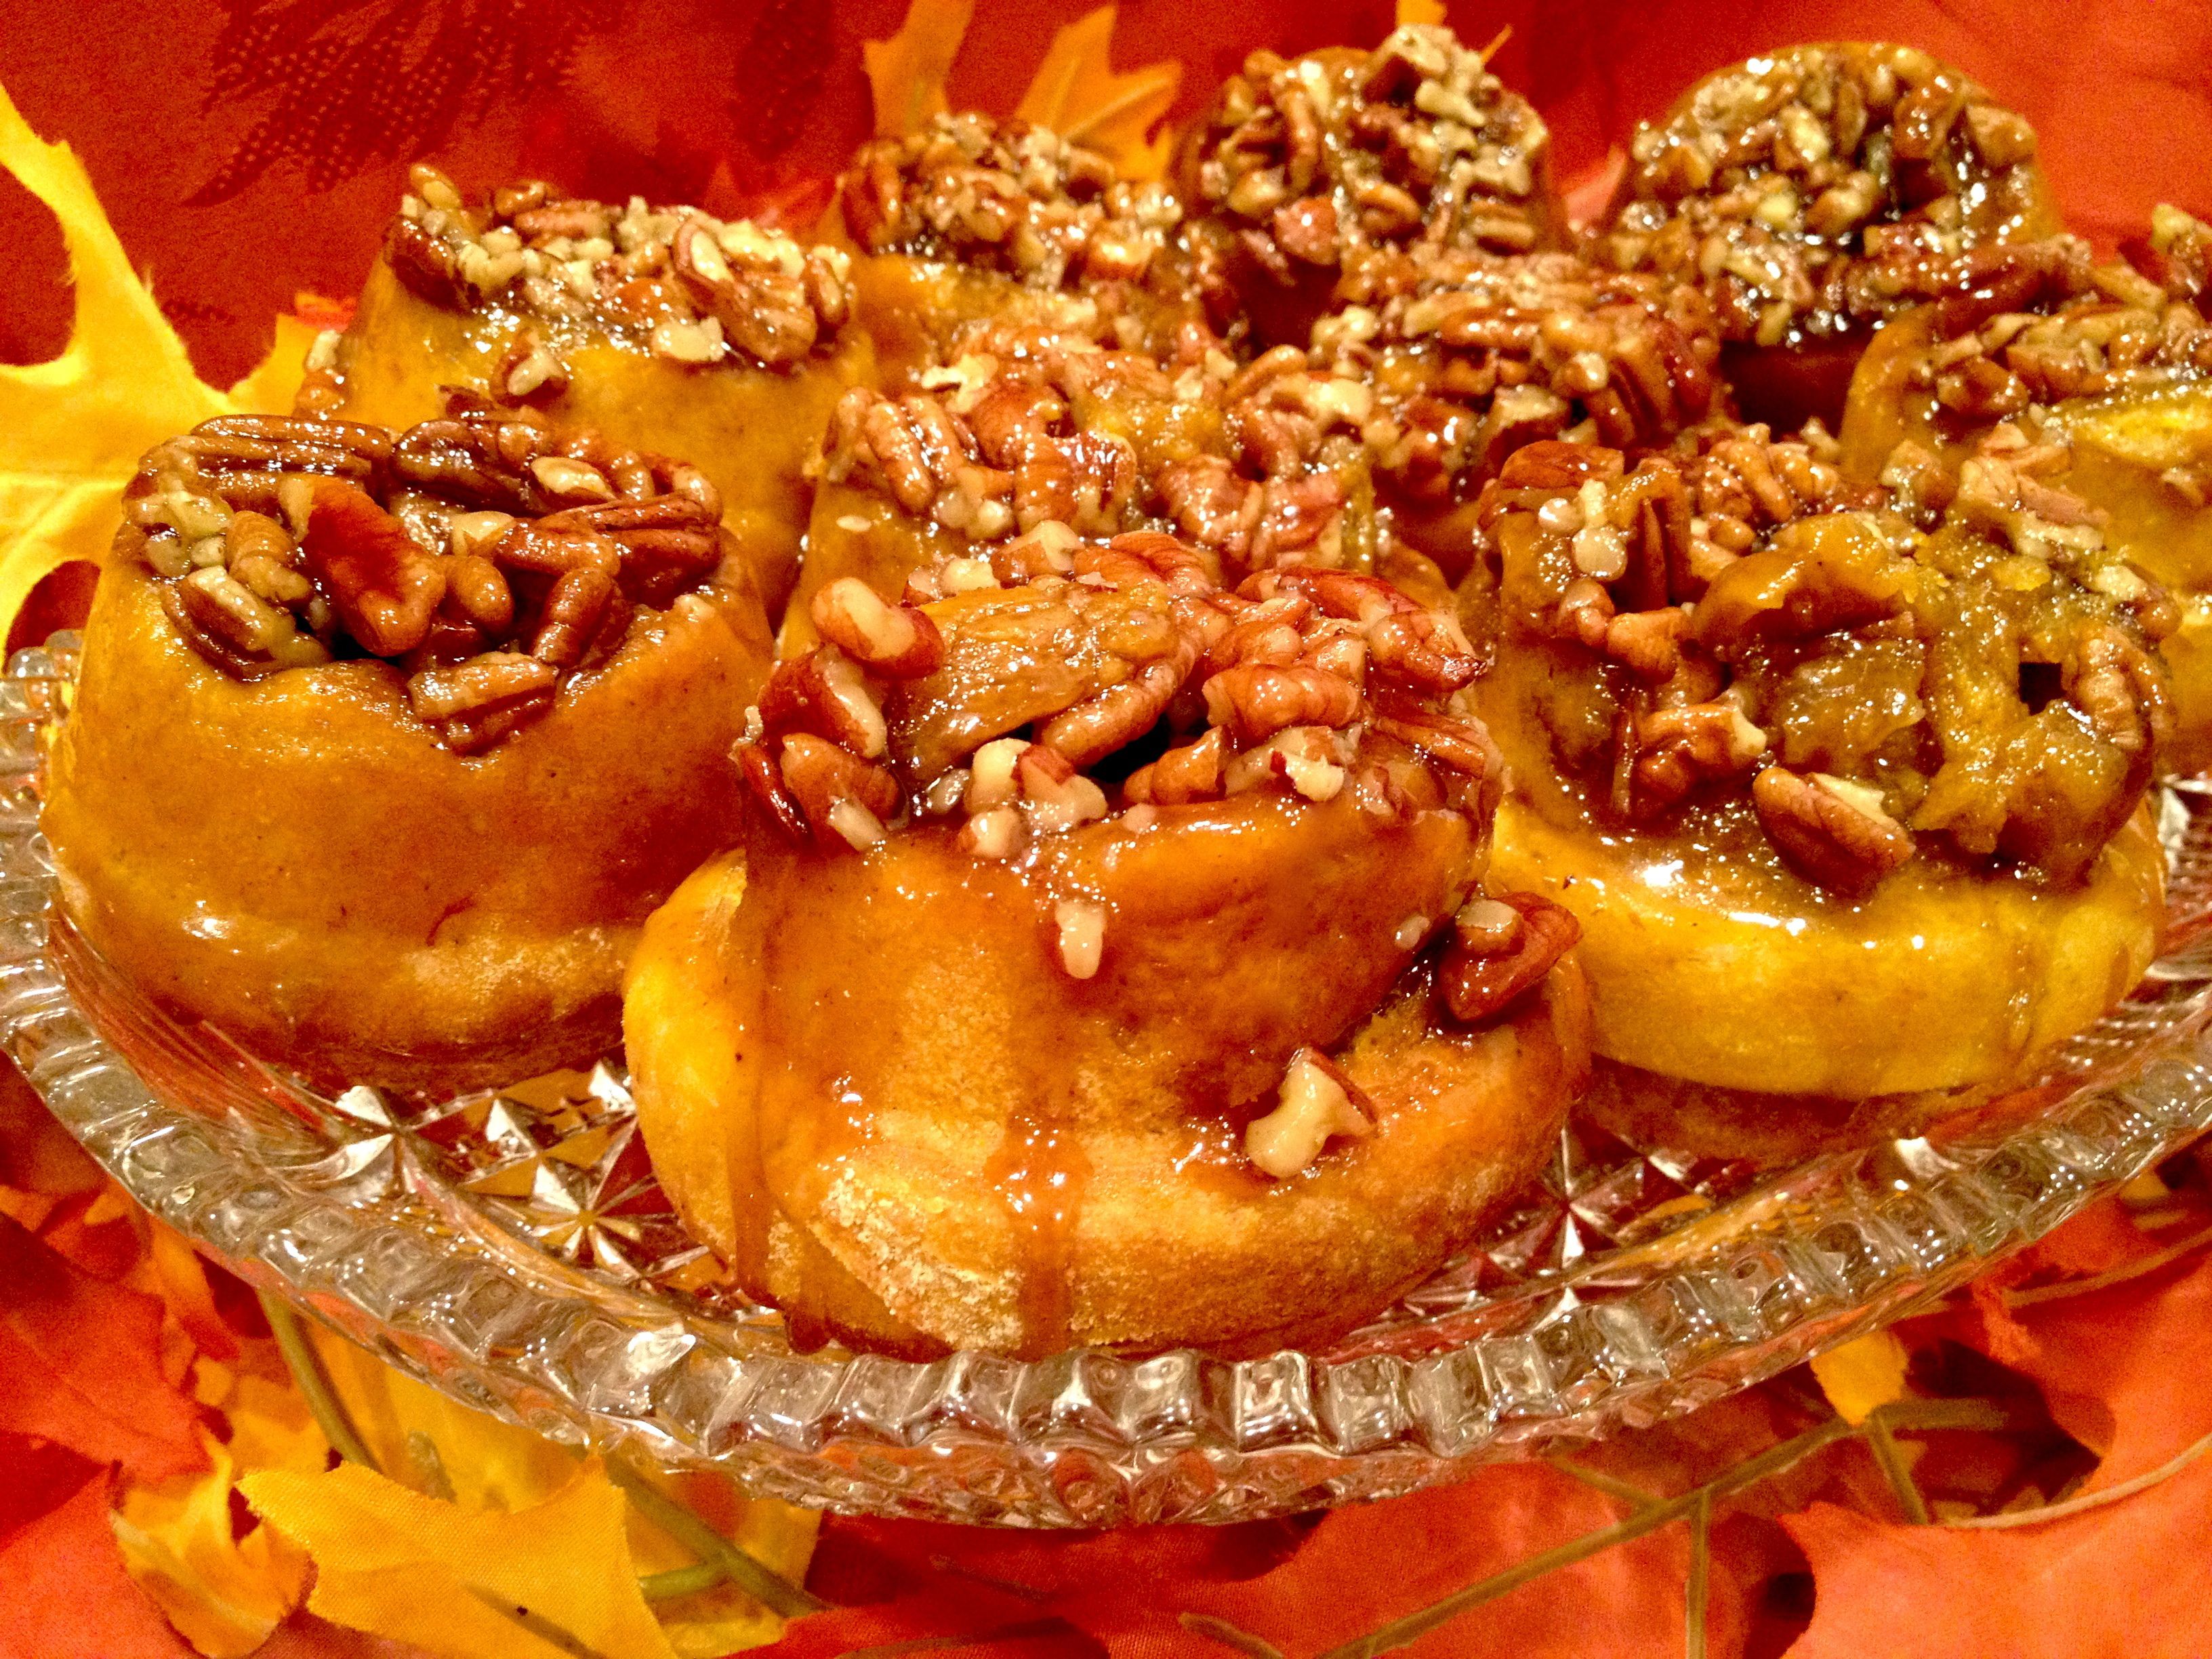
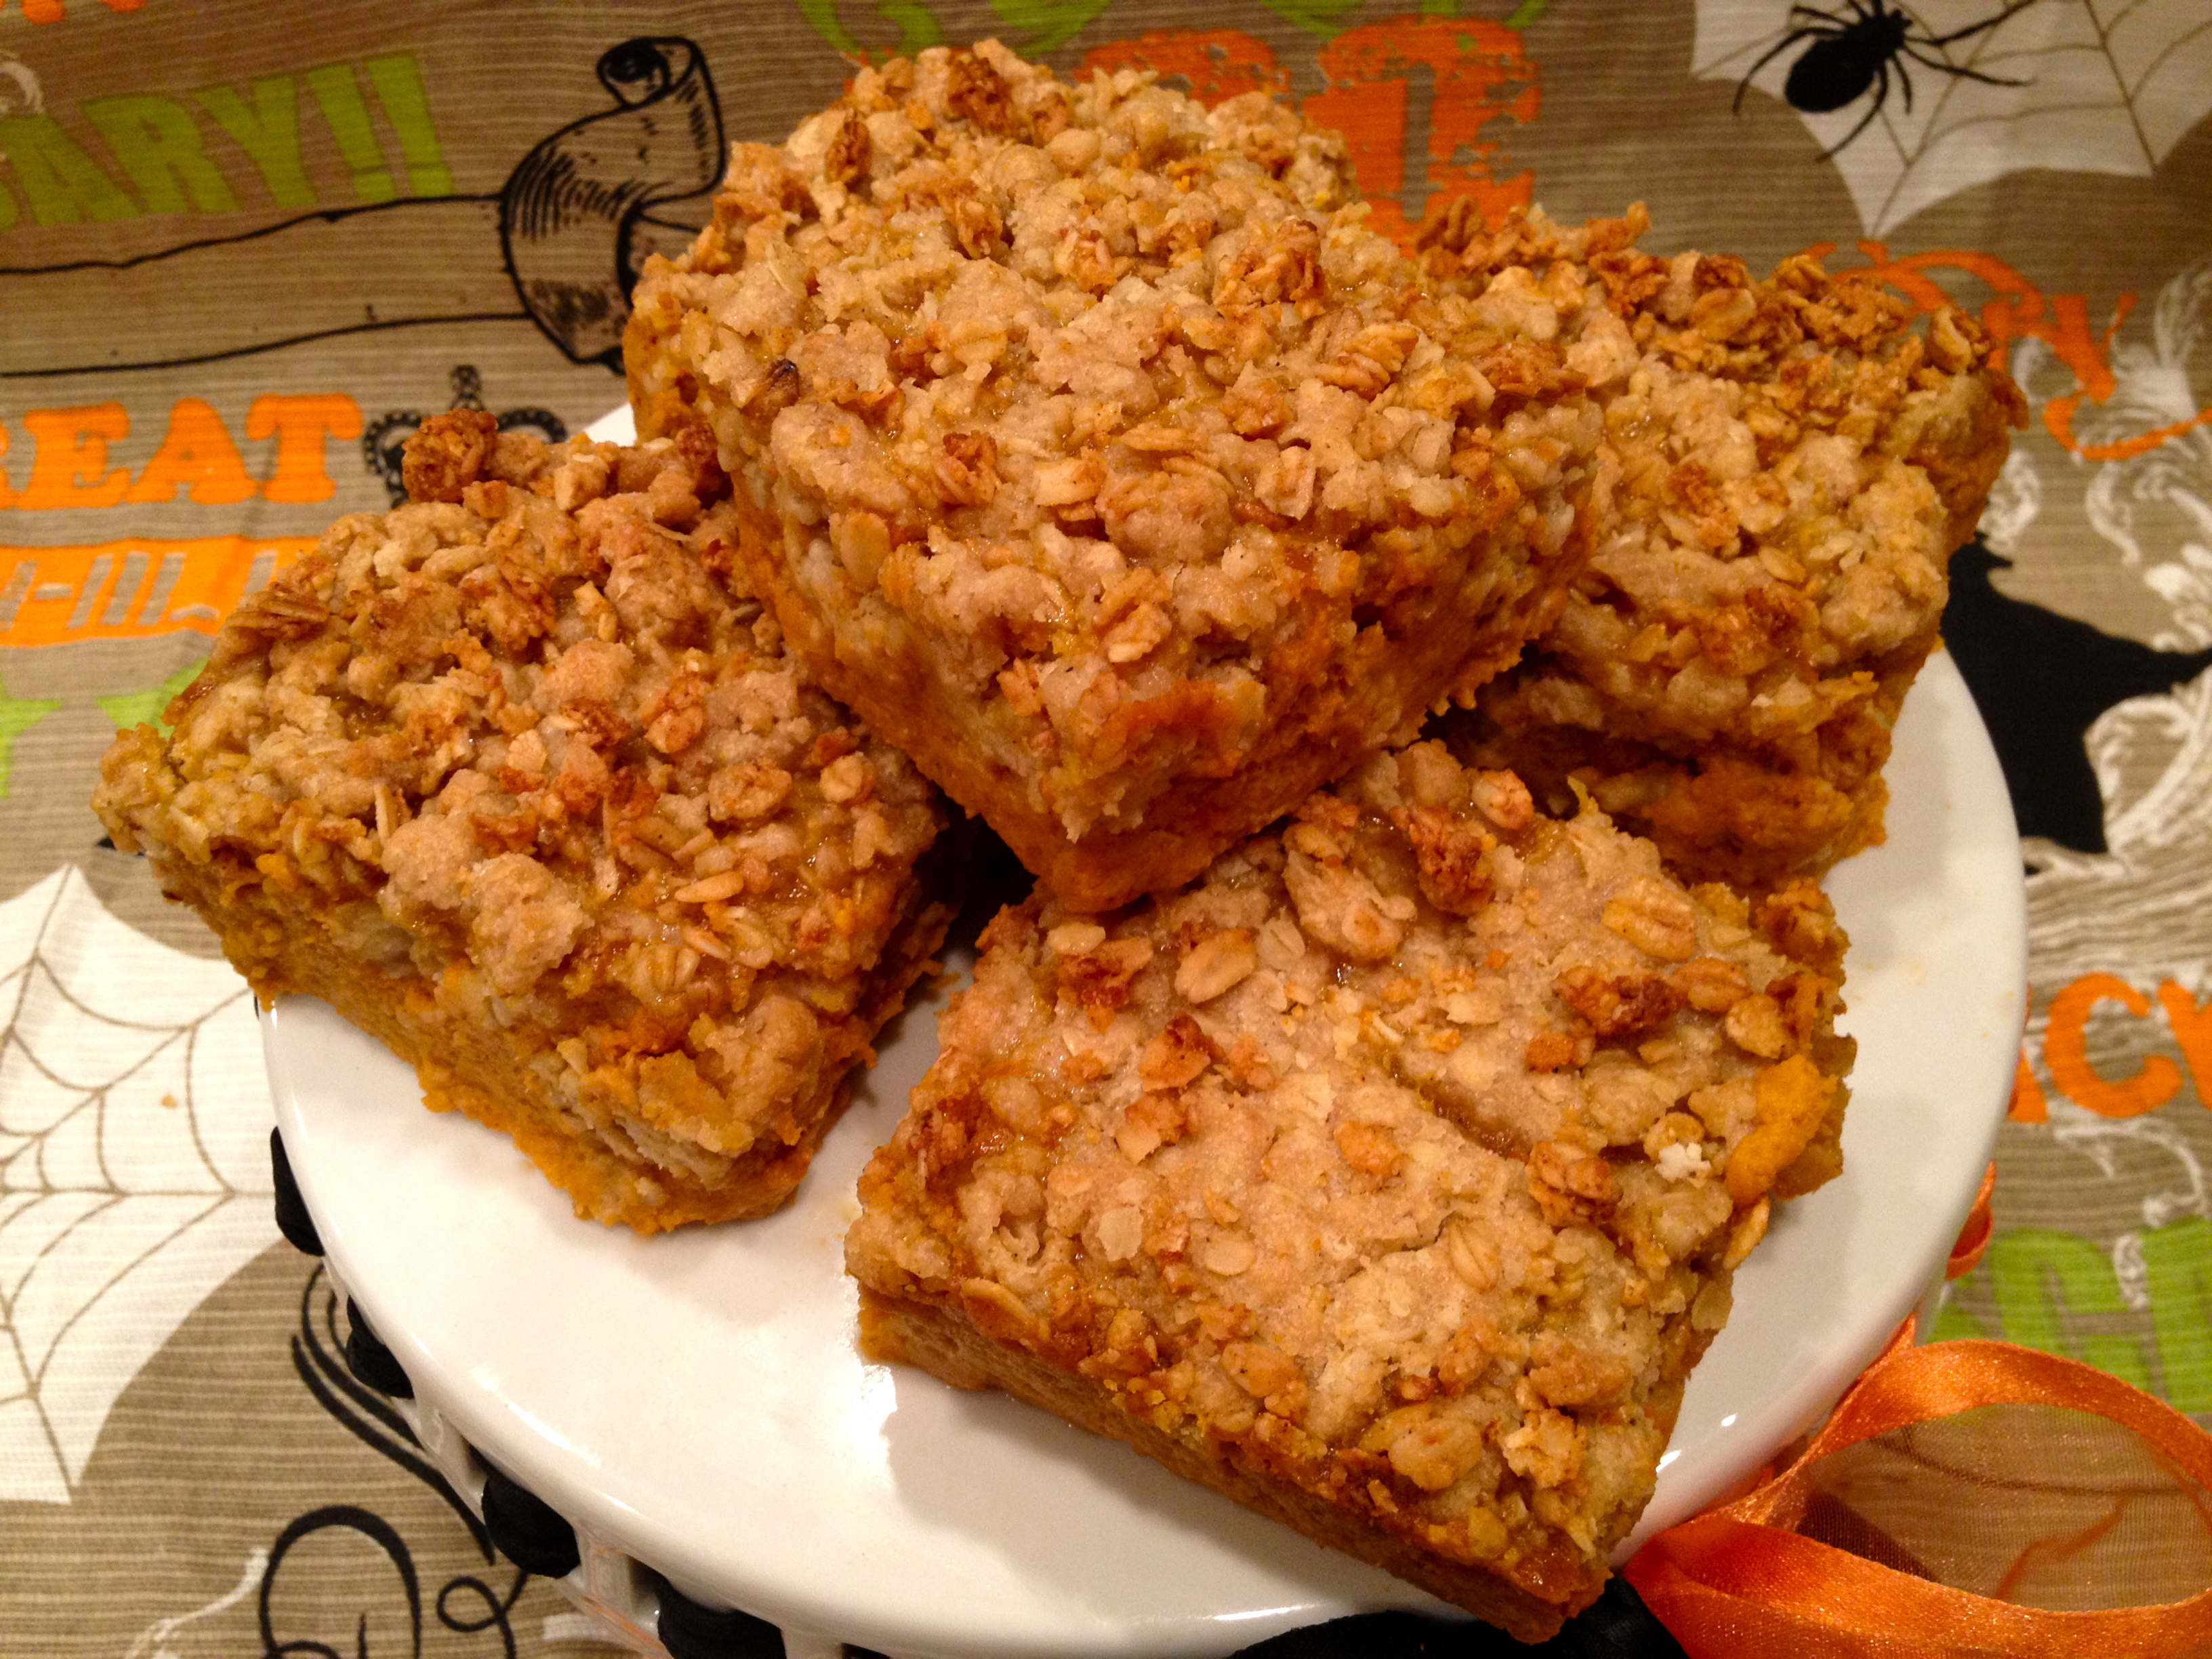
I give you the wonderful, the sticky, the gooey ooey, delicious Pumpkin Pecan Sticky Bun. Or, in other words, the perfect way to start your Thanksgiving (that is, if you aren’t pumpkin-ed out).
Pumpkin Pecan Sticky BunsHellllllo Thanksgiving Breakfast. Why shouldn’t you start and end the day with scrumptious food? Who decided Thanksgiving should only be about dinner and dessert? A crazy person who never tried these buns, that’s who.

These Pumpkin Pecan Sticky Buns are like cinnamon rolls on crack with a whole bunch more flavor and a lot more sticky. The buns are made from a pumpkin dough that bakes up into a chewy, spice filled, soft bun that pairs perfectly with the brown sugar filling, giving it that perfect pumpkiny taste we all loveeee. The top side of the bun is covered in a gooey caramel syrup, that gives the bun a more sugary flavor, as well as crunchy pecans that bring together this spice & sugar filled breakfast treat.

Want to know my favorite part about Thanksgiving? It’s the moment right before dinner, when my entire family sits down at the table (usually a few tables put together) and starts passing around all the yummy dishes. It’s not my favorite because we spent the whole day cooking and the feast is finally done. Or, because I’m moments away from entering a joyous food coma either. It’s my favorite because it’s the first time all day that my family (including relatives I don’t see on a daily basis) is together, in the same spot, enjoying themselves, smiling from ear to ear. That’s why I like it. And that’s why I wanted to make it happen for breakfast too.

Pumpkin Pecan Sticky BunsWhat can I say? I love me some family time. And, I’m beyond thankful for the wonderful people in my life. And, the fact that they let me plump them up with baked goods. You know what else I’m thankful for? Good health, supportive friends, smiling faces, dessert, and you.

Yes, you. You, reading this post, thank you. Thank you for making my baking blog dreams a reality. Thank you for supporting me in my endeavors in the kitchen. And thank you for using my recipes to make your family and friend’s stomach’s happy.

So, Happy {Early} Thanksgiving. Hope you have an amazing day that starts with your breakfast :)

Pumpkin Pecan Sticky Buns
Yields: About 12 buns

Ingredients:
Pumpkin Dough
½ cup milk (I’m using 2%, but whole milk would work too!)
½ cup (one stick) unsalted butter, at room temperature
1 packet (2 ¼ teaspoons) active dry yeast
¼ cup golden (or light) brown sugar
¼ cup sugar
½ teaspoon salt
½ teaspoon cinnamon
¼ teaspoon nutmeg
¼ teaspoon cloves
4 cups all-purpose flour, plus extra for rolling out dough
1 cup pumpkin puree
1 egg
Oil for coating the bowl

Filling
¼ cup unsalted butter, melted
2 teaspoons pumpkin pie spice
¾ cup brown sugar
¼ cup sugar

Caramel Syrup
1 cup pecans, roughly chopped
1 cup brown sugar
1/2 cup unsalted butter, cubed
1/2 cup (1 stick) light corn syrup

Directions:
Making the Pumpkin Dough
Warm milk and butter together in the microwave or over the stove. Set aside to cool slightly (the mixture should be warm, but not scalding hot). Depending on the type of yeast you are using, you can use a thermometer to measure the exact temperature needed for that yeast.
Sprinkle yeast on the surface of the milk and butter mixture and let rest for about 2 minutes before gently stirring together. Let sit for another 5 minutes.
In bowl of a stand mixer, combine 3 cups of flour, sugars, salt, and spices. Whisk until well-combined.
Add the yeast-milk-butter mixture to the flour mixture. Mix on low until combined.
Add egg and pumpkin puree. Stir until incorporated.
Switch to the dough hook for mixing, and add the remaining cup of flour. Combine until the dough separates from the sides of the bowl.
Coat the inside of a large bowl with oil and scrape the dough mixture into it. Cover with plastic wrap and a kitchen towel. Set aside for about 1 ½ to 2 hours (or until double in size) in a warm, draft free place.

Making the Caramel Syrup
Grease the 12 tin cups of a muffin pan. Set aside.
Combine butter, brown sugar, and corn syrup in a saucepan over medium heat. Stir frequently until sugar has dissolved completely.
Remove from heat and spoon 1 ½ tablespoons into the tin cups of the greased muffin pan.
Evenly sprinkle the chopped pecans on top of the syrup. Set aside.

Making the Filling & the Buns
In a small bowl, combine sugars and pumpkin pie spice.
On a floured surface, roll the dough into a 16×19-inch rectangle (or as close as you can get to a rectangle). Flour your rolling pin as necessary.
Brush melted butter all over the rolled dough and then sprinkle evenly with the sugar mixture.
Starting with the long side, tightly (and gently) roll up the dough into a spiral—it’s okay if some of the filling falls out.
Using a sharp serrated knife, gently move the knife back and forth, applying no pressure, until the dough spiral is cut into 12 buns—I cut off the ‘butts’ (the not so rolled up ends) of the dough spiral, and then baked them in a separate tin…no need to waste pumpkin goodness.
Place each roll in the muffin pan on top of the syrup. Cover the pan with greased plastic wrap and let rise for about another 45 to 60 minutes (until double in size).
*If you want to prepare these in advance, place the plastic wrap covered muffin pan in the fridge over night. In the morning, let the buns sit at room temperature for 15 minutes before baking them.

Baking the Pumpkin Pecan Sticky Buns
Preheat oven to 350 degrees. Bake buns for 25-30 minutes or until golden brown. Let cool in the pan for 10 minutes and then invert rolls onto a cooling rack. Make sure you have a piece of wax paper under the cooling rack to catch any dripping caramel.
Serve warm and ENJOY :)


Pumpkin Pecan Sticky Buns

Pumpkin Ice Cream Cupcakes

Pumpkin Ice Cream CupcakesI spent the last week in Seattle.

And, I’m fairly certain I fell in love.

I want to live there someday. It’s absolutely beautiful.

I’d never been to Seattle before, but it had always been a place I wanted to visit. Partly because I Love (yes, with a capital L) the rain. I’m a huge fan of cloudy days, cold weather, and jumping around in rain puddles (with rain boots on, of course). The other part, which you may have already guessed, is that Seattle is the birthplace of Starbucks. And, we all know, how much I love my coffee.

I spent most of my time walking the streets in downtown Seattle. Window shopping with my mom. Drinking excessive amounts of coffee. Site seeing with my family. Jumping around in the fall leaves (don’t judge me…we don’t quite get all, or really any, of the fall changes in California. In fact, it’s still in the eighties where I live.). Watching the Seahawks’ fans proudly wear bright green and blue. And, eating more than my fair share of desserts.

There was one bakery, in particular, that I would gladly live in. It’s called Cupcake Royale, and it may just be the cutest little bakery I’ve ever seen. They have coffee, homemade ice cream, and adorably decorated cupcakes. Can you see why I want to live there?

They had Pumpkin Cardamom ice cream, which I obviously had to try, and I can’t even begin to explain how good it was. It had chunks of soft pumpkin bread swirled with a cardamom cream cheese ice cream that was literally like eating pumpkin pie in ice cream form. Just thinking about it makes my mouth water. That ice cream was the inspiration for these Pumpkin Ice Cream Cupcakes. And can I just say, these little bad boys taste pretty darn good.

Pumpkin Ice Cream Cupcakes

These Pumpkin Ice Cream Cupcakes require a little bit more time and work than your normal cupcake, but trust me when I say, it’s soooo worth it. The cupcake portion, itself, is a graham cracker cupcake that is ridiculously moist and maintains that spicy graham cracker flavor that we all love. On top of the cupcake, is a thick layer of pumpkin ice cream, which is then covered in a cream cheese glaze. Finally, the cupcake is sprinkled generously with toasted pumpkin spice graham cracker crumbs. These cupcakes are a little messier than most (blame the delicious pumpkin ice cream), but I don’t think you’ll mind the sticky fingers after your first bite!

Pumpkin Ice Cream Cupcakes
Recipe adapted from How Sweet It Is
Yields: About 22 cupcakes

Ingredients:
Graham Cracker Cupcakes
½ cup butter, at room temperature
1 cup sugar
3 eggs, at room temperature
1 ½ cups (about 13 graham cracker sheets) of graham cracker crumbs (I used honey graham crackers and a food processor to make my crumbs)
1 cup all-purpose flour
1 teaspoon baking powder
1 teaspoon baking soda
1/8 teaspoon salt
1 cup milk

Ice Cream Layer
1 quart pumpkin cream (I used Trader’s Joe Pumpkin Ice Cream)

Cream Cheese Glaze
8 oz. cream cheese, softened
7 tablespoons powdered sugar
4 tablespoons milk
½ teaspoon vanilla extract

Toasted Pumpkin Spice Graham Cracker Crumbs
5 sheets of graham crackers, crumbled
1-1 ½ teaspoons pumpkin spice

NOTE: I had extra crumb topping at the end, so maybe try using 3 sheets of graham crackers instead of 5 and add pumpkin spice based off of taste.

Directions:
Graham Cracker Cupcakes
Preheat oven to 350 degrees and line cupcake tin with liners. Set aside.
Cream butter in stand mixer until smooth. Add sugar and beat until light and fluffy.
Add eggs, one at a time, beating until each egg is incorporated.
In a small bowl, sift together flour, baking powder, baking soda, and salt. Mix in the graham cracker crumbs.
Alternate between adding the flour mixture and milk to the wet ingredients. Mix until just combined.
Scoop 2 tablespoons of batter into each cupcake tin. Bake for 14-15 minutes or until toothpick comes out clean.
Let cupcakes cool completely or put them in the freezer to speed up the process.

Ice Cream Layer
If you removed the cupcakes from the cupcake pan for cooling, return cupcakes to the pan once completely cooled.
Carefully and quickly spread a spoonful of pumpkin ice cream on top of the cupcakes—make sure to cover the whole cupcake and leave a little mound on the top of the cupcake so they aren’t flat.
If the ice cream becomes too soft to work with, return cupcakes and ice cream to the freezer until you can work again.
Freeze cupcakes for about 1-2 hours or until ice cream layer is frozen enough (I let mine sit over night).

Toasted Pumpkin Spice Graham Cracker Crumbs
Before making your cream cheese glaze, preheat oven to 350 degrees.
Line a cookie sheet with foil and set aside.
Combine graham cracker crumbs and pumpkin spice. Mix until well-combined.
Pour crumbs onto foiled cookie sheet and bake for 3-5 minutes or until golden brown—watch the crumbs carefully because they can quickly become burnt.

Cream Cheese Glaze
Once the ice cream layer has been set and the crumbs have been toasted make your glaze.
In a stand mixer, beat cream cheese and powdered sugar until smooth.
Add milk and vanilla. Mix until combined.

Assembly
Remove cupcakes from freezer and pour a heaping spoonful of cream cheese glaze over each cupcake—make sure to cover the whole thing.
Once the cupcakes have been glazed, sprinkle the toasted crumbs over the cupcake.
Place cupcakes back in the freezer for another 30 minutes, and then finalllllly you can eat them :)


Pumpkin Ice Cream Cupcakes

Spider Chocolate Chip Cookies

Spider Chocolate Chip CookiesHappy {Early} Halloween!

Have I mentioned that Halloween is actually my third favorite holiday? (If you’re wondering, first and second is a toss-up between Thanksgiving and Christmas.) I like the fact that Halloween kicks off the fall, that I get to dress up in a costume (I was a cavewoman this year…check my Instagram for pictures!), and that I get the chance to go trick-or-treating. Come on…walking around, knocking on doors, and getting bags full of candy…who wouldn’t like that? And more importantly, how can we make that happen every day of the year? I also like that people decorate their houses like crazy, that desserts become themed for a month, and that spiders, are for once, considered adorable.

I do not, in any way, like spiders. If I see one, I run. And, scream. And, then ask the closest person to kindly dispense of the creature. I just don’t want anything to do with them. Ever. And then I saw this idea for spider cookies on Pinterest. My first thought was “Ewww. Gross. Throw those cookies away and run in the opposite direction”. My second thought was ‘Wait a minute, how stinking cute would it be if I made these for Halloween?” Pretty cute, huh? That’s why I decided I had to make them.

Spider Chocolate Chip Cookies

Just look at them. The perfect scary Halloween cookie. It was totally worth putting aside my dislike for spiders.

Spider Chocolate Chip Cookies

For these Spider Chocolate Chip Cookies all you need is your favorite chocolate chip cookie recipe, Halloween semi-sweet chocolate and orange colored morsels (I’m sure using just regular chocolate chips would look cute too!), and extra chocolate chips to draw your creepy crawly spiders! These cookies do take a little time to make, but I promise the end result is totalllly worth the effort :)

Spider Chocolate Chip Cookies
This isn’t really an exact recipe, just some general guidelines for how to make the cookies.

Ingredients:
24 large chocolate chip cookies (made using Halloween semi-sweet chocolate and orange colored morsels—I used Ghirardelli’s Chocolate Chip Cookie recipe)
¼ cup + a handful semi-sweet chocolate chips
Piping bag (with a small tip) or a Ziploc bag

Directions:
Guidelines for Baking Cookies
When making the dough for the cookies, keep a heaping ¼ cup of the orange and black chocolate chips out of the mixture.
I didn’t chill my dough (I was too excited!), which made it harder to handle when scooping out my cookies, so you might want to chill your dough for at least 30 minutes before baking.
Scoop a tablespoon and half of the dough onto an ungreased cookie sheet (I baked six cookies at a time).
Using the ¼ cup of colored morsels you took out, arrange a few morsels on top of the unbaked cookies. About halfway through the cookies being baked, look to make sure you have enough ‘spider bodies’ showing, if not add a few more colored morsels.
Let the cookies cool completely (about three hours) before you start decorating.

Guidelines for Decorating
To create the spiders, melt a ¼ cup + a handful of semi-sweet chocolate chips in a microwave safe bowl (microwave in 15 minute intervals, stirring after each interval, until smooth).
Spoon melted chocolate chips into a piping bag (or Ziploc bag).
First pipe the spider’s face, this means piping a circle at the top of one of the chips. Then, carefully pipe the spider’s legs.
If the chocolate becomes too thick (and the piping becomes harder), heat up the chocolate again until smooth.

 
Spider Chocolate Chip Cookies

Pumpkin Spice Shortbread Cookies

Pumpkin Spice Shortbread CookiesHave you heard the song “I Miss You” by Blink-182?

If you haven’t, there is a line that references The Nightmare Before Christmas: “ We can live like Jack and Sally if we want, where you can always find me, and we’ll have Halloween on Christmas”. These cookies remind me of Halloween on Christmas. Or, really it’s more of Christmas on Halloween. It’s the cookie cutters.

Cookie cutters instantly make me think of Christmas time. Specifically, it makes me think of sitting at the table, covered in flour, wearing an over-sized apron, as my two younger cousins and I frost and sprinkle (in an excessive amount that only an eight year old would consider edible) our sugar cookies.

One of my cousins, Jason, was even around as I glazed and took photos of these cookies. Actually, he always seems to be around during my dessert photo shoots. I think it’s so he can pick out which slice or cookie to eat first. In this case, he went for the owl. Followed by two bats. And later, a ghost.

Even though I’m a fan of enjoying each holiday as it comes (unlike the stores, who like to rub holidays in your face months in advance…I’ve seen Valentine’s Day stuff already…Are you kidding me?), it was actually kind of nice to think of these as Christmas on Halloween cookies. It really put me in a festive mood and made me even more excited for my future holiday baking, which I didn’t think was possible.

Pumpkin Spice Shortbread Cookies

These Pumpkin Spice Shortbread Cookies are the perfect fall treat! The shortbread cookie itself is simple to make and has a buttery flavor with a subtle hint of pumpkin spice. The glaze is made from pumpkin spice flavored candy melts, giving each bite the perfect punch of pumpkin spice. So, if you’re in need of a pick me up, some festive spirit, or just a delicious pumpkin flavored cookie, make these. Get in your kitchen. You won’t regret it. And your relatives, like mine, will happily devour them.

Pumpkin Spice Shortbread Cookies
Yields: about 40 cookies

Ingredients:
Shortbread Cookies
½ cup (1 stick) salted-butter, softened
3 oz. cream cheese, softened
1 cup powdered sugar
½ teaspoon baking powder
½ teaspoon pumpkin spice
½ teaspoon salt
1 egg
1 ½ teaspoons vanilla
2 ¼ cup all-purpose flour

Glaze & Decorations
1 bag pumpkin spice candy melts
1 cup black candy melts
4 teaspoons shortening (plus some more if melts start to harden)

Directions:
Shortbread Cookies
In a large bowl, cream together butter and cream cheese, until well combined.
Gradually add the powdered sugar, baking powder, pumpkin spice, and salt. Beat until combined.
Add eggs and vanilla. Mix until incorporated.
Slowly beat in flour, until mixture forms into dough.
Cover the bowl with plastic wrap and place in the refrigerator. Let chill for about an hour or until dough is easy to handle.
Once dough has chilled, preheat the oven to 375 degrees.
On a lightly floured surface, roll out dough until about ¼ inch thick. Using cookie cutters, cut out dough.
Place cutouts an inch apart on a ungreased baking sheet. Bake for 5-7 minutes (I found the bats cooked faster and were done around 5 ½ minutes, but the bigger cutouts took a little longer) or until the edges start to lightly brown.
Transfer cookies to a wire rack and let them cool completely (I let mine sit over night).

Glaze & Decorations
In a microwave safe bowl, melt a cup of pumpkin spice flavored candy melts and two teaspoons of vegetable shortening. Microwave in 15 second intervals, stirring after each interval, until the mixture is smooth (the hotter the mixture, the easier it is to glaze the cookies).
When glazing, I found that pouring the mixture into a piping bag or Ziploc bag (with the tip cut off) was extremely helpful. Pipe the outline of the cookie first and then fill the inside with glaze.
If the glaze begins to harden, add some more vegetable shortening and microwave until it becomes smooth.
Once all the cookies have been glazed orange, melt a cup of the black candy melts and two teaspoons of vegetable shortening. Microwave in 15 second intervals, until smooth.
Using a toothpick (or, a piping bag if that’s easier for you) add faces to your cookies—remember, it’s Halloween, so have fun with your faces and don’t stress if they aren’t perfect!

 
Isn’t the skeleton cup the cutest thing ever? Don’t even get me started on the napkin…

Pumpkin Spice Shortbread Cookies

Pumpkin Crisp

Pumpkin Crisp
I’m maybe, just a little bit, pumpkin obsessed.

A pumpkin freak, as my brother calls it.

I like, no, it’s more along the lines of love with my whole heart, pumpkiny things. I’m that girl that walks into the store during fall, sees all the pumpkin flavored things, and then has to restrain herself from buying every single delicious pumpkin thing in sight. It’s hard. Really hard. Do you know what I mean?

If all these pumpkin flavored things didn’t taste so good, then I wouldn’t eat them. Or, want to buy them. Or, hoard them in my cupboard for a later date. See, it’s really out of my control at this point.

Pumpkin Spice Lattes. I could drink one everyday of the year if Starbucks would let me.

Pumpkin Ice Cream. Have you tried the Trader Joe’s version? It’s magical. And addicting.

Pumpkin Pie. Breakfast, lunch, and dinner. Am I right?

So, really, the world made me a pumpkin freak. And, you know what, I happily accept that. Want to join me in my pumpkin madness? If you do, you can have a slice (or, two if you’re really nice) of this Pumpkin Crisp.

Pumpkin Crisp

This Pumpkin Crisp is for all the pumpkin freaks out there. The pumpkin filling itself is very creamy and not too sweet, which allows that warm spicy flavor of the pumpkin to really shine. The crumble topping is made with pumpkin spice flavored granola as well as regular oats giving this crisp the perfect amount of crunch. I served the crisp cold with homemade whipped cream and a little bit of cinnamon…it was devoured pretty quickly. You could also try it with vanilla ice cream. I’m sure that would be pretty darn delicious too.

Pumpkin Crisp
Yields: 9 large servings

Ingredients:
Pumpkin Filling
3 eggs
1 (29 oz.) can pumpkin puree
1 cup sugar
2 teaspoons pumpkin pie spice
1 teaspoon vanilla
¾ cup (6 oz.) evaporated milk

* If you like a sweeter pumpkin flavor you can add another ½ cup of sugar.

Crumble Topping
2/3 cup all-purpose flour
¼ cup brown sugar
1/8 cup sugar
¼ teaspoon cinnamon
½ cup old fashioned oats
¼ cup pumpkin spice granola (I used the Trader Joe’s brand and picked out the raisins)
6 tablespoons butter, melted

Directions:
Pumpkin Filling
Preheat oven to 350 degrees. Lightly grease an 8×8-inch square pan.
In a large bowl, beat eggs until well combined.
Whisk in the pumpkin puree, until blended.
In a smaller bowl, combine sugar and pumpkin pie spice. Whisk into the wet ingredients, until mixture is smooth.
Gradually pour in the evaporated milk. Stir until combined.
Pour filling into the greased pan and set aside while you make the crumble topping.

Crumble Topping
In a medium bowl, combine flour, sugars, cinnamon, oats, and pumpkin spice granola.
Pour melted butter over mixture and stir until moistened and well combined.
Sprinkle the doughy mixture evenly over the pumpkin pie filling—I wanted a little extra crunch, so I sprinkled a little bit more pumpkin spice granola on top of the crumble making sure to cover any spots where the pumpkin filling was visible.
Bake for 45 minutes or until center is set and topping is golden brown.
Let crisp cool completely. Refrigerate for at least 30 minutes (this makes it easier to cut square servings).
I suggest serving with whipped cream and a sprinkle of cinnamon.


Pumpkin Crisp