Welcome to Hint Of Nutmegg!
I hope you enjoy my blog and please come back in the future. I’ve got some great recipes in the works.
Feel free to check out my recipe index for what I have so far :)
-Meggan

I hope you enjoy my blog and please come back in the future. I’ve got some great recipes in the works.
Feel free to check out my recipe index for what I have so far :)
-Meggan
 Greek yogurt is all that and a bag of chips.
Ask anybody.
I’m sure you’ve noticed the craze. Greek yogurt recipes are all over the Internet. Butter is being substituted left and right. Pinkberry created Greek yogurt froyo. And some people are even standing in front of their fridges (or mini fridges, if you’re in a dorm like me) eating spoonfuls of yogurt from the container as we speak. And by some people, I mean my roommate.
I don’t judge her. Especially since I stand next to her with a jar of peanut butter in my hand and a spoon in the other. That’s the kind of relationship we have. The kind of relationship where I tell her I’ve never had Greek yogurt and she tells me to put the peanut butter down and come try a spoonful of tart heaven.
How can you say no to a description like that? You can’t. So, I tried a spoonful. And sadly, I wasn’t a huge fan. It’s way too tart for my liking. But, when I saw a recipe for Greek yogurt chocolate chip cookies, I decided to give it another shot. Maybe it would taste better mixed with something. Maybe, mixing it with cookie dough and white chocolate chips was the perfect solution. So, that’s what I did.

Normally I don’t skimp on dessert. I live by the ‘go big or go home’ motto when it comes to sweets, but I figured since bikini season is here, why not? What’s the worst that could happen?
Let me just tell you the worst that can happen. The worst is that, like me, you classify these cookies as “healthy food”, making it okay for you to eat half of the batch. In one sitting. Without sharing. Or stopping for a sip of milk. I’m not saying they taste like regular cookies or that they can replace your buttery-chocolate-chip-hot-out-of-oven cravings, but if you are looking for a lighter cookie, that you won’t feel guilty for eating, then these have your name all over them.
These cookies taste just like the top of a muffin. They are cakey, extremely moist, and very pillowly. The morsels of white chocolate add the perfect hint of sweetness and the best part is, unlike a muffin, these cookies are relatively healthy. So, feel free to eat two, seven, or the whole batch. Either way, I won’t judge you.
Ingredients:
1 cup brown sugar
½ cup granulated sugar
2 eggs
2 teaspoons vanilla
2/3 cup plain Greek yogurt
2 ½ cups all-purpose flour
1 teaspoon baking soda
1 tsp salt
1 10 oz. bag white chocolate chips
Directions:
Preheat oven to 375 degrees.
Combine eggs and both sugars in a bowl.
Add the vanilla and Greek yogurt. Stir until mixed.
In a separate bowl, combine flour, baking soda, and salt.
Gradually stir flour mixture into wet ingredients. Mix until well combined.
Fold in white chocolate chips.
Scoop about a tablespoon of dough (per cookie) onto a greased cookie sheet—the dough will be very sticky.
Bake for 10-11 minutes.
Let cookies cool slightly before eating.

 I think it’s time I shared something with you.
If you haven’t read my about me section, you don’t know about my love for affair with obsession with peanut butter. I consider peanut butter to be its own food group, as in I need to eat 6 giant spoonfuls a day in order to survive. I’m not even kidding. How could I be? Have you tasted peanut butter? It’s heavenly.
I don’t really remember when this obsession started, but I do know that almost anything with peanut butter is an automatic warning signal for my stomach to grumble with excitement, my mouth to water in anticipation, and my hands to blindly grab as much as possible. Think about it. Peanut butter sandwiches. Fabulous. Peanut butter M&M’s. Addicting. Peanut butter and bananas. Amazing. Peanut butter ice cream. Mouthwatering. And, then there’s peanut butter and Oreos.
I blame Parent Trap. I learned three things from watching this movie. First, I needed to come up with a ridiculously cool handshake for my best friend and I (you’ll be sad to know that fourteen years later, it’s still a work in progress). Second, Lindsay Lohan was a twin. I thought there were two of her and to be honest, I was really disappointed when I found out she was twinless. Third, peanut butter and Oreos are a must have.
So, of course, I had to try it, and now I can’t eat Oreos without peanut butter. It’s a real problem. Oreos are decent on their own, but smothering, covering, drenching, dipping, or drowning them in peanut butter is like walking on rainbows. You can’t help but smile as you bite the cookie and do a little happy dance as you eat it.
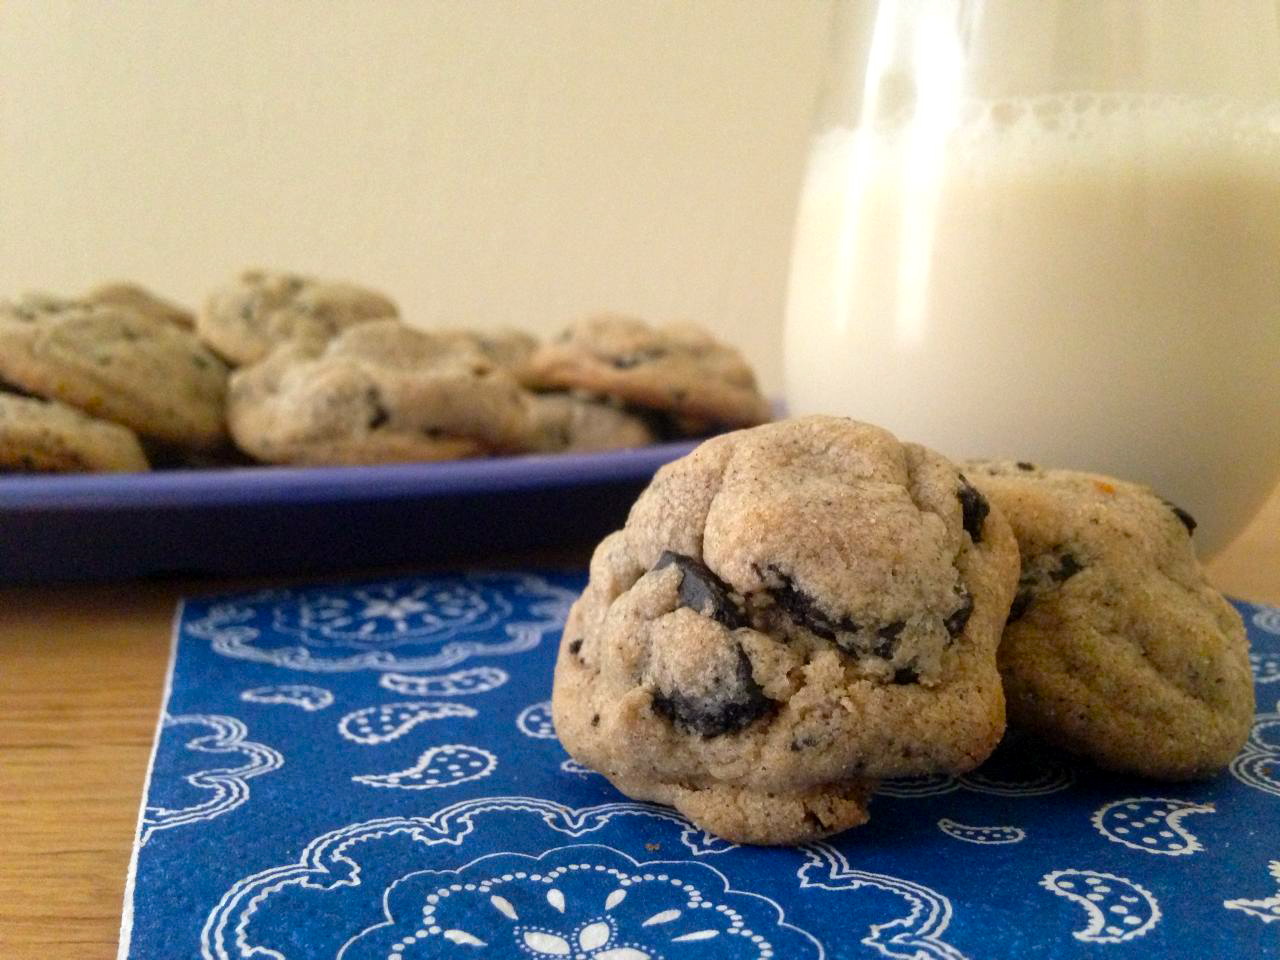
 And since no one likes to dance alone, I’m slowly trying to convert the world into peanut butter and Oreo lovers. This is my first (and definitely not my last) attempt to convince you. These cookies taste exactly like dipping an Oreo into the jar of peanut butter. So, if you’re a fan of that, you’ll love these. The cookies are super soft and chewy with a little crunch from the crumbled Oreo pieces and have the perfect creamy peanut butter undertone. I suggest pouring yourself a large glass of milk, grabbing a handful of cookies, and preparing yourself for the huge smile that’s about to cross your face.
Ingredients:
½ cup (one stick) salted butter, at room temperature
6 tablespoons granulate sugar
6 tablespoons brown sugar
1 teaspoon vanilla
1 egg
½ teaspoon salt
½ teaspoon baking soda
1 ¼ cups all-purpose flour
½ cups creamy peanut butter
13 Oreos, crushed into small chunks
Directions:
Preheat oven to 350 degrees.
Cream together butter and both sugars, until light and fluffy.
Add the vanilla and egg. Mix until well combined.
In another bowl, combine the salt, baking soda, and flour.
Gradually add the flour mixture to the wet ingredients. Stir until combined.
Add the peanut butter and mix thoroughly.
In a Ziploc bag, crush up the Oreos into small chunks.
Fold Oreos into the mixture.
Scoop about a tablespoon of dough (per cookie) onto an ungreased cookie sheet.
Bake for 11-12 minutes.
Transfer cookies to a cooling rack and let them cool slightly before eating.


When you hear the word s’more, what do you think about?
Aside from the visual of beautifully golden crackers sandwiching melted Hershey squares and marshmallow gooeyness (did your mouth just water? Or is that just me?) two things immediately come to mind.
You can probably guess the first one. It’s a location and usually there are tents. If you said circus, try again, but if you said campsite, keep reading. S’mores make me think of camping with my grandparents when I was little. We used to sit around the fire on folded chairs, have fuzzy blankets thrown around our backs, and bent wires held in our hands roasting marshmallows to perfection. It sounds wonderful, right? Wrong. There is one problem with camping. And it’s bugs. I would be moments away from stuffing my face with a melted s’more sandwich when bugs would fly into my face, cuddle in my hair, or worse, perch on the my s’more claiming it as their own. Needless to say, I don’t go camping very much anymore.
I doubt you’ll guess the second thing that comes to mind. But, if you do, I’ll be so impressed that I’ll mail you a box of these delicious S’more Bites. Take a guess. What do you have to lose?
Did you guess the movie Sandlot? If yes, I need your address or better yet lets get together and eat these while watching that movie. S’mores also make me think of the scene in which Ham asks Smalls if he wants s’more and Smalls answers, “Some more of what? I haven’t had anything yet, so how can I have some more of nothing?” If you haven’t seen this movie, I highly recommend making a batch of these cookies and plopping down on the couch.
Now, my question to you is, would you like s’more?
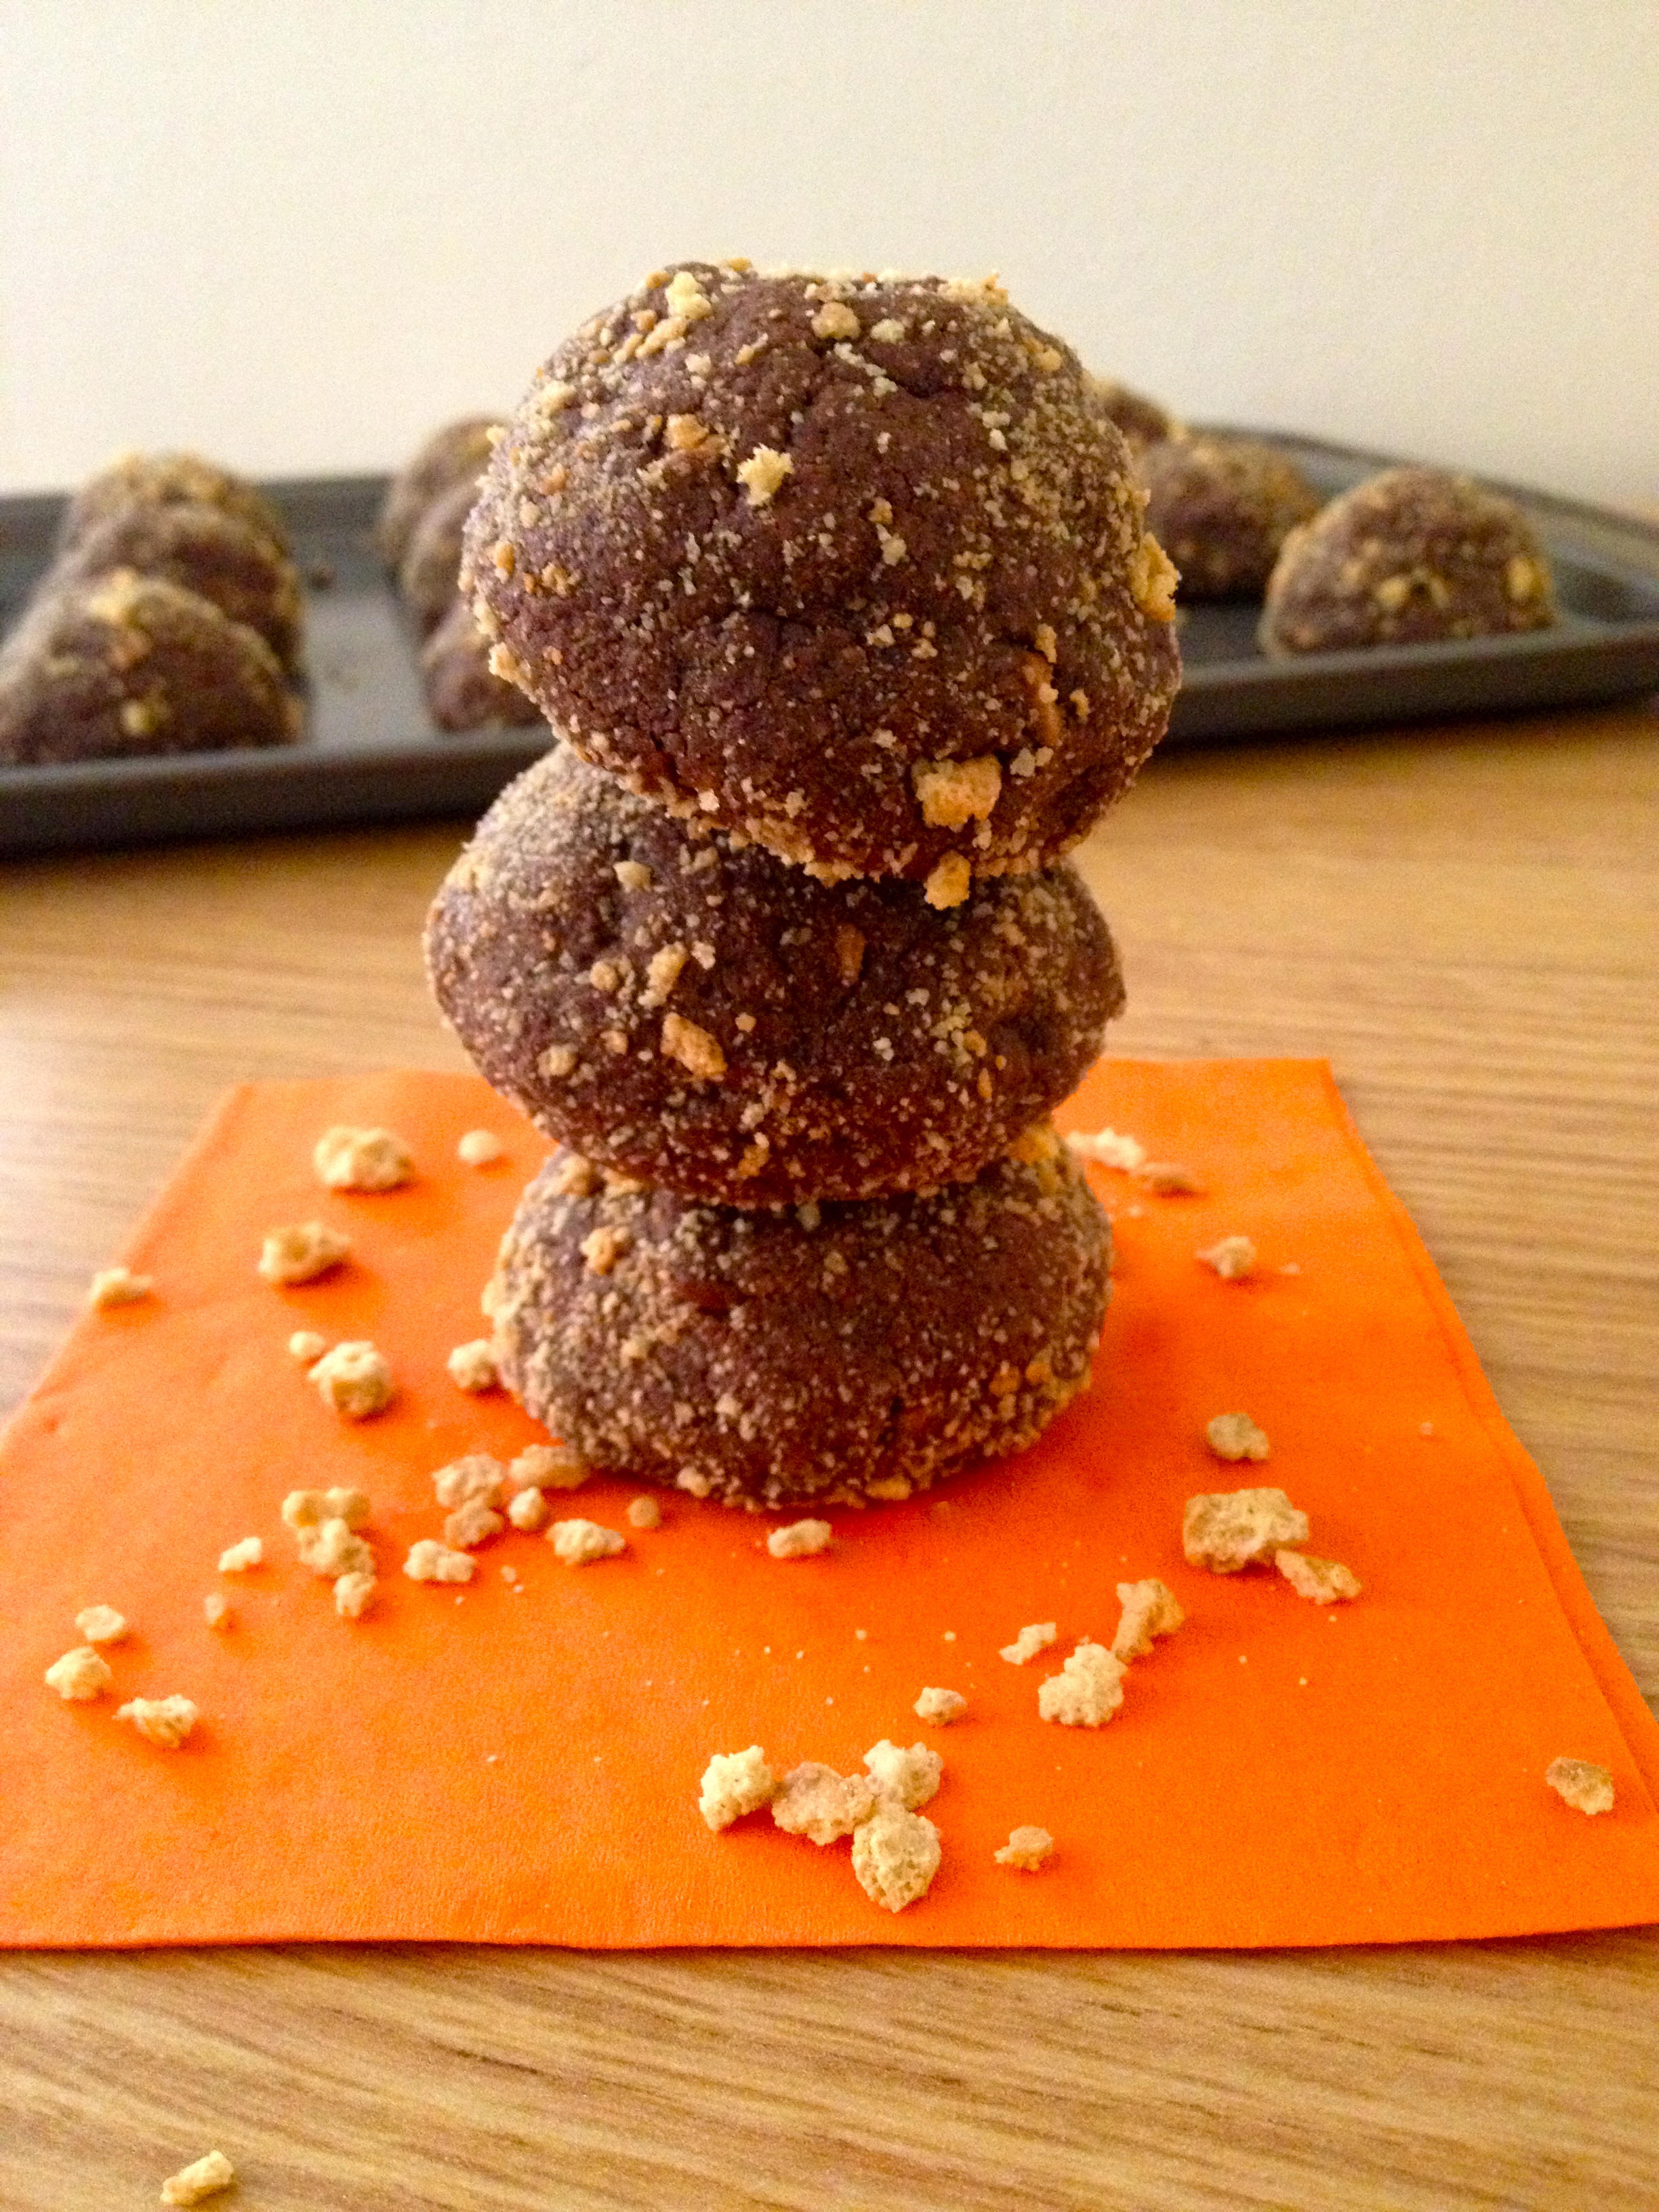 These S’more Bites are the perfect way to get your s’more fix without having to deal with fire or bugs or camping. The bite itself is packed with chocolately flavor, both from the cakelike cookie and the added chocolate chips, a gooey marshmallow center, and a graham cracker crunch, which is swirled inside the bite and coated on the outside too. If you think the best part of a s’more is the middle part of the sandwich, then these cookies are a perfect fit for you. These bites really highlight the chocolate and marshmallow portion of a s’more, but fair warning they are extremely addicting…there is no possible way you won’t want some more.
Ingredients:
1 2/3 cups all-purpose flour
½ cup unsweetened cocoa powder
¼ teaspoon salt
½ teaspoon baking soda
1 ½ sticks (12 tablespoons) of salted butter, melted and cooled
1 cup brown sugar
½ granulated sugar
1 egg, room temperature
1 egg yolk, room temperature
2 teaspoons vanilla extract
24 marshmallows (I used Williams-Sonoma mini vanilla marshmallows, but you could use the bigger marshmallows and cut them in half)
1/3 cup of semi-sweet chocolate chips
4 full honey graham crackers
Directions:
Preheat oven to 325 degrees.
Melt 1 ½ sticks of butter in the microwave. Set aside until cooled.
Mix flour, cocoa powder, salt, and baking soda together in a bowl. Then set aside.
In another bowl, combine the cooled butter with the brown and granulated sugars.
Add the egg, egg yolk, and vanilla. Stir until well combined.
Gradually add the dry ingredients into the bowl and mix until dough forms.
Add the chocolate chips—the dough will be thick, so you may have to use your hands to combine the chocolate chips.
In a Ziploc bag, place two graham crackers and crumble into small chunks.
Mix graham cracker crumbles into the dough—again, you may have to use your hands.
To assemble the cookies, place the other two graham crackers in a Ziploc bag and crumble into dust (smaller than the pieces you folded into the dough). Place crumbles in a bowl. Set aside.
Take a little over a tablespoon of dough and flatten it in your hands.
Place a marshmallow in the center and wrap the cookie dough around it. Gently roll into a ball (the dough will be crumbly, so you might have to play with it in order to cover up the entire marshmallow).
Roll the cookie ball into the graham cracker dust and place on an ungreased baking sheet.
Bake for 11 to 12 minutes.
Let cookies cool slightly before eating (if you really want the full melted s’more experience, eat the cookies while still warm).


Ahh, finally. Warm weather.
I’m not entirely a fan of sunny days. You’re probably thinking I’m joking, but I assure you, I’m not. You see, the sun and I have a complicated relationship. Mainly, I dislike the sun and it seems to really love me. And by love, I mean that it enjoys burning my skin so red, that I make lobsters look pale.
But, the sun and I have set aside our differences for now. Why? Because warm weather means popsicles. That’s right, I said popsicles. Who doesn’t love popsicles?
I was always a fan of fudgsicles. There was something about eating cold chocolate that didn’t melt quickly in the sun that made even the hottest days that much cooler. I never really liked the fruity popsicles though, they always seemed to melt all over my hands before I could figure out what flavor was actually on the stick. Don’t get me wrong, this didn’t stop me from eating them, but if I had to choose between fudgsicles or fruity popsicles, fudgsicles would always win.
Until now. These parfait popsicles have changed my mind completely.

Besides being ridiculously adorable, these pops are extremely refreshing, (relatively) healthy, easy to make, and perfect for eating after a stroll in the sun, a long day of classes, or even breakfast (popsicles that you can eat for breakfast? I know, dream come true). If you’re a fan of parfaits, you should already be in your kitchen making these. They taste just like frozen smoothies packed with chunks of fruit and lightly sprinkled with a crunchy granola finish. The chunks of fruit add the perfect fruity undertone to the creamy yogurt and the granola adds just the right amount of bite to the pop. I made two different flavors, strawberry pineapple and strawberry banana, and both came out delicious. Feel free to try other flavor combinations if these don’t sound good to you, and if you do, let me know how they taste!
Note: I used Kind Healthy Grains Maple Walnut Clusters as my granola and Wallaby Organic Low-fat yogurt.
For the wooden sticks, I took coffee stirrers, cut them in half, and used two halves per cup (the sticks were too flimsy to only use one half).
Directions:
Strawberry Pineapple Pops
In a medium bowl, combine vanilla yogurt, strawberry yogurt, and 2 tablespoons honey.
Open canned pineapples and cut the chunks in half following the natural grain of the fruit. Add to the bowl.
Add about 1/3 of the juice from the pineapple can to the mixture.
Mix until well combined.
Strawberry Banana Pops
In a medium bowl, combine vanilla yogurt, strawberry yogurt, and 1 tablespoon honey.
Slice bananas in circles and cut into fourths. Add to the bowl.
Mix until well combined.
Assembling the Pops
Pour mixture into the paper sample cups.
Place a wooden stick in the middle of the cup (try to spear a piece of fruit to help the stick stand up straight).
Place popsicles in the freezer and let them sit over night or until frozen.
Once frozen, remove from the freezer and peel off the paper sample cups.
Let them sit for about 4 to 5 minutes or until slightly thawed (this will help the granola stick).
Pour ½ cup granola into a shallow bowl and with the bottom of a cup smash the clusters into smaller pieces.
While holding the stick of a popsicle, roll the popsicle in granola until some of it sticks—cover it with as much granola as you’d like (if the popsicles start getting too thawed, place them back in the freezer to firm up). Add more smashed granola to the bowl as needed.
After rolling the popsicles in granola, put them back in the freezer for about ten minutes or until ready to eat.

